
Sensorbox - Type Lift-Sensorbox
Building a Planet sensorbox from the type Lift-Sensorbox (formerly known as moon) will be described in individual steps in this document.
Box and Hinges
The Spelsberg TK PC Box has the ingress protection IP66 - acc. EN 60529 / DIN VDE 0470-1 and an ambient temperature from -35 °C min. to 80 °C max. Due to it’s UV resistancy, weatherproof and a rated insulation voltage 690V AC the box is fitting for outdoor application.
Drilling Holes


Rolls
Temperature, Humidity and Illuminance
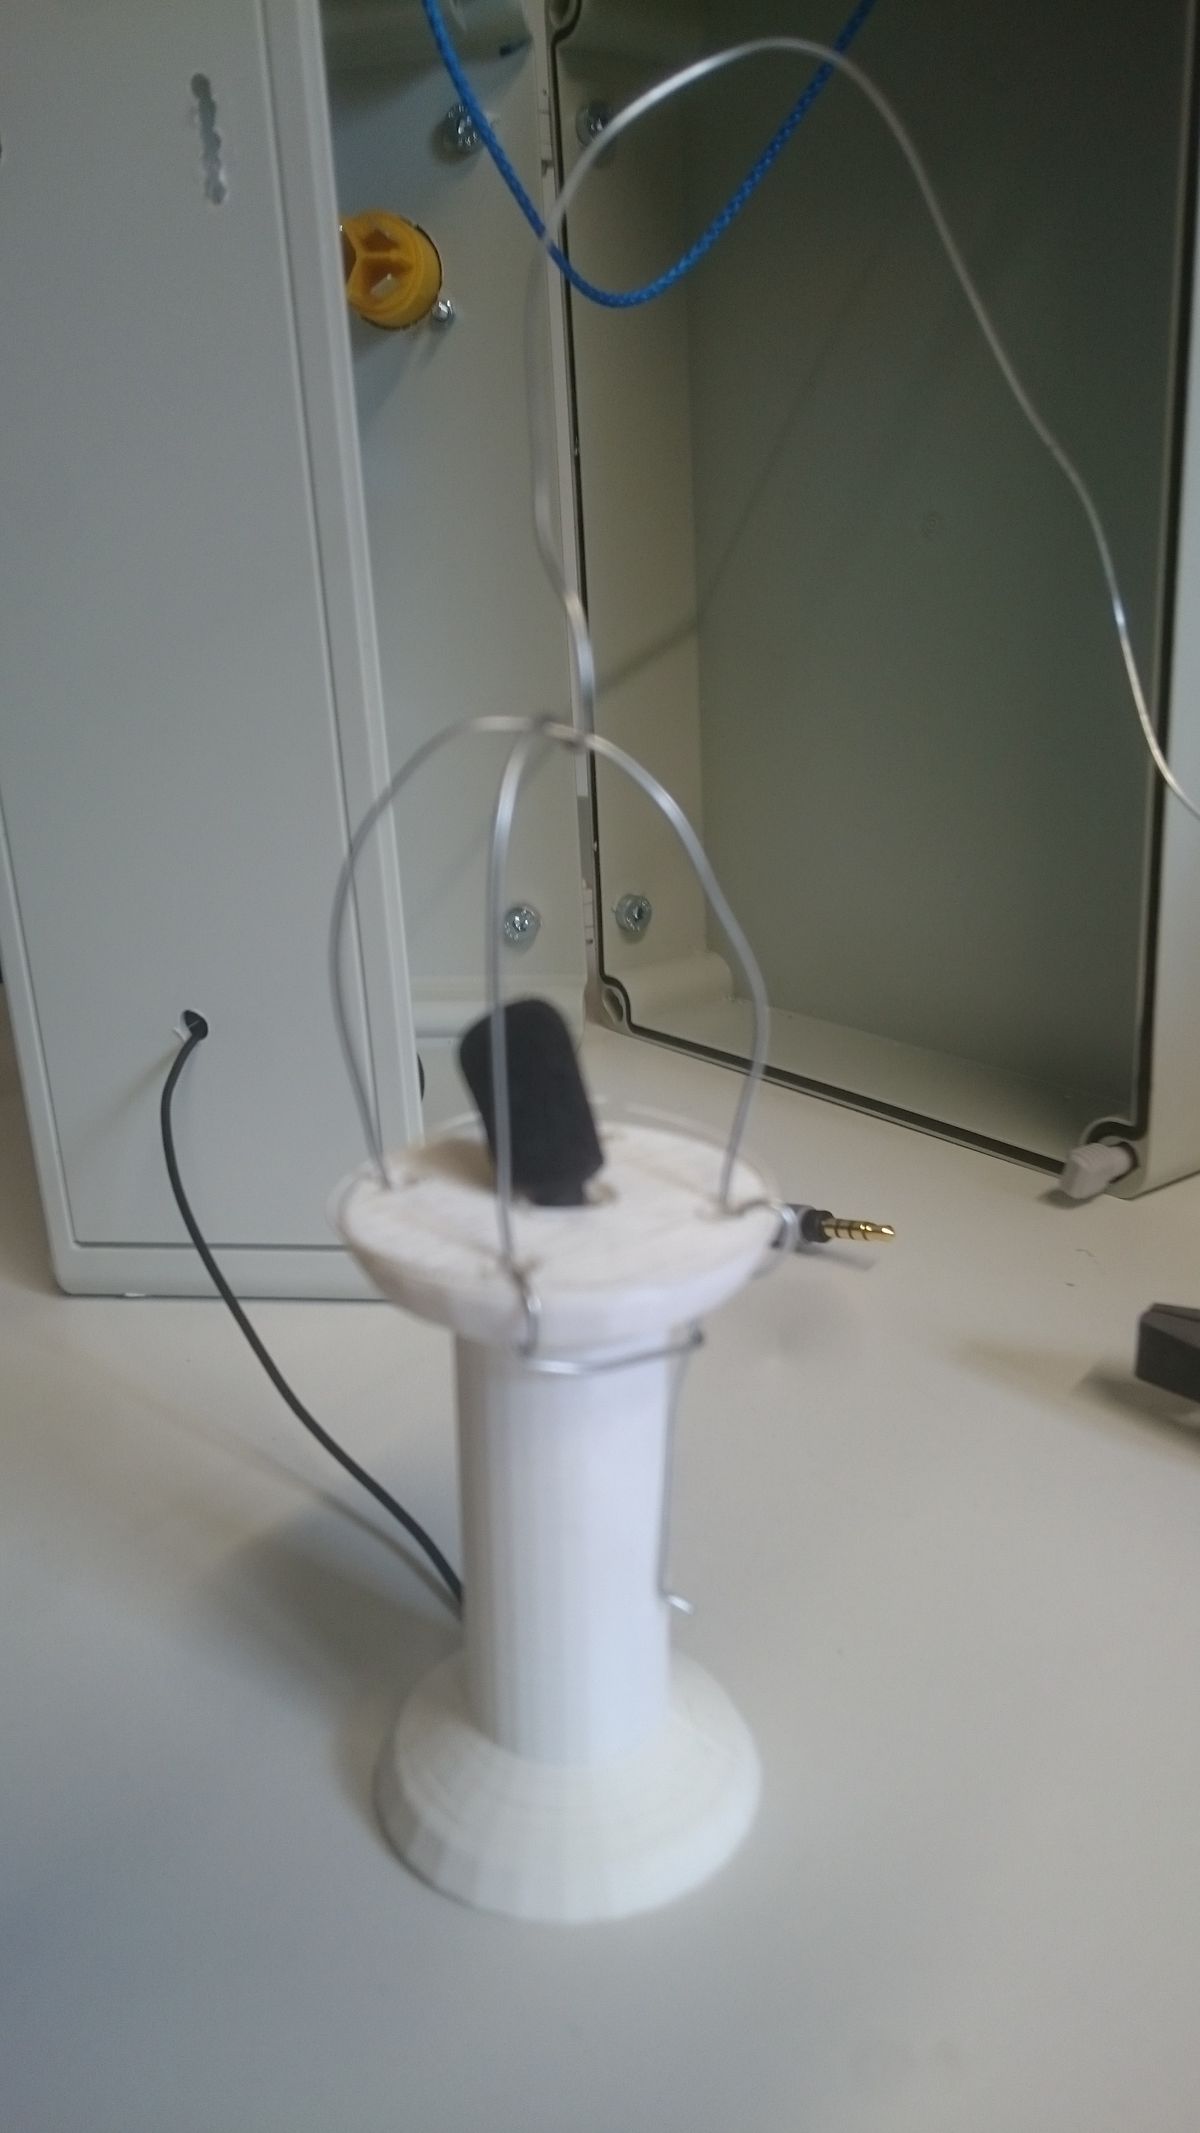
The microclimate sensor tower is assembled from custom 3D-printed parts, which contain a Temperature and Humidity as well as a Lux sensor.
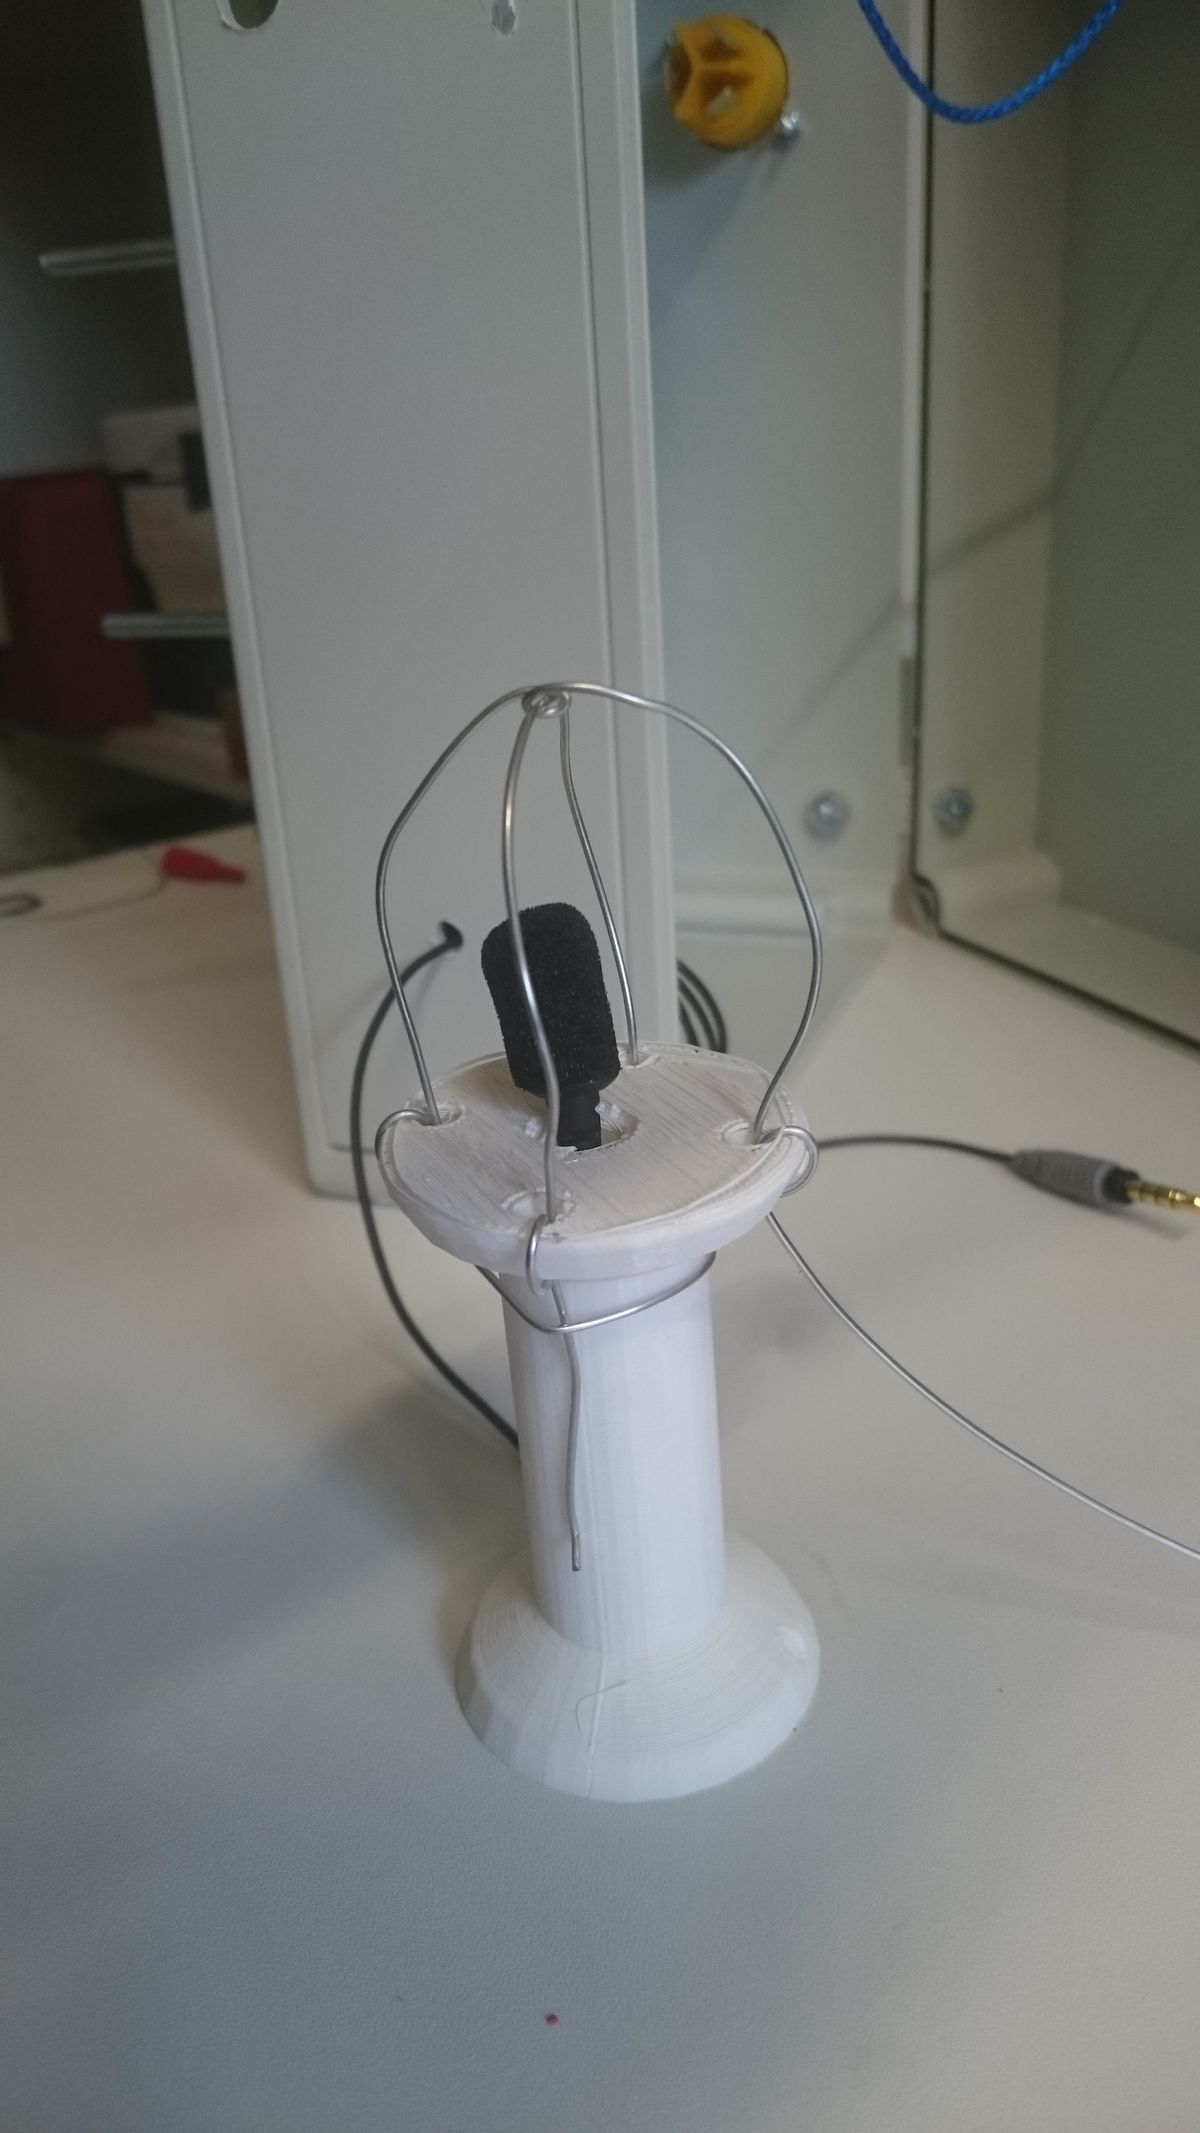
Microphone
The microphone is used to record the singing of birds. This data can be used by a machine learning algorithm to identify bird species. Bird species are an important indicator for biodiversity in forest ecosystems. Due to the ranges of quality and price on the microphone market, two alternating microphones have been chosen to attach to the Planet, both models are tested alternately.
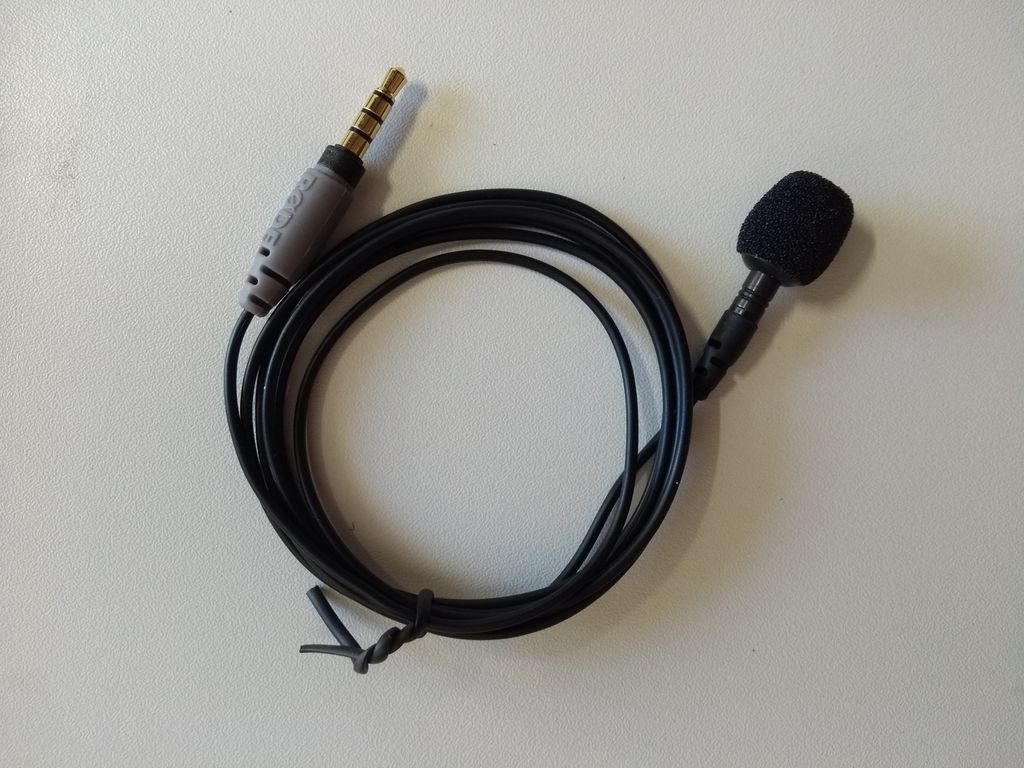
The RØDE – Smartlav Microphone is composed of following components.
- RØDE – Smartlav
- external soundcard UGREEN USB
- Design - Audio y adapter cinch cable 3.5mm socket to cinch cable
- acoustic cloth 2.0 - 4102/B2 hydrophobic
- metal wire 0.9 mm
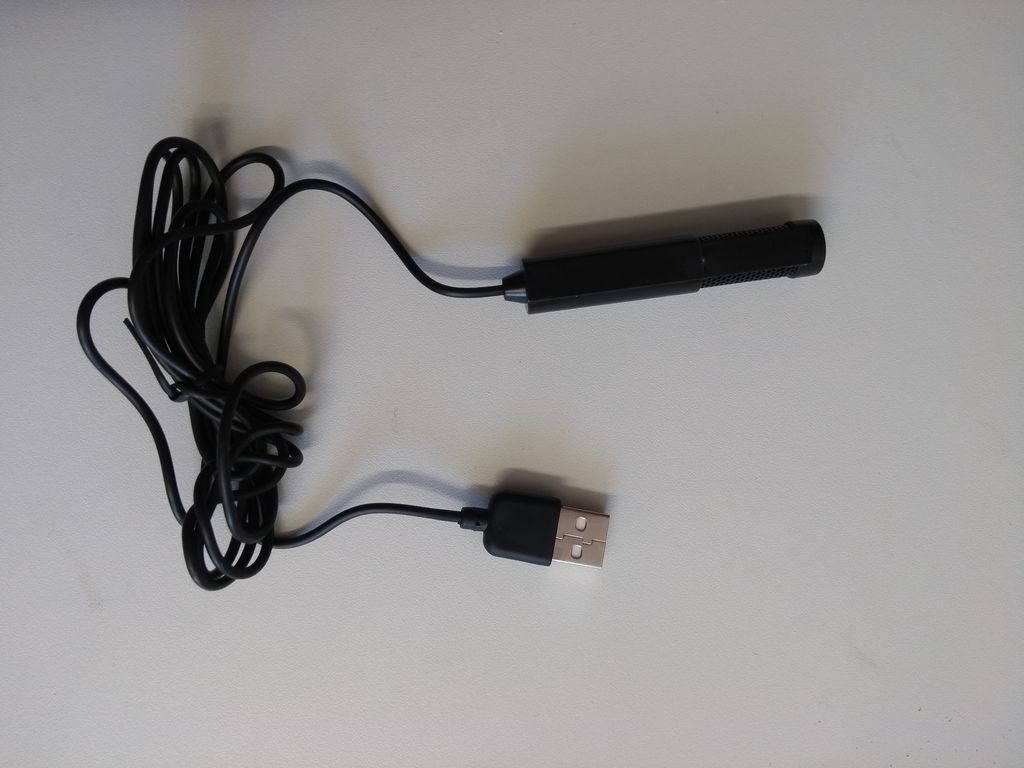
The second preference is a lower price Microphone.
- Foxnovo SF-555
- acoustic cloth 2.0 - 4102/B2 hydrophobic
- metal wire 0.9 mm
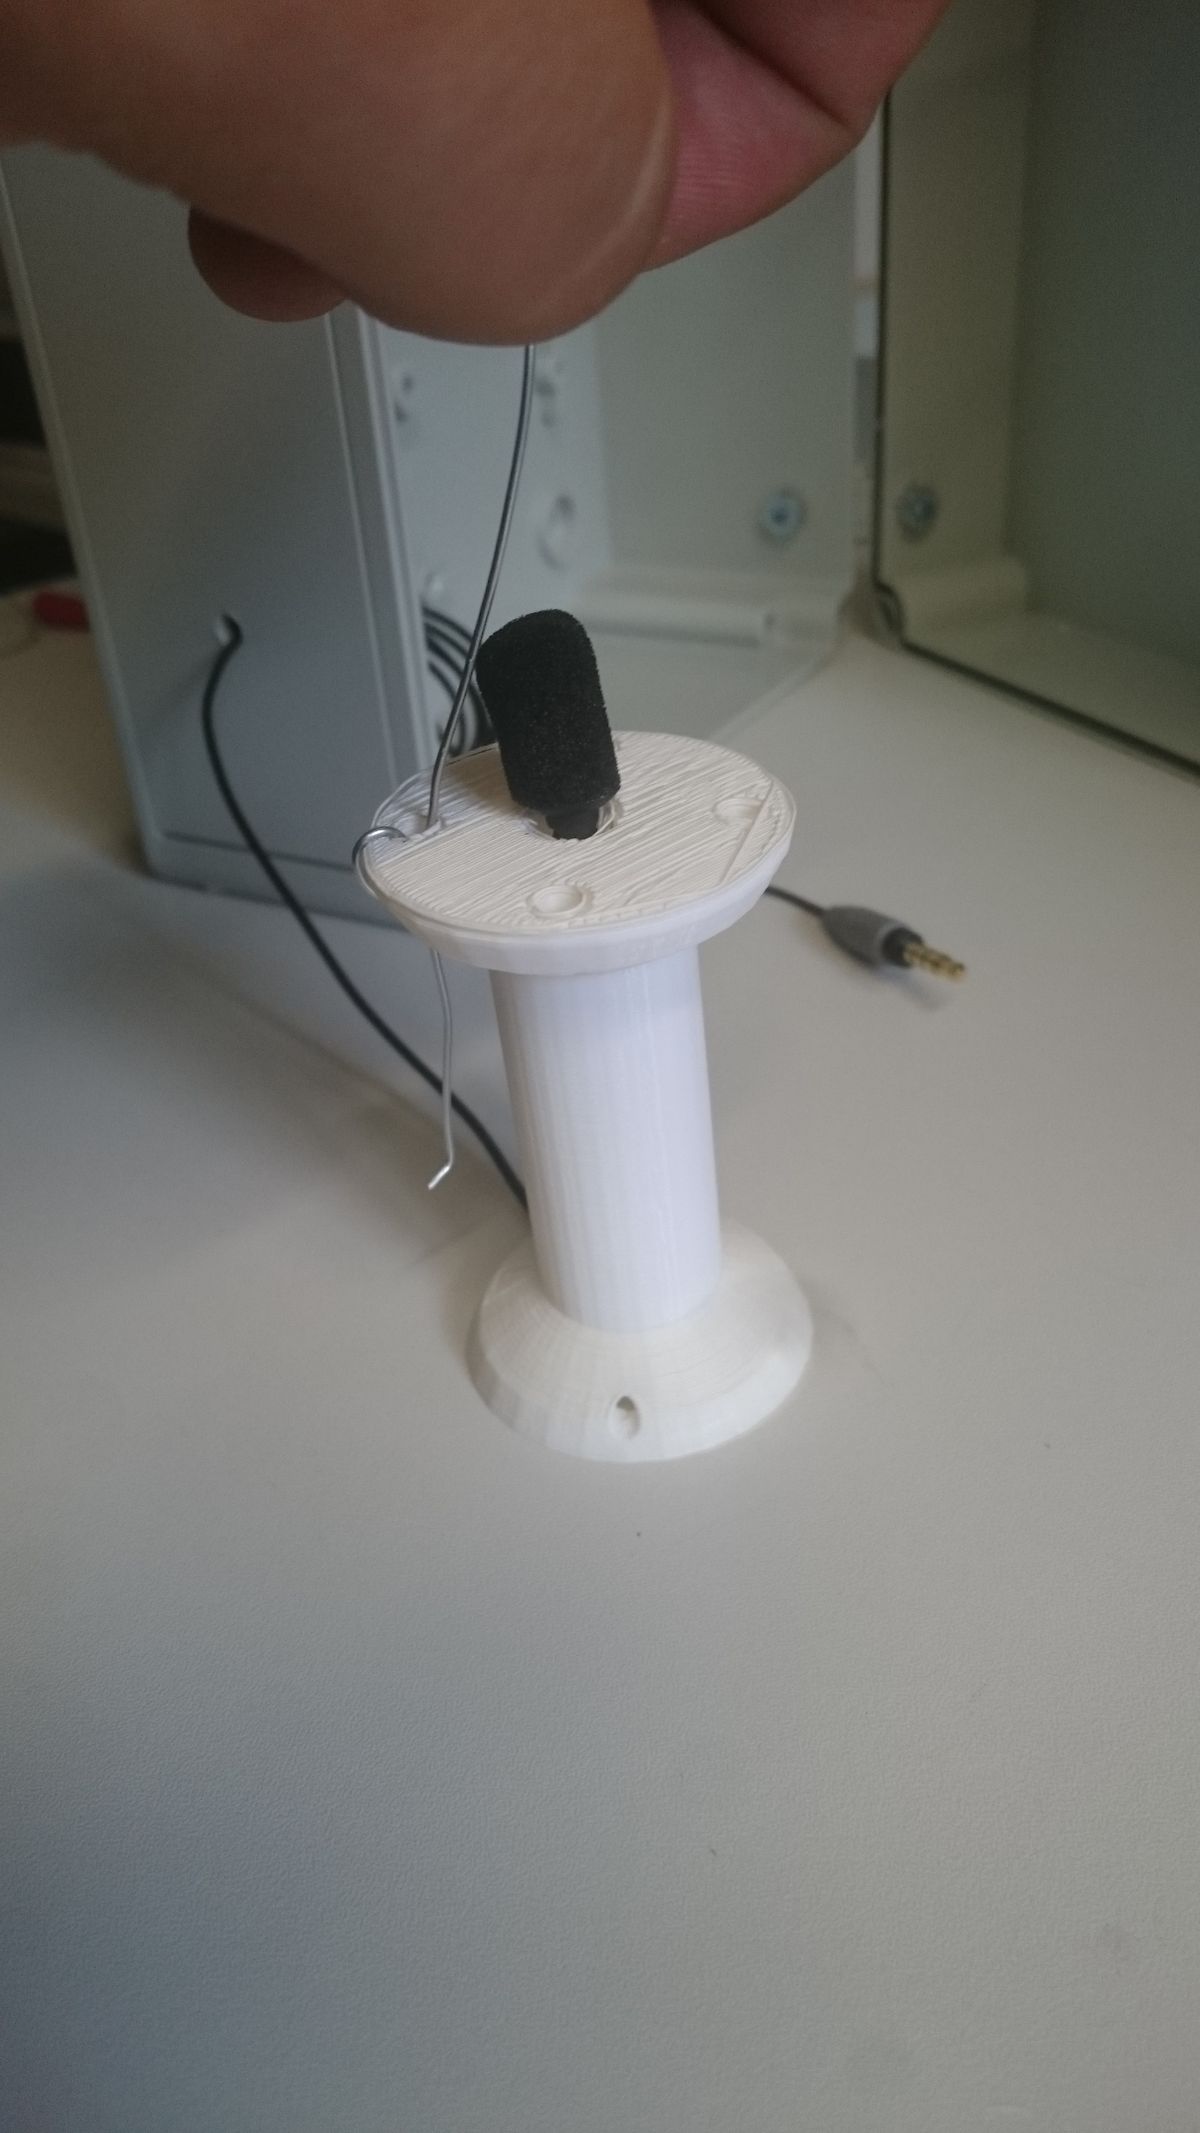
Both microphone types have there individual 3D printed microphone tower, published here.
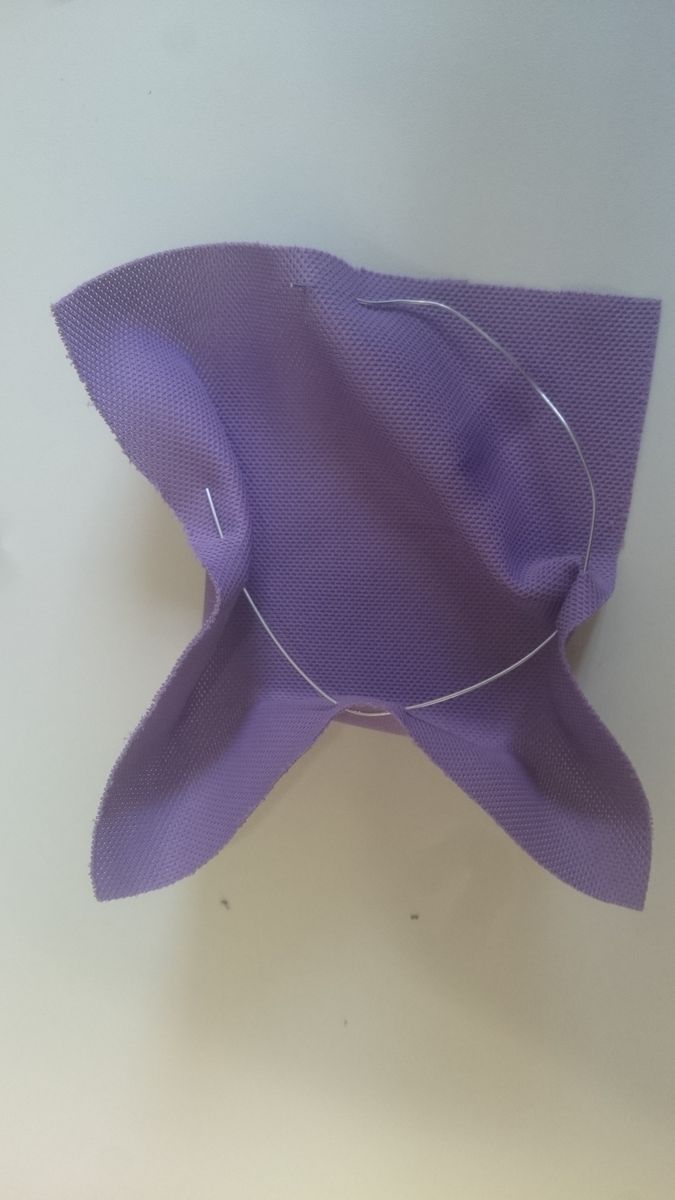
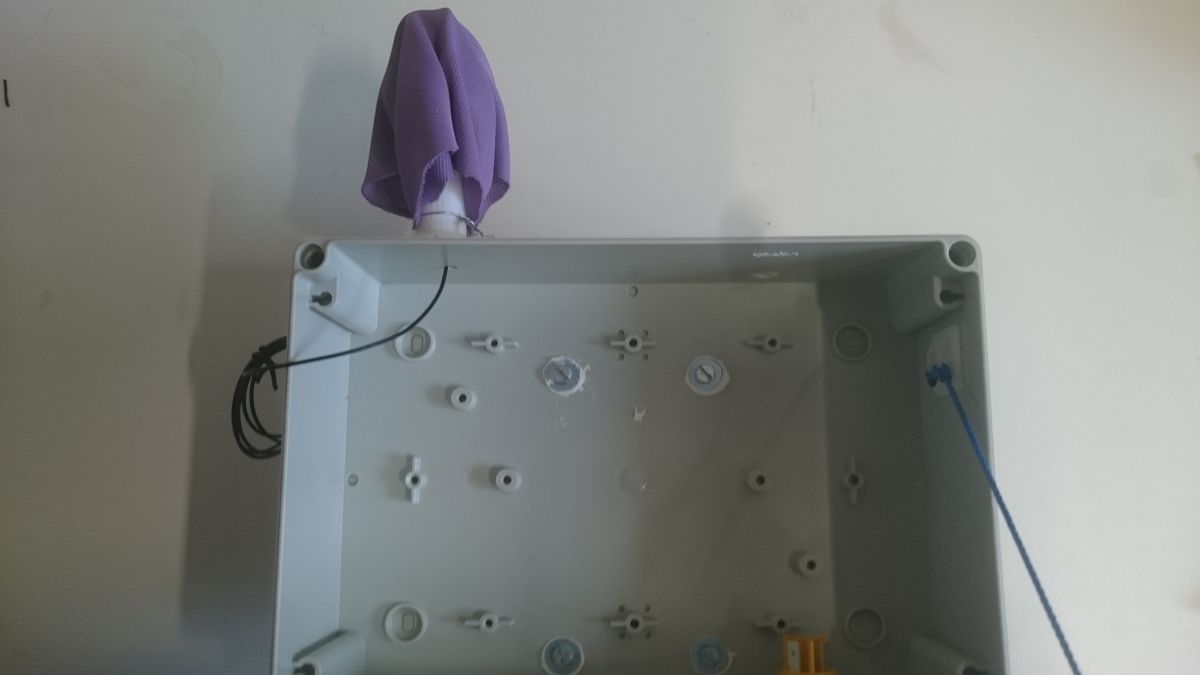
To address the problem of incoming water, the microphone will be sourounded by an hydrophobic acoustic cloth. First an acoustic cloths carrier is constructed on top of the microphone tower using the metal wire.
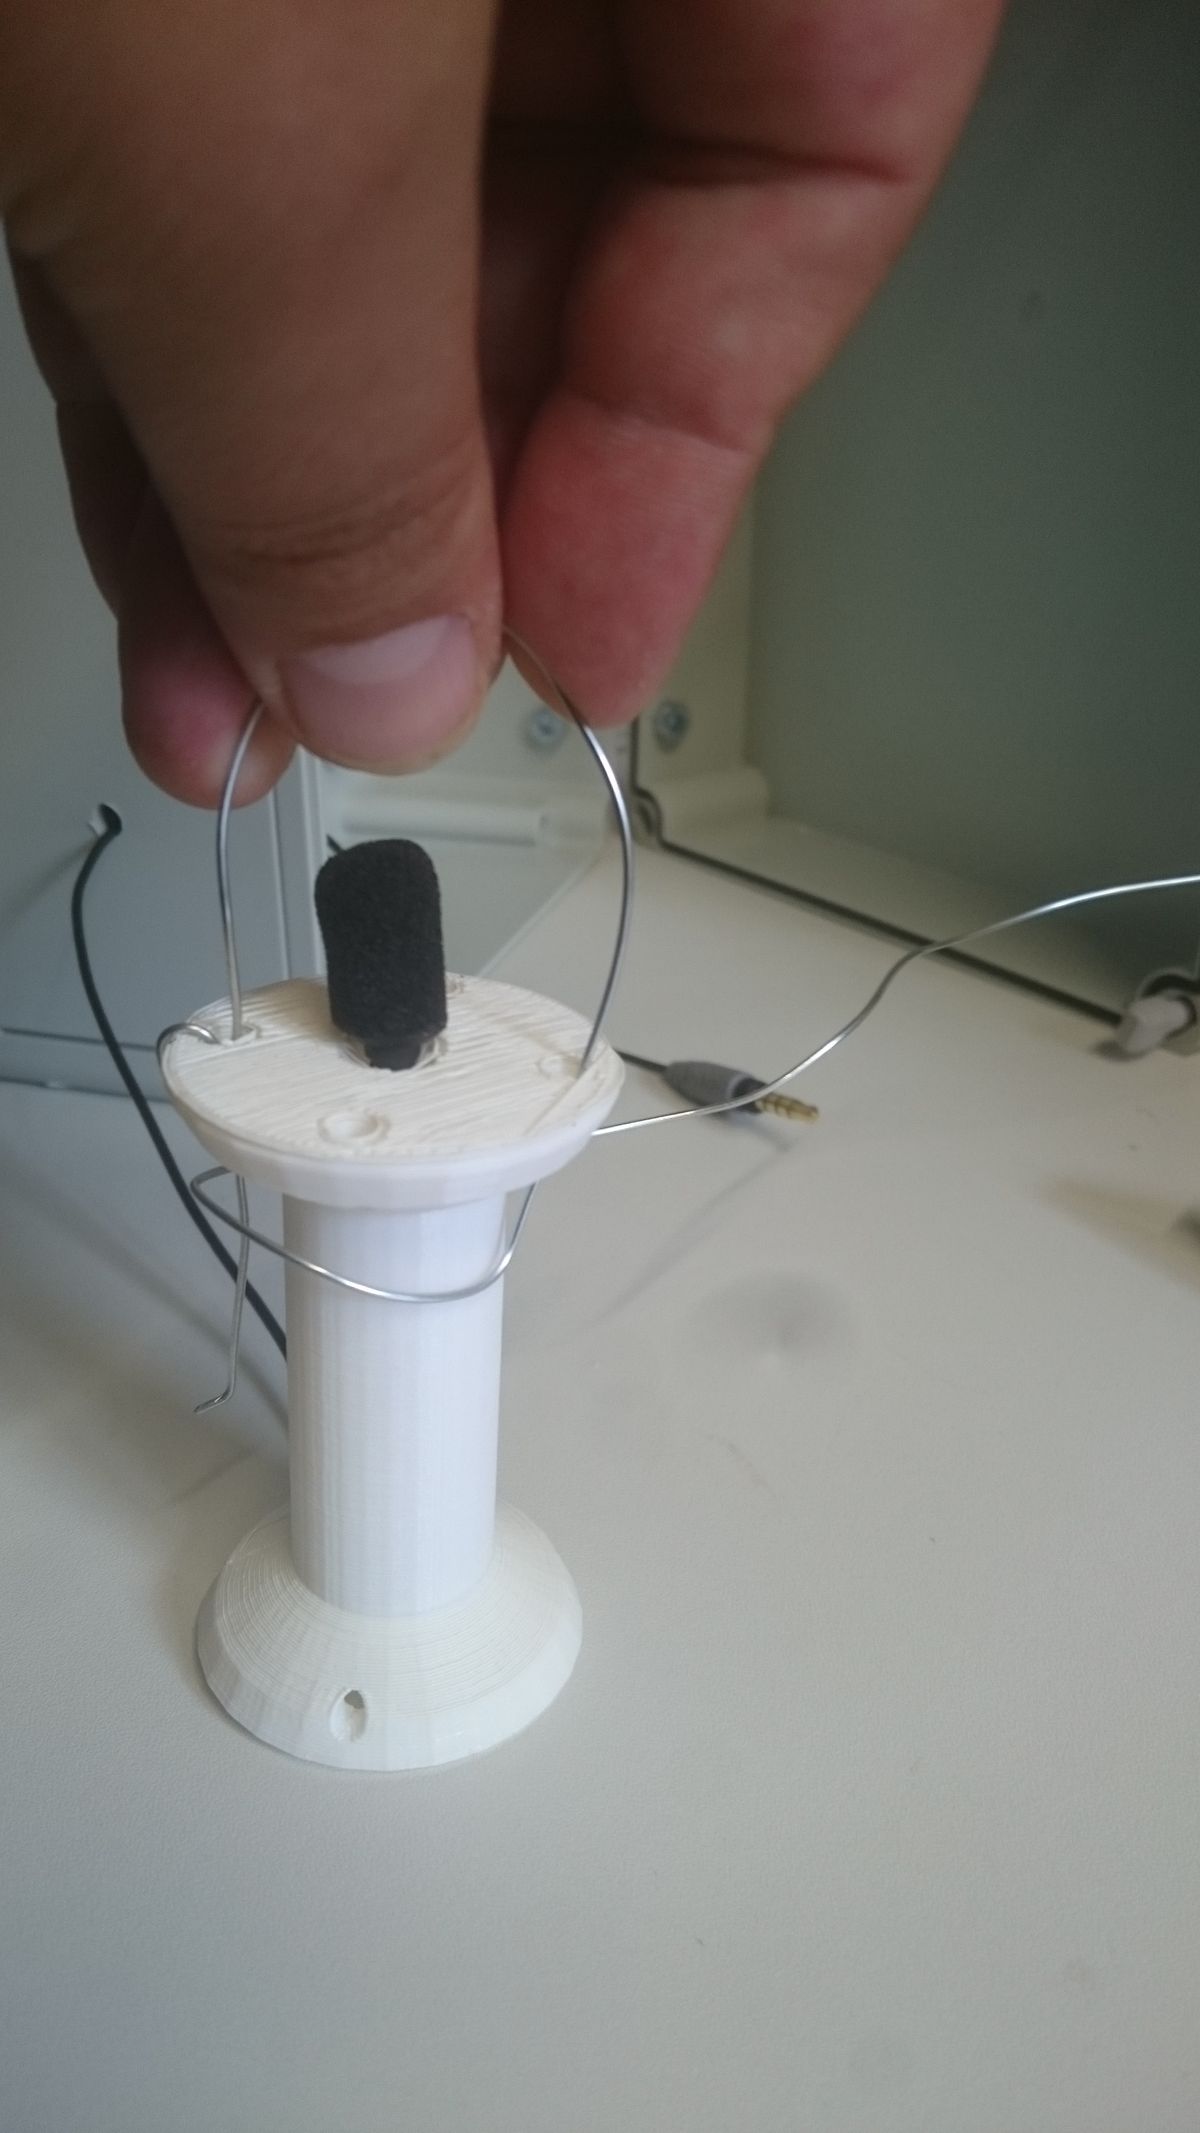

Now the acoustic cloth can be attached.

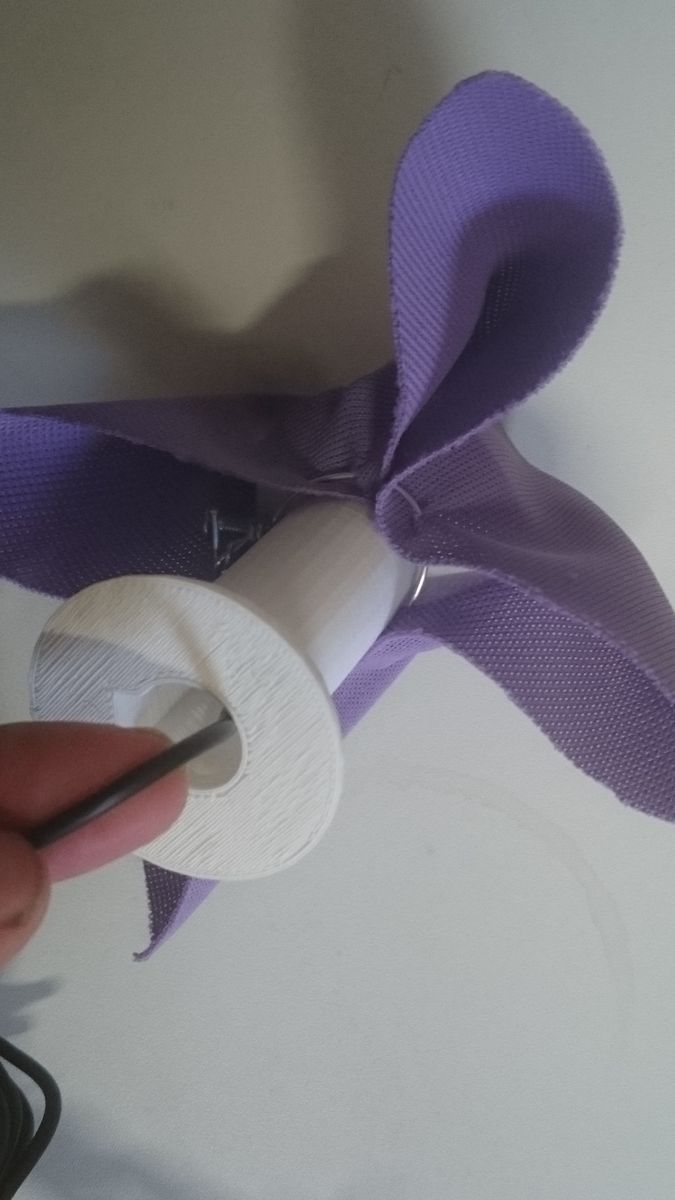
Finally the microphone incl. the tower can be glued on the box.
6. Camera
A camera is used to monitor the canopy from below crown surface. The collected data can be used to calculate the greenness-index to compare it with UAV generated aerial RGB-images. Further it can be used to monitor vegetational growth and animal wildlife detection.
As a camera the Raspberry Pi Camera Module v2.1 with a custom 3D-printed mount is used.
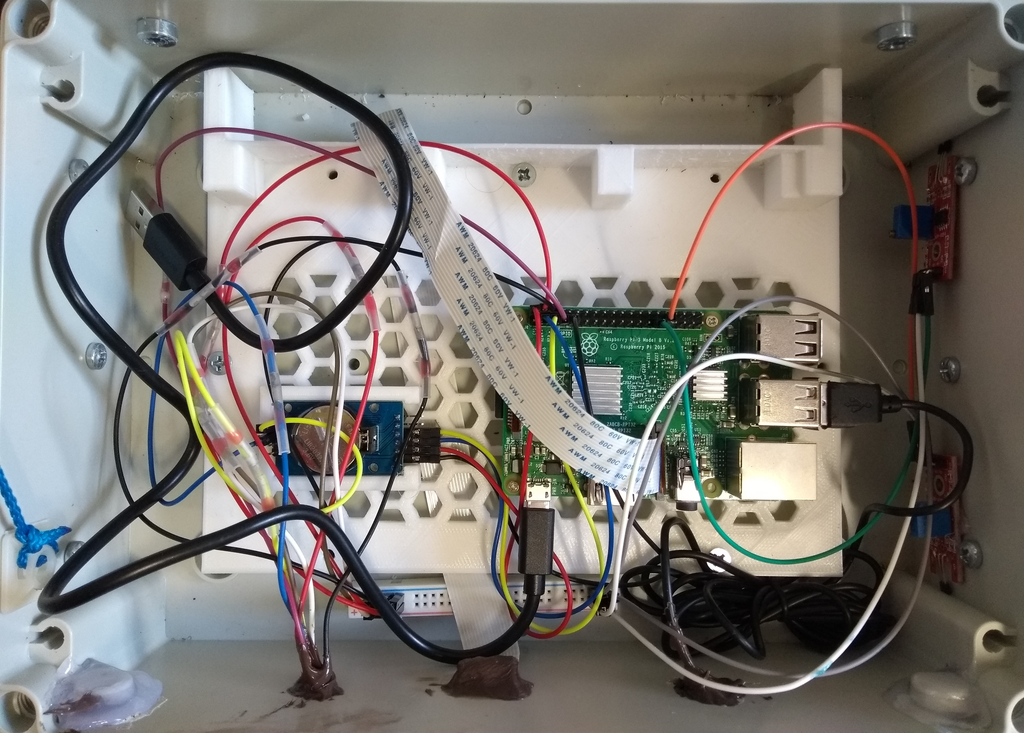
7. Base Plate
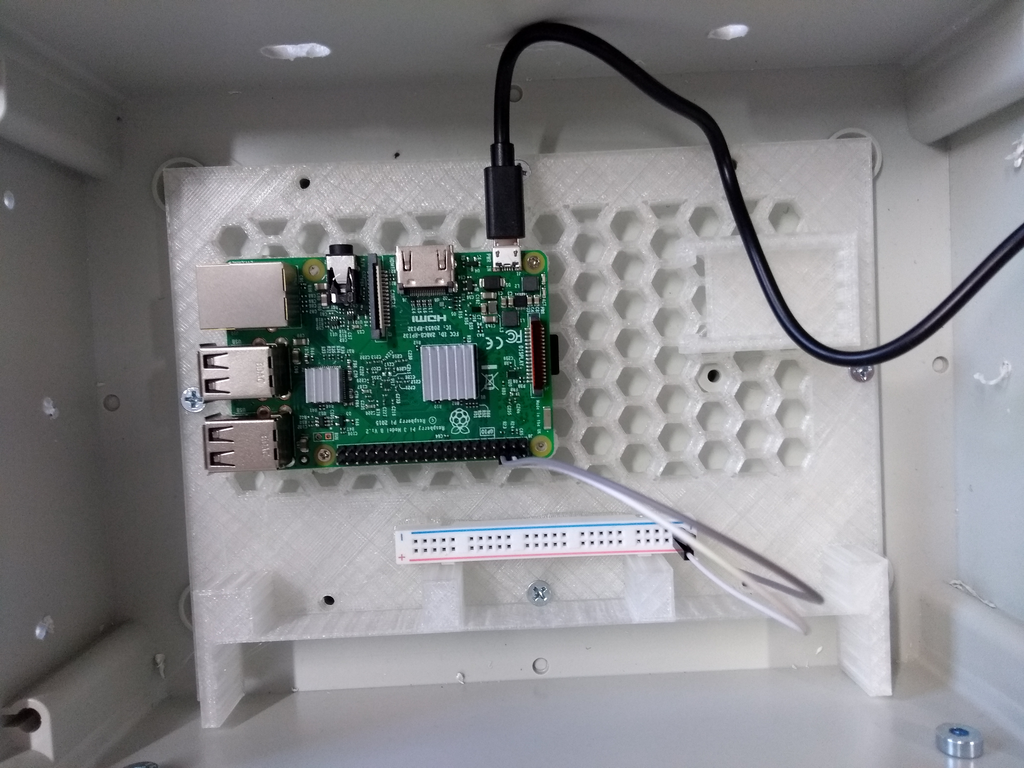
The Raspberry Pi, the Real-time clock as well as DC/DC Converter are directly attached to the 3D printed baseplate, using 4x C 2,9 X 13 H countersunk-head tapping screw for the Raspberry Pi, hot glue for the real-time clock. Using Jumper Cables the Real-time clock is connected to the Raspberry Pi’s General Purpose Input Output (GPIO) interface.
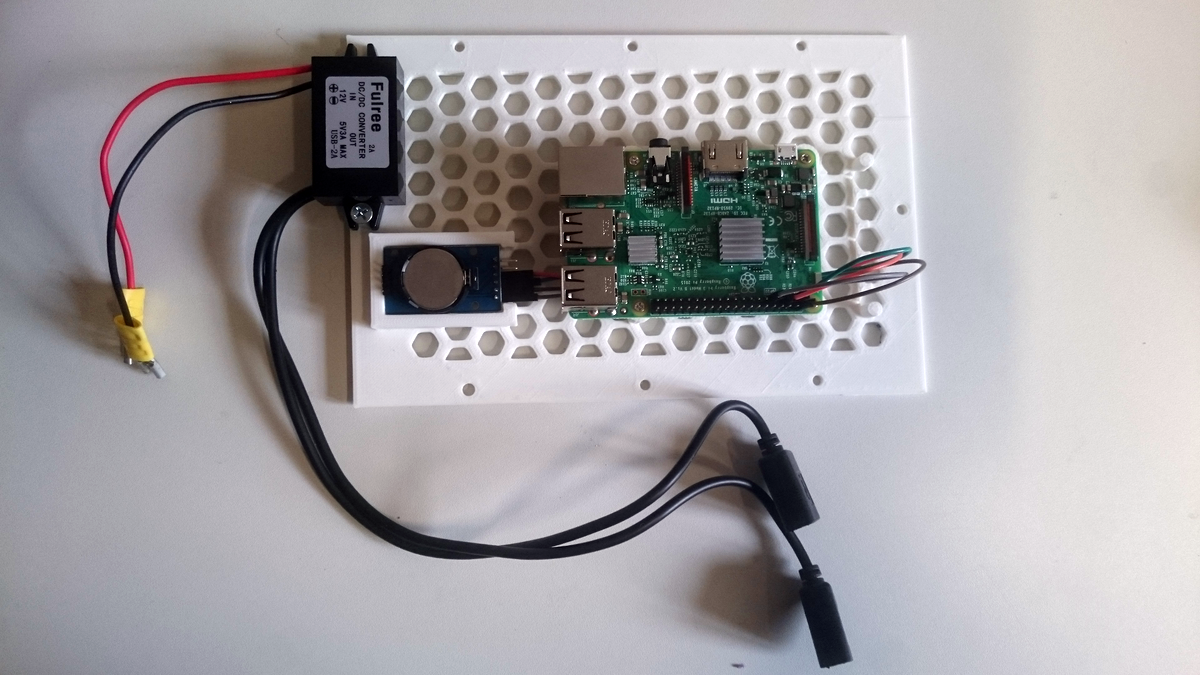
Take one +/- rail from a Breadboard and glue it on the bottom side of the Raspberry Pi mounting plate and connect it with the jumper-cables: red for (+) and black for (-).
Connect the USB-power-cable to the Raspberry Pi. Put the Powerbank on the inner side of the containment box cover.
8. System and Storage
The Samsung MB-MC32GA MicroSD card is directly plugged into the Raspberry Pi, the MicroSD card contains the purpose-build operation system. A freely available repository collects software and hardware descriptions and contains distribution definitions as well as configuration files for sensorboxes.
9. Hall Sensors
Connect the jumper-cables and adjust the sensitivity by turning the adjusting-screw on top of the sensors. Use a magnet to test the reaction: The Hall-sensor’s lamp should glow if it senses a magnetic field.
10. Wiring Diagram
Connect the wires according to this Frizzing diagram:
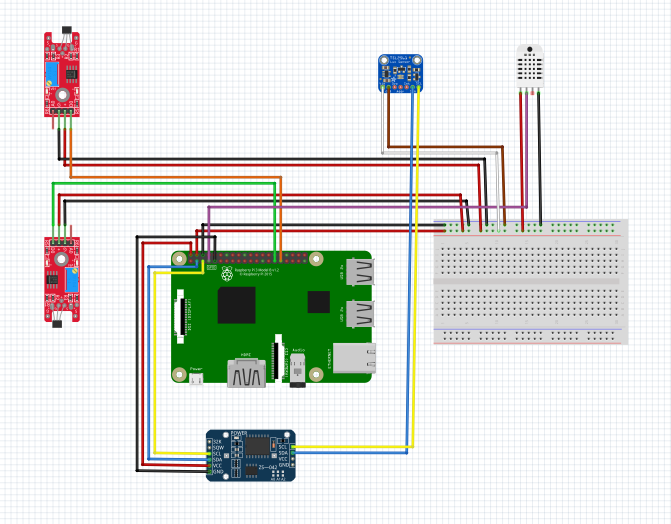
Seal all space between the Sensors and the containment box with silicon or glue. Further seal all openings from the inner side of the containment box leading to the sensors with silicon or glue.
Parts List
These parts are required to build a sensorbox type planet.
Basis
- Spelsberg TK PS 2518-11-o (180 x 254 x 111 mm)
- External hinge set Spelsberg ASS-gro
- Raspberry Pi 3 B v1.2
- Heat Sink Set
- DS3231 real-time clock
Power Supply
- EasyAcc PB26000MS Powerbank, 26000 mAh
- Charge-through
- microSD QI Charging Pad
Sensors
Microclimate
- Adafruit TSL2561 Digital Luminosity/Lux/Light Sensor Breakout
- AOSONG AM2302 Temperature Sensor
RPi Camera
Microphone
- Acoustic cloth 2.0 - 4102/B2 hydrophobic
- Metal wire 0.9 mm
Option 1: RØDE – Smartlav Microphone
- RØDE – Smartlav
- external soundcard UGREEN USB
- Audio y-adapter cinch cable 3.5mm socket to cinch cable
Option 2: low-price microphone
- Foxnovo SF-555
Storage
- Samsung MB-MC64GA MicroSD 64GB
Lift Car
- 6x Rolls
- 2x Joy-IT KY-024 Hall Sensor
Mounting
- Custom 3D-printed sensor mount
- Custom 3D-printed base plate
- Pi: 4x C 2,9 X 13 H countersunk-head tapping screw (DIN 7982)
- Box: 5x M 4,0 x 12,0 countersunk-head screws DIN 965
- USB Sound Card, Powerbank, QI Charger: 3M Dual Lock Thin SJ 457 D
- Hall sensor, power rail: Hot glue
- Silicone (for sealing cable holes)
- 6x Screws M4 x 20 (rolls)
Wiring
- Breadboard Power Rail
- Hall Sensor: 6x Jumper Wire female-female
- RPi: 2x Jumper Wire female-male
- RTC: 4x Jumper Wire female-female
- Microclimate Tower: 8x Jumper Wire female-male
- Camera: 30cm CSI camera cable