BatRack in a nutshell
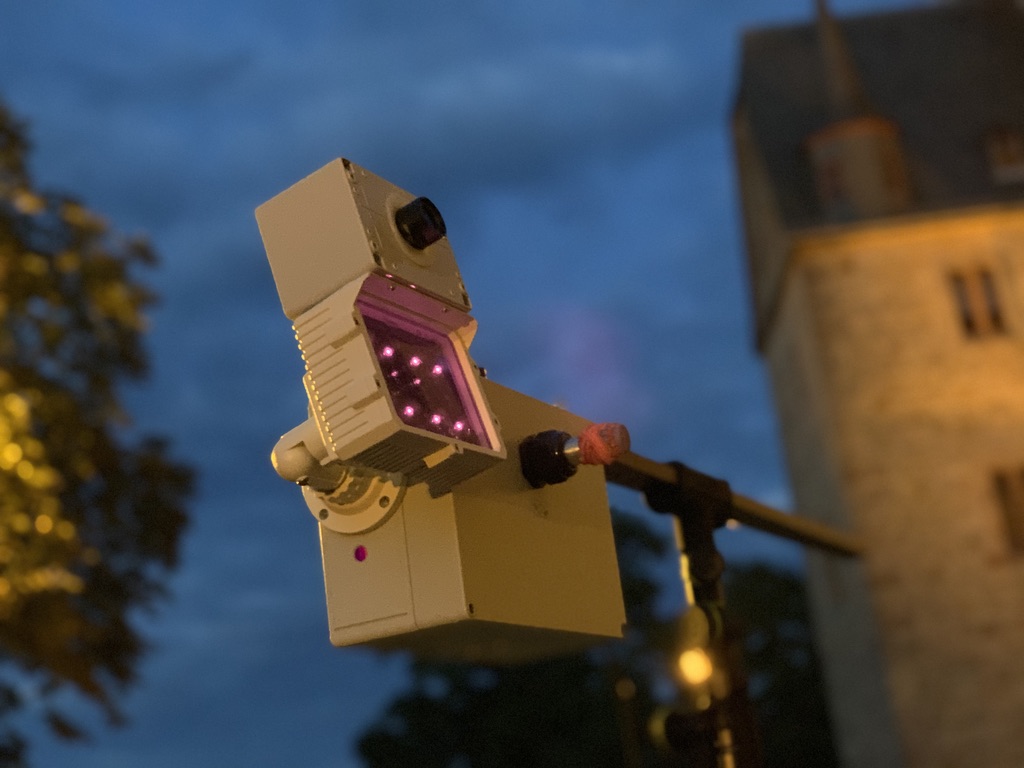
The BatRack is an open-source multi-sensor tool consisting of an audio sensor, a camera unit and an automatic radio tracking unit (Gottwald et al 2019). It is designed to allow automatic observation of bats in the wild and, depending on the configuration, to assign the observations to individuals. Bat calls can be used as a trigger for the camera, enabling reliable recording. VHF can also be used as a trigger for video and audio recordings and additionally allows the recordings to be assigned to individuals equipped with VHF transmitters. The different sensors are able to fill in information gaps of the other sensor. This page is intended to provide an in-depth overview of the functionality of the BatRack and to enable a replication. For a detailed description of the possible applications and an assessment of the performance of the trigger approach see the corresponding publication.
Examples:
In the following we show an example video and an example audio recording. In addition, an animation illustrates the principle of individual recognition.
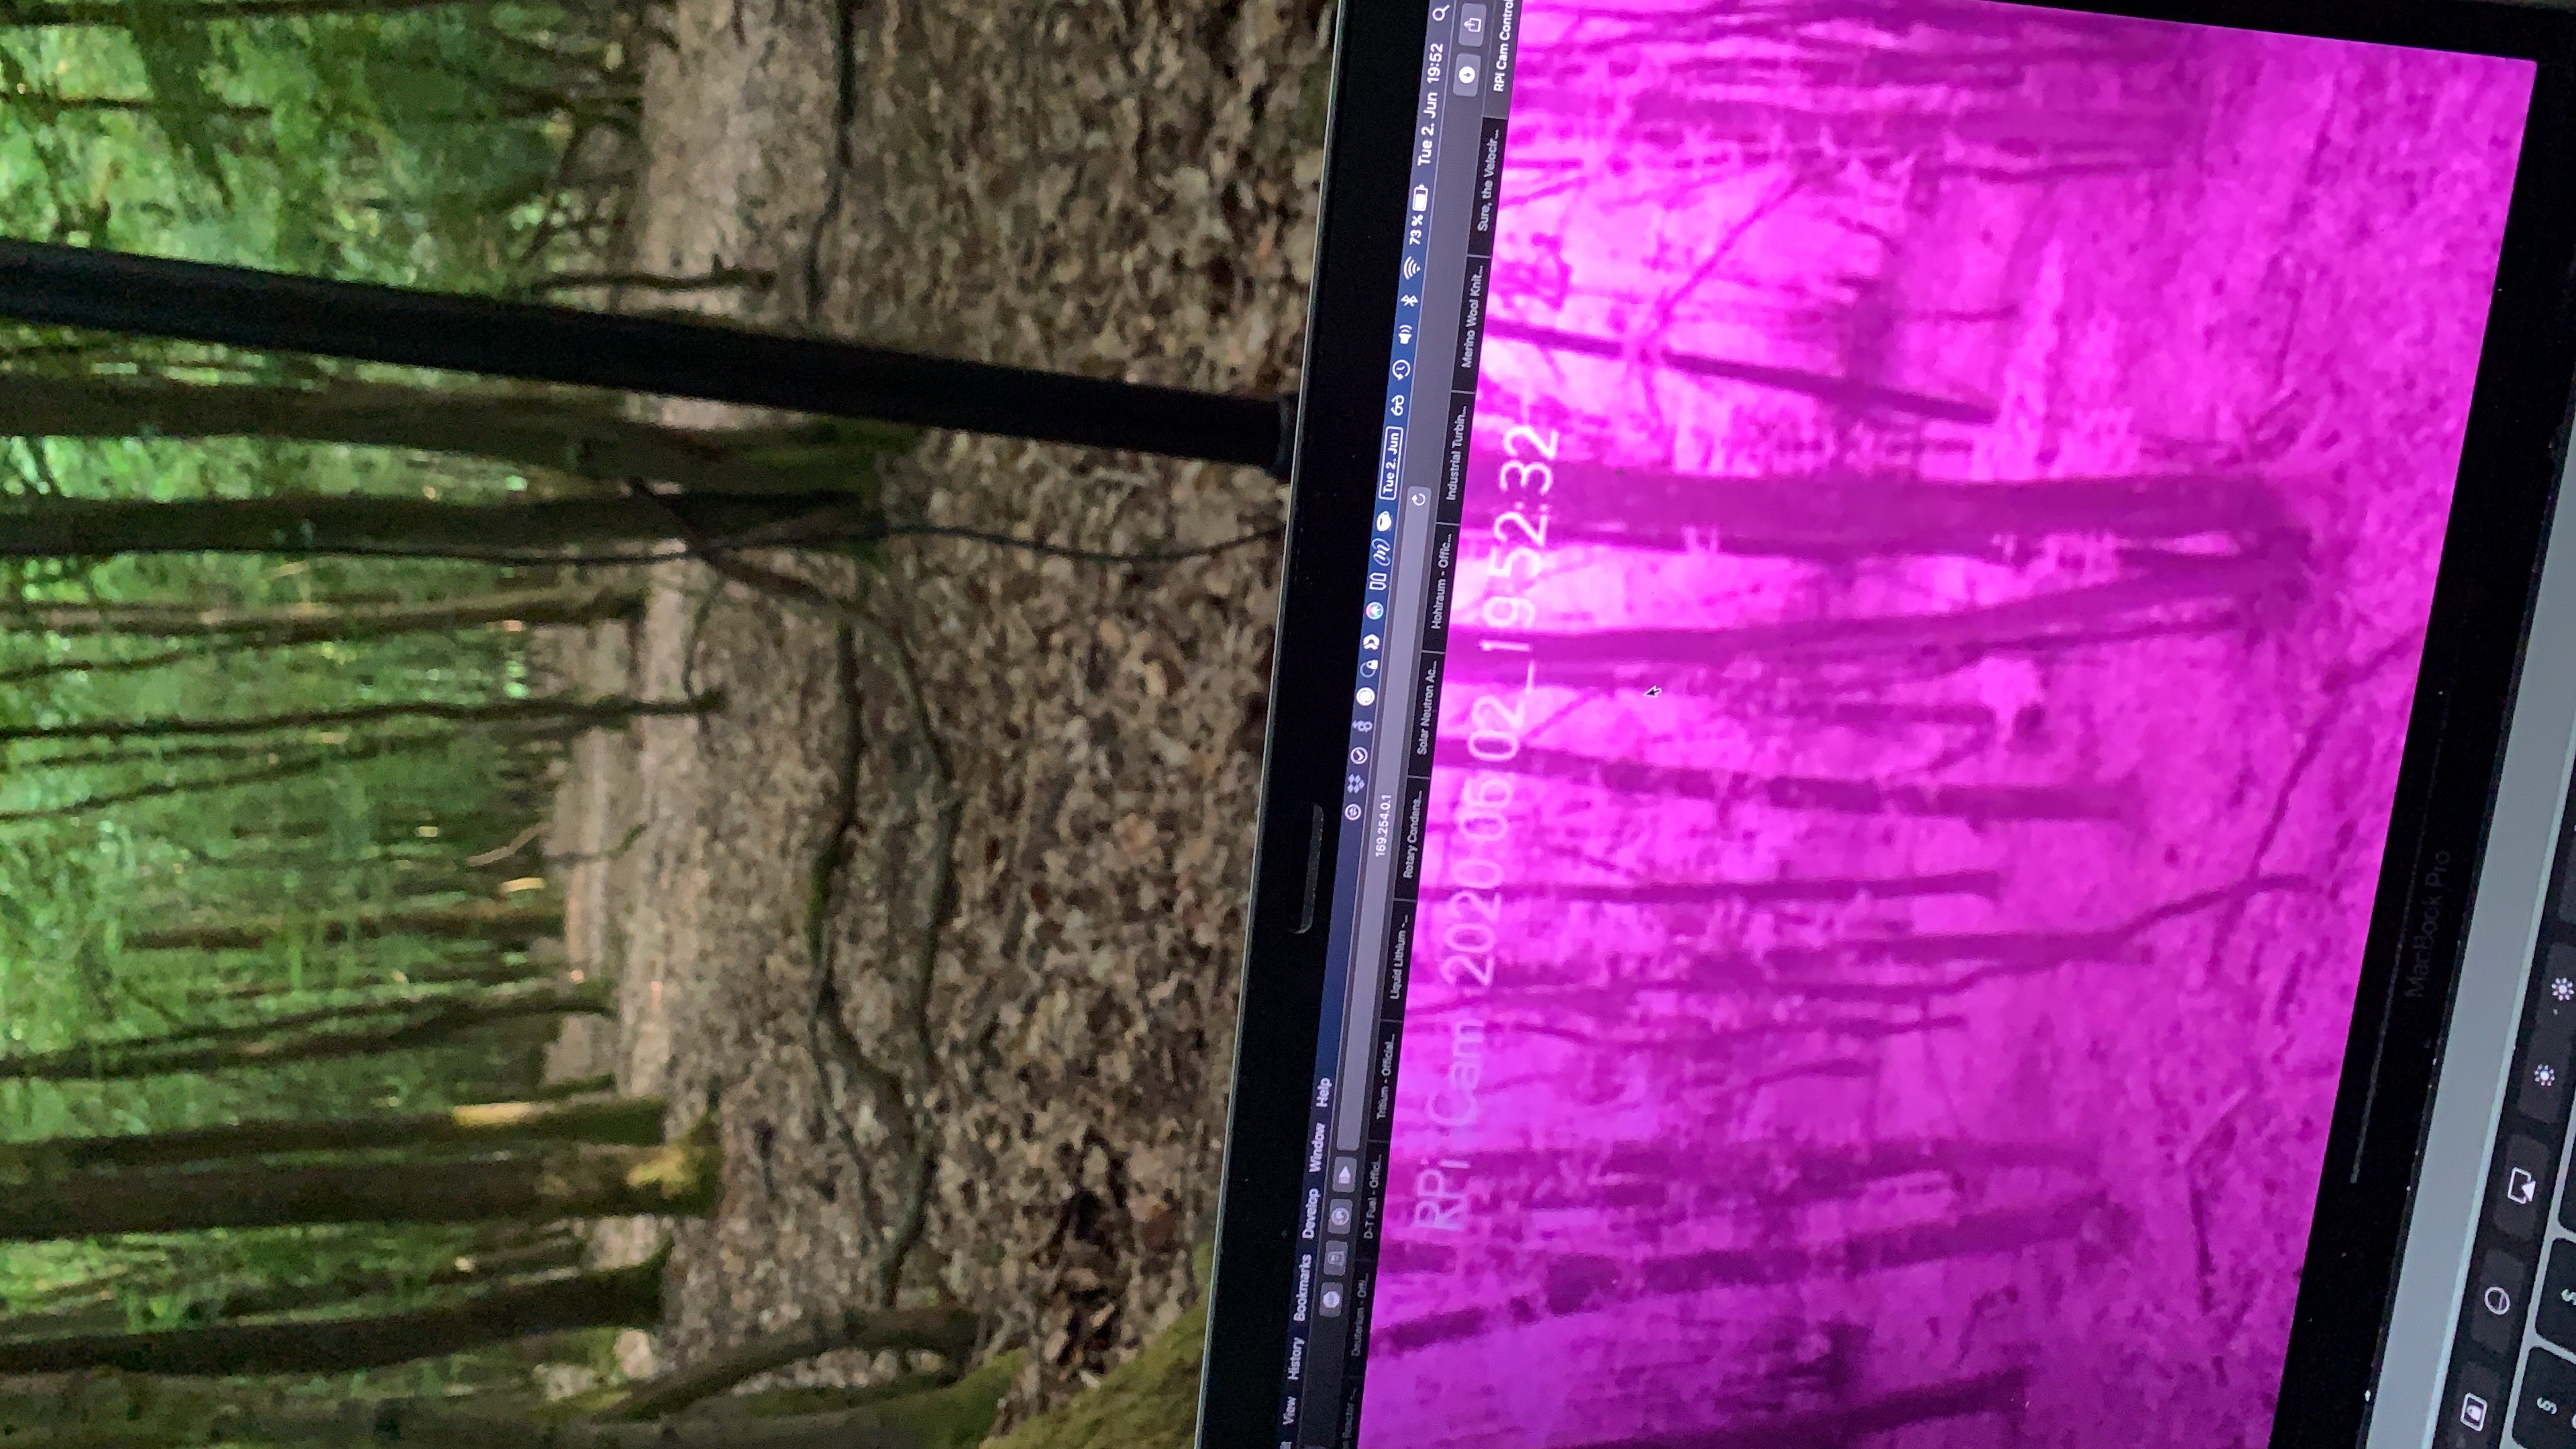
The following video was recorded by BatRack and was triggered automatically by VHF. The triggering could also have been done by an audio trigger.
An example spectrogram of bat calls recorded by BatRack. (It was post-processed by audacity by hand with moise filter, highpass and lowpass filter) The possibility to time match both video and audio, BatRack can capture the matching sound for behaviour identified by the video recording.batrack All this data is collected in the normal environment of the bats and so is an optimal source for machine learning approaches.

The animation illustrates the principle of individual recognition using VHF. For this purpose the VHF signals recorded by the radio tracking unit were matched with the frames of the video (red dot in the graphic). The tagged individual approaches the observed tree at 11:13 pm. The recording is triggered before the individual enters the observed area. After the individual appears, a short swarming sequence begins. The bat flies around the tree and approaches the roost several times. The VHF signal shows strong fluctuations during the swarming episode. At about 11:14 pm the individual enters the tree. The signal fluctuations decrease significantly. At 11:14:20 pm a swarming bat appears in the picture again. Since the VHF signal is still stationary, it cannot be the tagged individual. A few seconds after this 2nd individual enters the tree, a bat flies out of the roost. The VHF signal simultaneously shows strong fluctuations and a sudden drop. The tagged individual has emerged from the roost.
Parts list
To rebuild BatRack the following components are needed. For the products not explicitly mentioned, we either have no specific recommendation or the choice depends strongly on the planned project
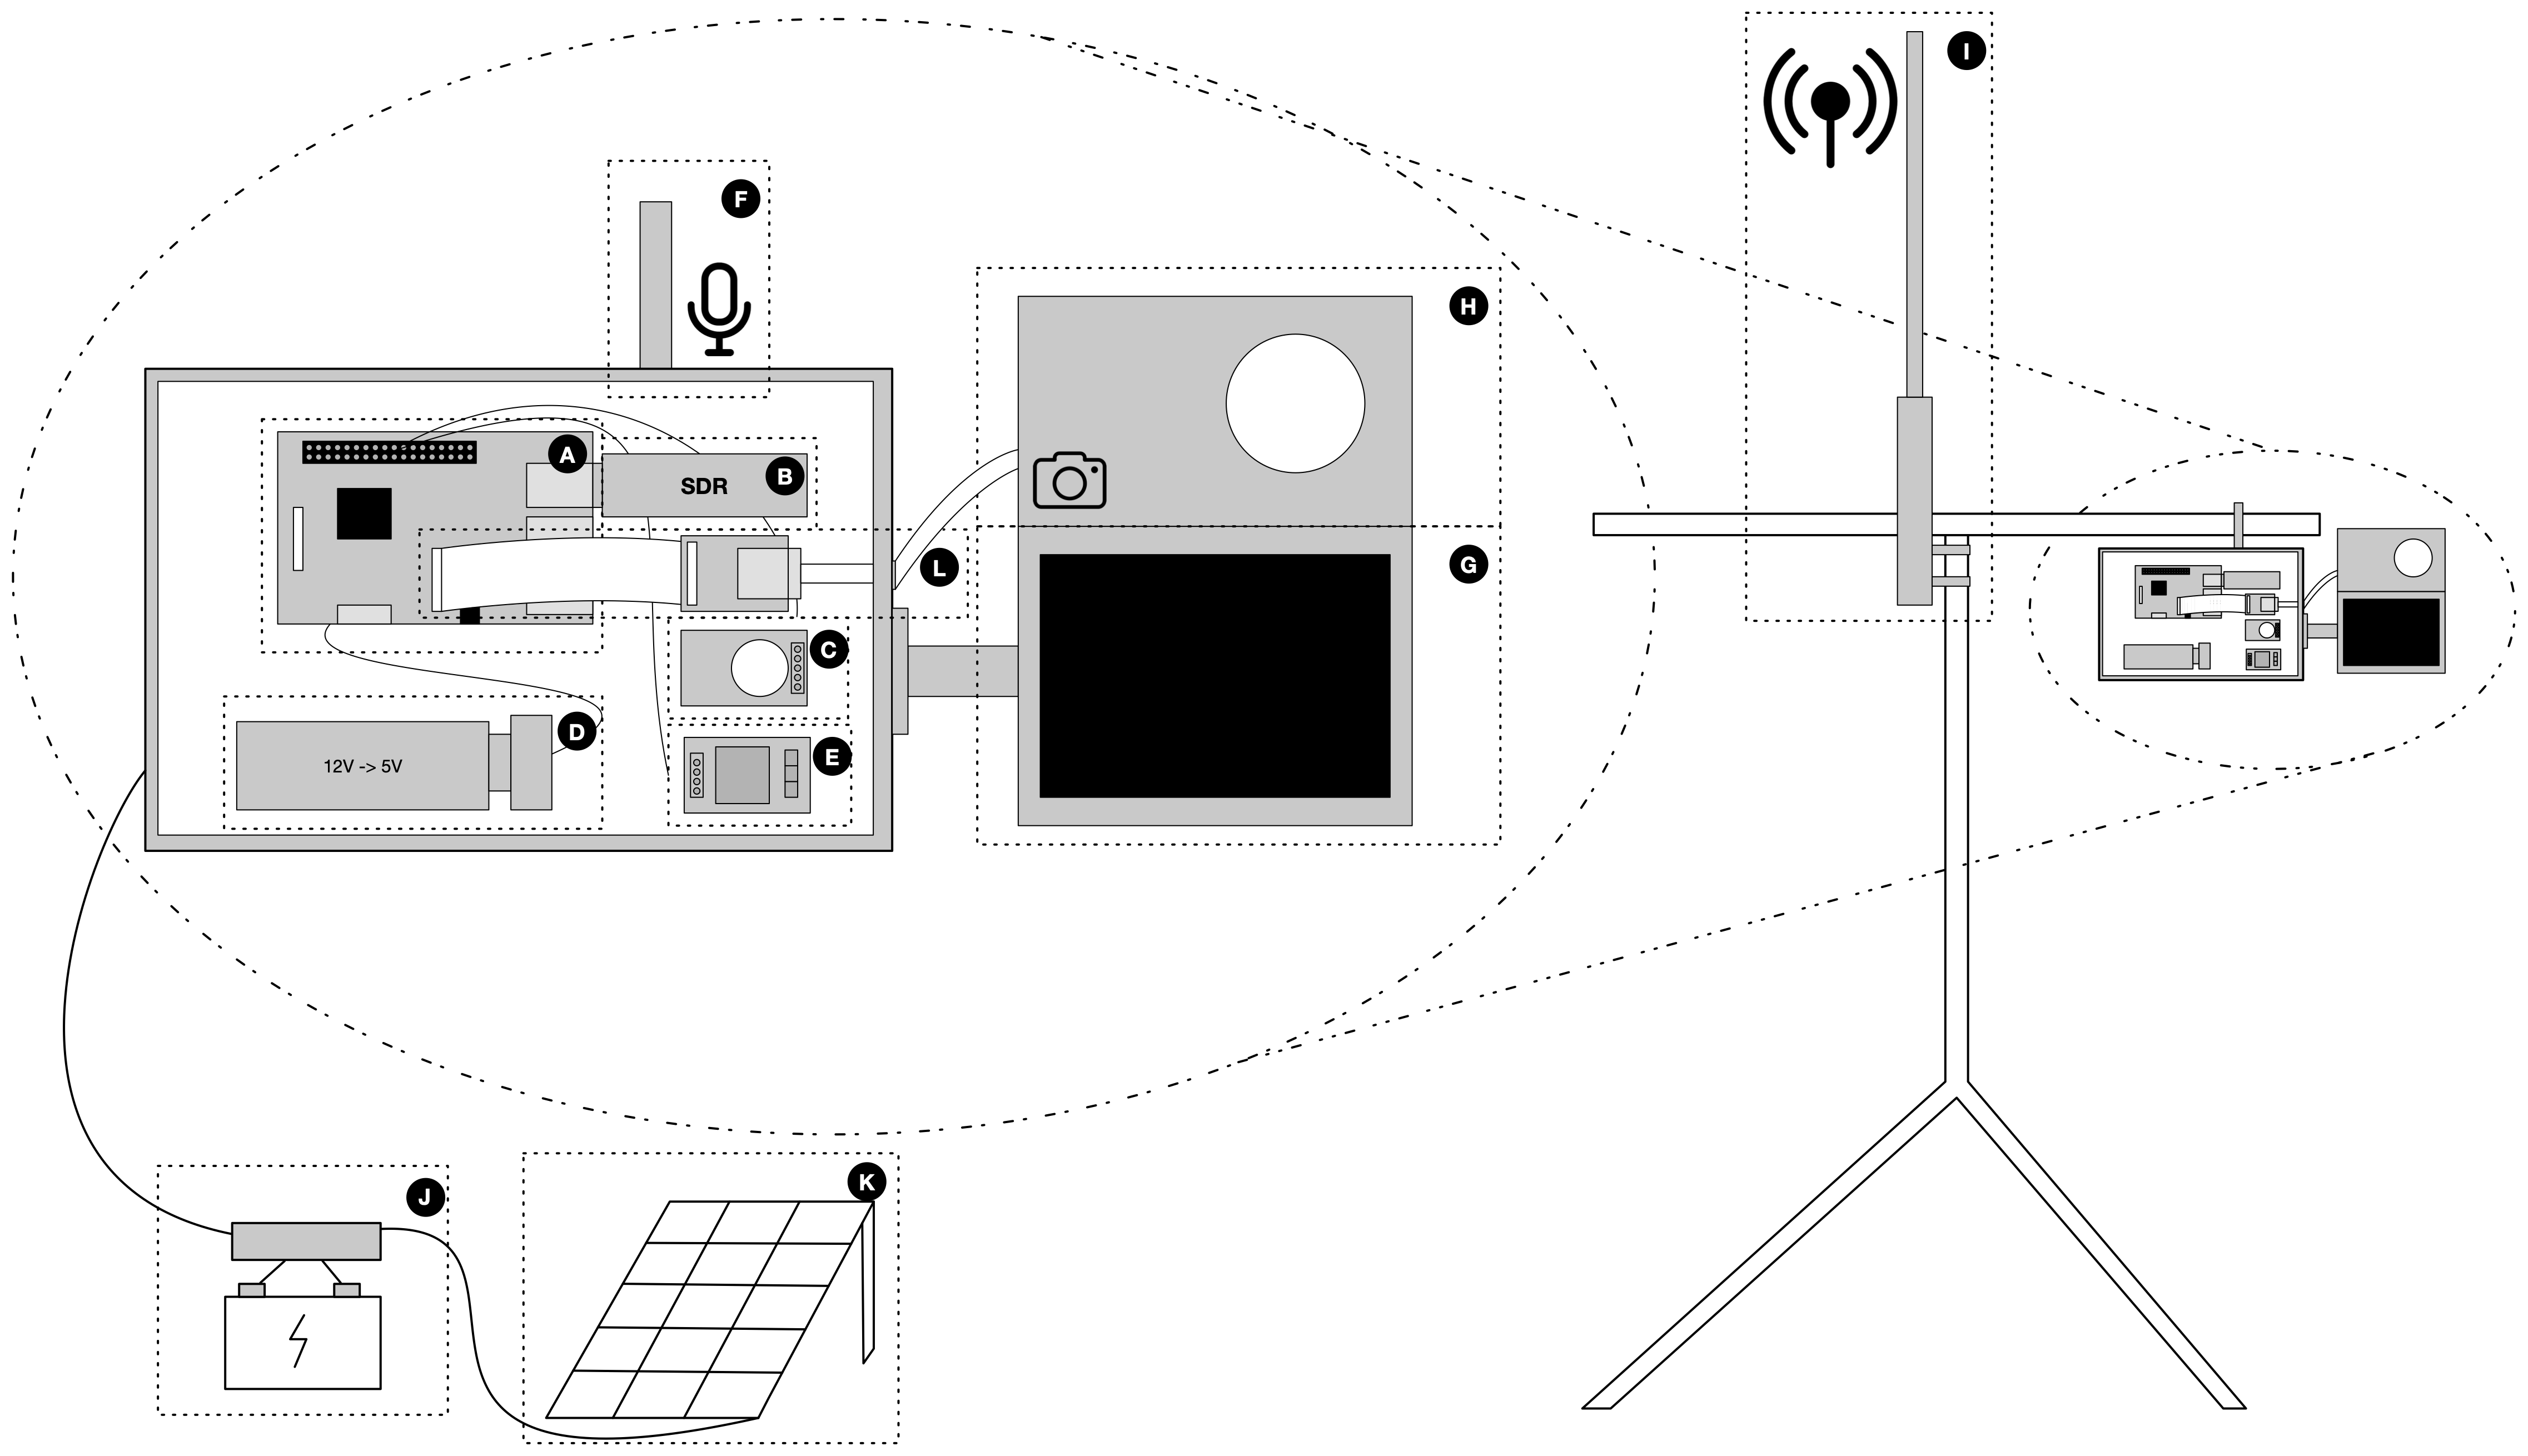
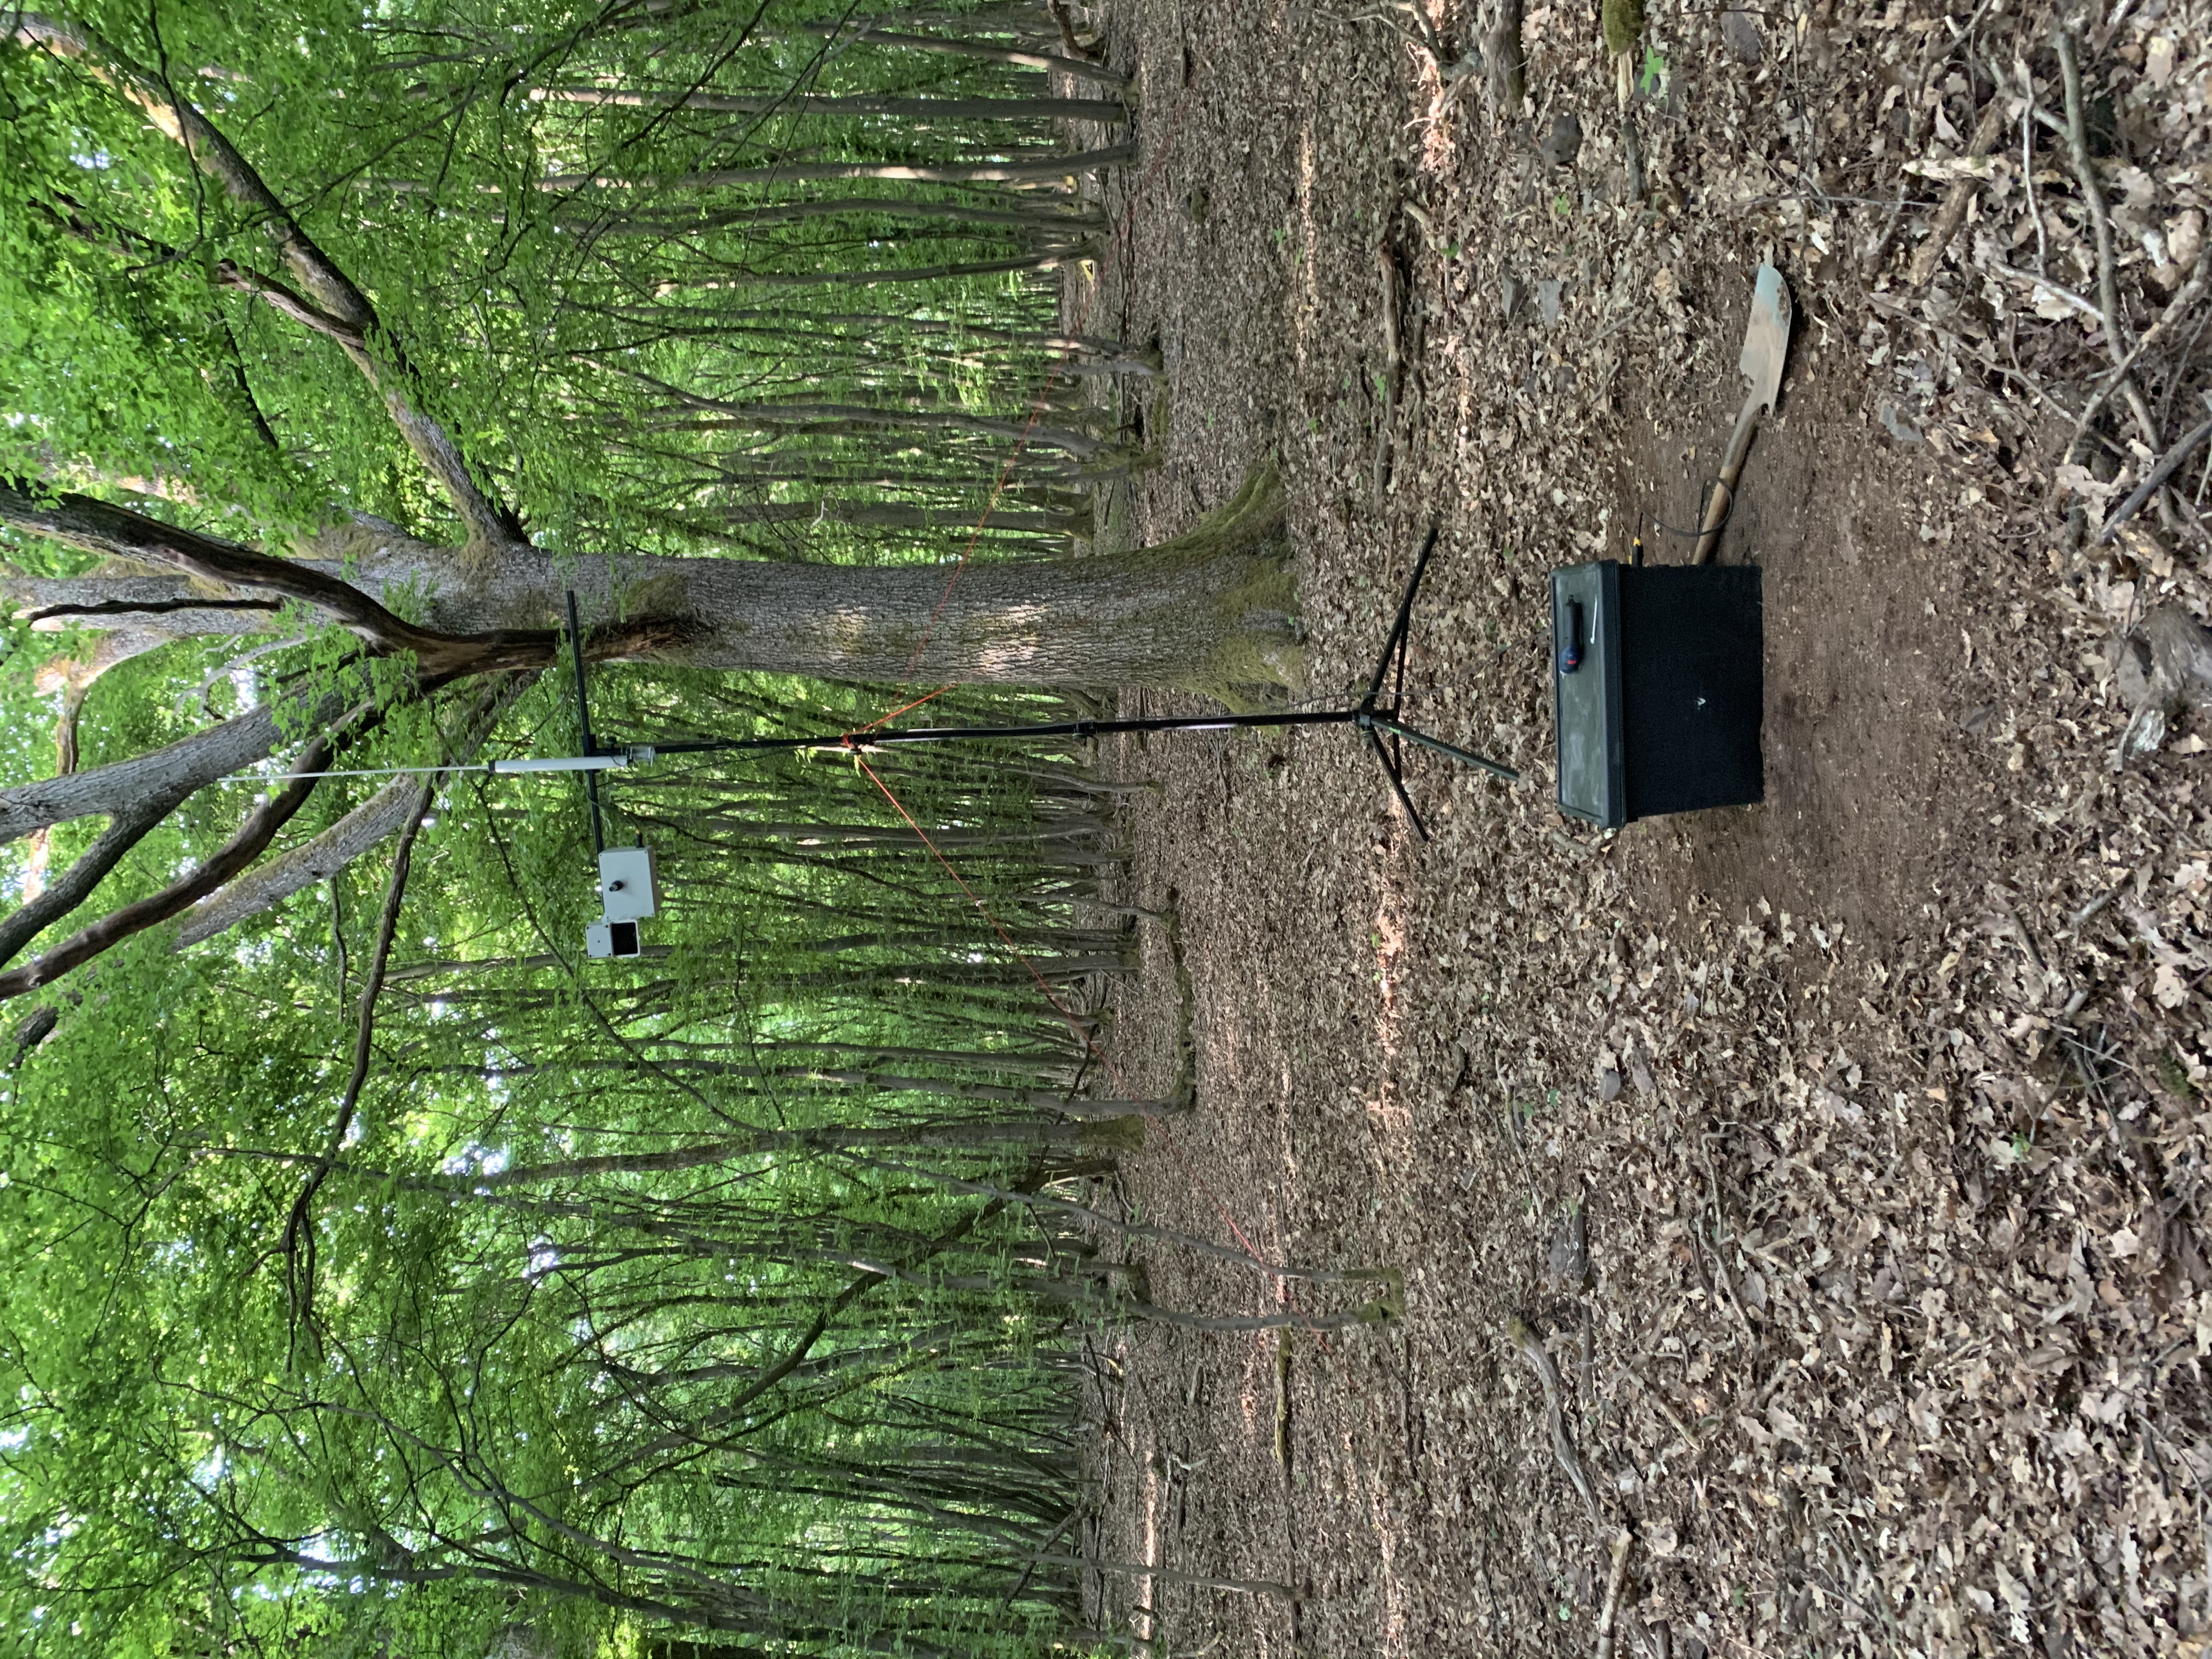
An overview of the overall design of BatRack is illustrated in the following graphic.
| Position | Count | Part list item | Price per unit | Price summed up | Product name |
|---|---|---|---|---|---|
| raspberry Pi | 1 | A | 40,00 € | 40,00 € | Raspberry pi 3 b |
| case (big) | 1 | 20,00 € | 20,00 € | Spelsberg TK PS 2518-11-o | |
| case (small) | 1 | 25,00 € | 25,00 € | Spelsberg TG PC 1208-9-o | |
| ultrasonic microphone | 1 | F | 250,00 € | 250,00 € | Ultramic UM250K |
| hq camera | 1 | H | 55,00 € | 55,00 € | Raspberry Pi High Quality Camera |
| camera lens | 1 | H | 25,00 € | 25,00 € | 6mm lens for Raspberry Pi HQ camera module |
| relay | 1 | E | 1,40 € | 1,40 € | KY-019 5 V One Channel Relay |
| ir led | 1 | G | 70,00 € | 70,00 € | |
| csi hdmi adapter | 1 | L | 9,00 € | 9,00 € | Arducam CSI to HDMI cable |
| hdmi feedthrough | 2 | L | 12,00 € | 24,00 € | Neutrik NAHDMI-W-B |
| hdmi cabel outdoor | 1 | 39,00 € | 39,00 € | Neutrik NKHDMI-3 | |
| hdmi cable short | 2 | L | 3,00 € | 6,00 € | DeLock Adaptor HDMI-A Male to A Male |
| sdr stick | 1 | B | 40,00 € | 40,00 € | Nooelec NESDR SMArt v4 SDR |
| vhf antenna | 1 | I | 50,00 € | 50,00 € | |
| vhf cable | 1 | 15,00 € | 15,00 € | ||
| sma adapter | 1 | 3,20 € | 3,20 € | Blueberry Each® Coaxial Adaptor | |
| 12v cigarette lighter | 1 | D | 7,00 € | 7,00 € | Carpoint 0523484 Waterproof Buillt-Up Socket 12 V |
| 12v -> 5v adapter | 1 | D | 7,00 € | 7,00 € | RAVPower 24 W 4.8 A Dual USB Mini Car Charger |
| power plug male | 1 | 12,00 € | 12,00 € | Neutrik | |
| 3D printed mounting plate | 1 | 3,00 € | 3,00 € | ||
| feedthrough led | 1 | 0,50 € | 0,50 € | ||
| moun microphone | 1 | 1,50 € | 1,50 € | JSM32KVS-S Cable Connectors M32 | |
| usb a -> mirco usb cable | 1 | 1,25 | 1,25 | ||
| lte stick | 1 | 45,00 € | 45,00 € | Huawei Surfstick, E3372H-320 LTE | |
| Subtotal | 749,85 € | ||||
| tripod mount | 1 | 80,00 € | 80,00 € | Gravity GLSTBTV28 | |
| wam bam box | 1 | 30,00 € | 30,00 € | ||
| solar charger | 1 | 20,00 € | 20,00 € | ||
| battery | 1 | J | 150,00 € | 150,00 € | |
| fuse | 1 | 10,00 € | 10,00 € | ||
| power cable | 1 | 5,00 € | 5,00 € | ||
| Power plug female | 1 | 12,00 € | 12,00 € | Neutrik | |
| solar panel | 1 | K | 165,00 € | 165,00 € | |
| Total | 1.221,85 € |
Instruction of building a BatRack prototype
Step 1 - Main case and infrared led light:
The first thing to start with is the main case of BatRack. Here, holes are drilled for all required feed-throughs and the components are inserted. On the left short side both power and the HDMI signal is carried out.
On the opposite side the feed-through for the antenna cable as well as the connection to the IR spotlight is created and the spotlight is screwed directly to the case.
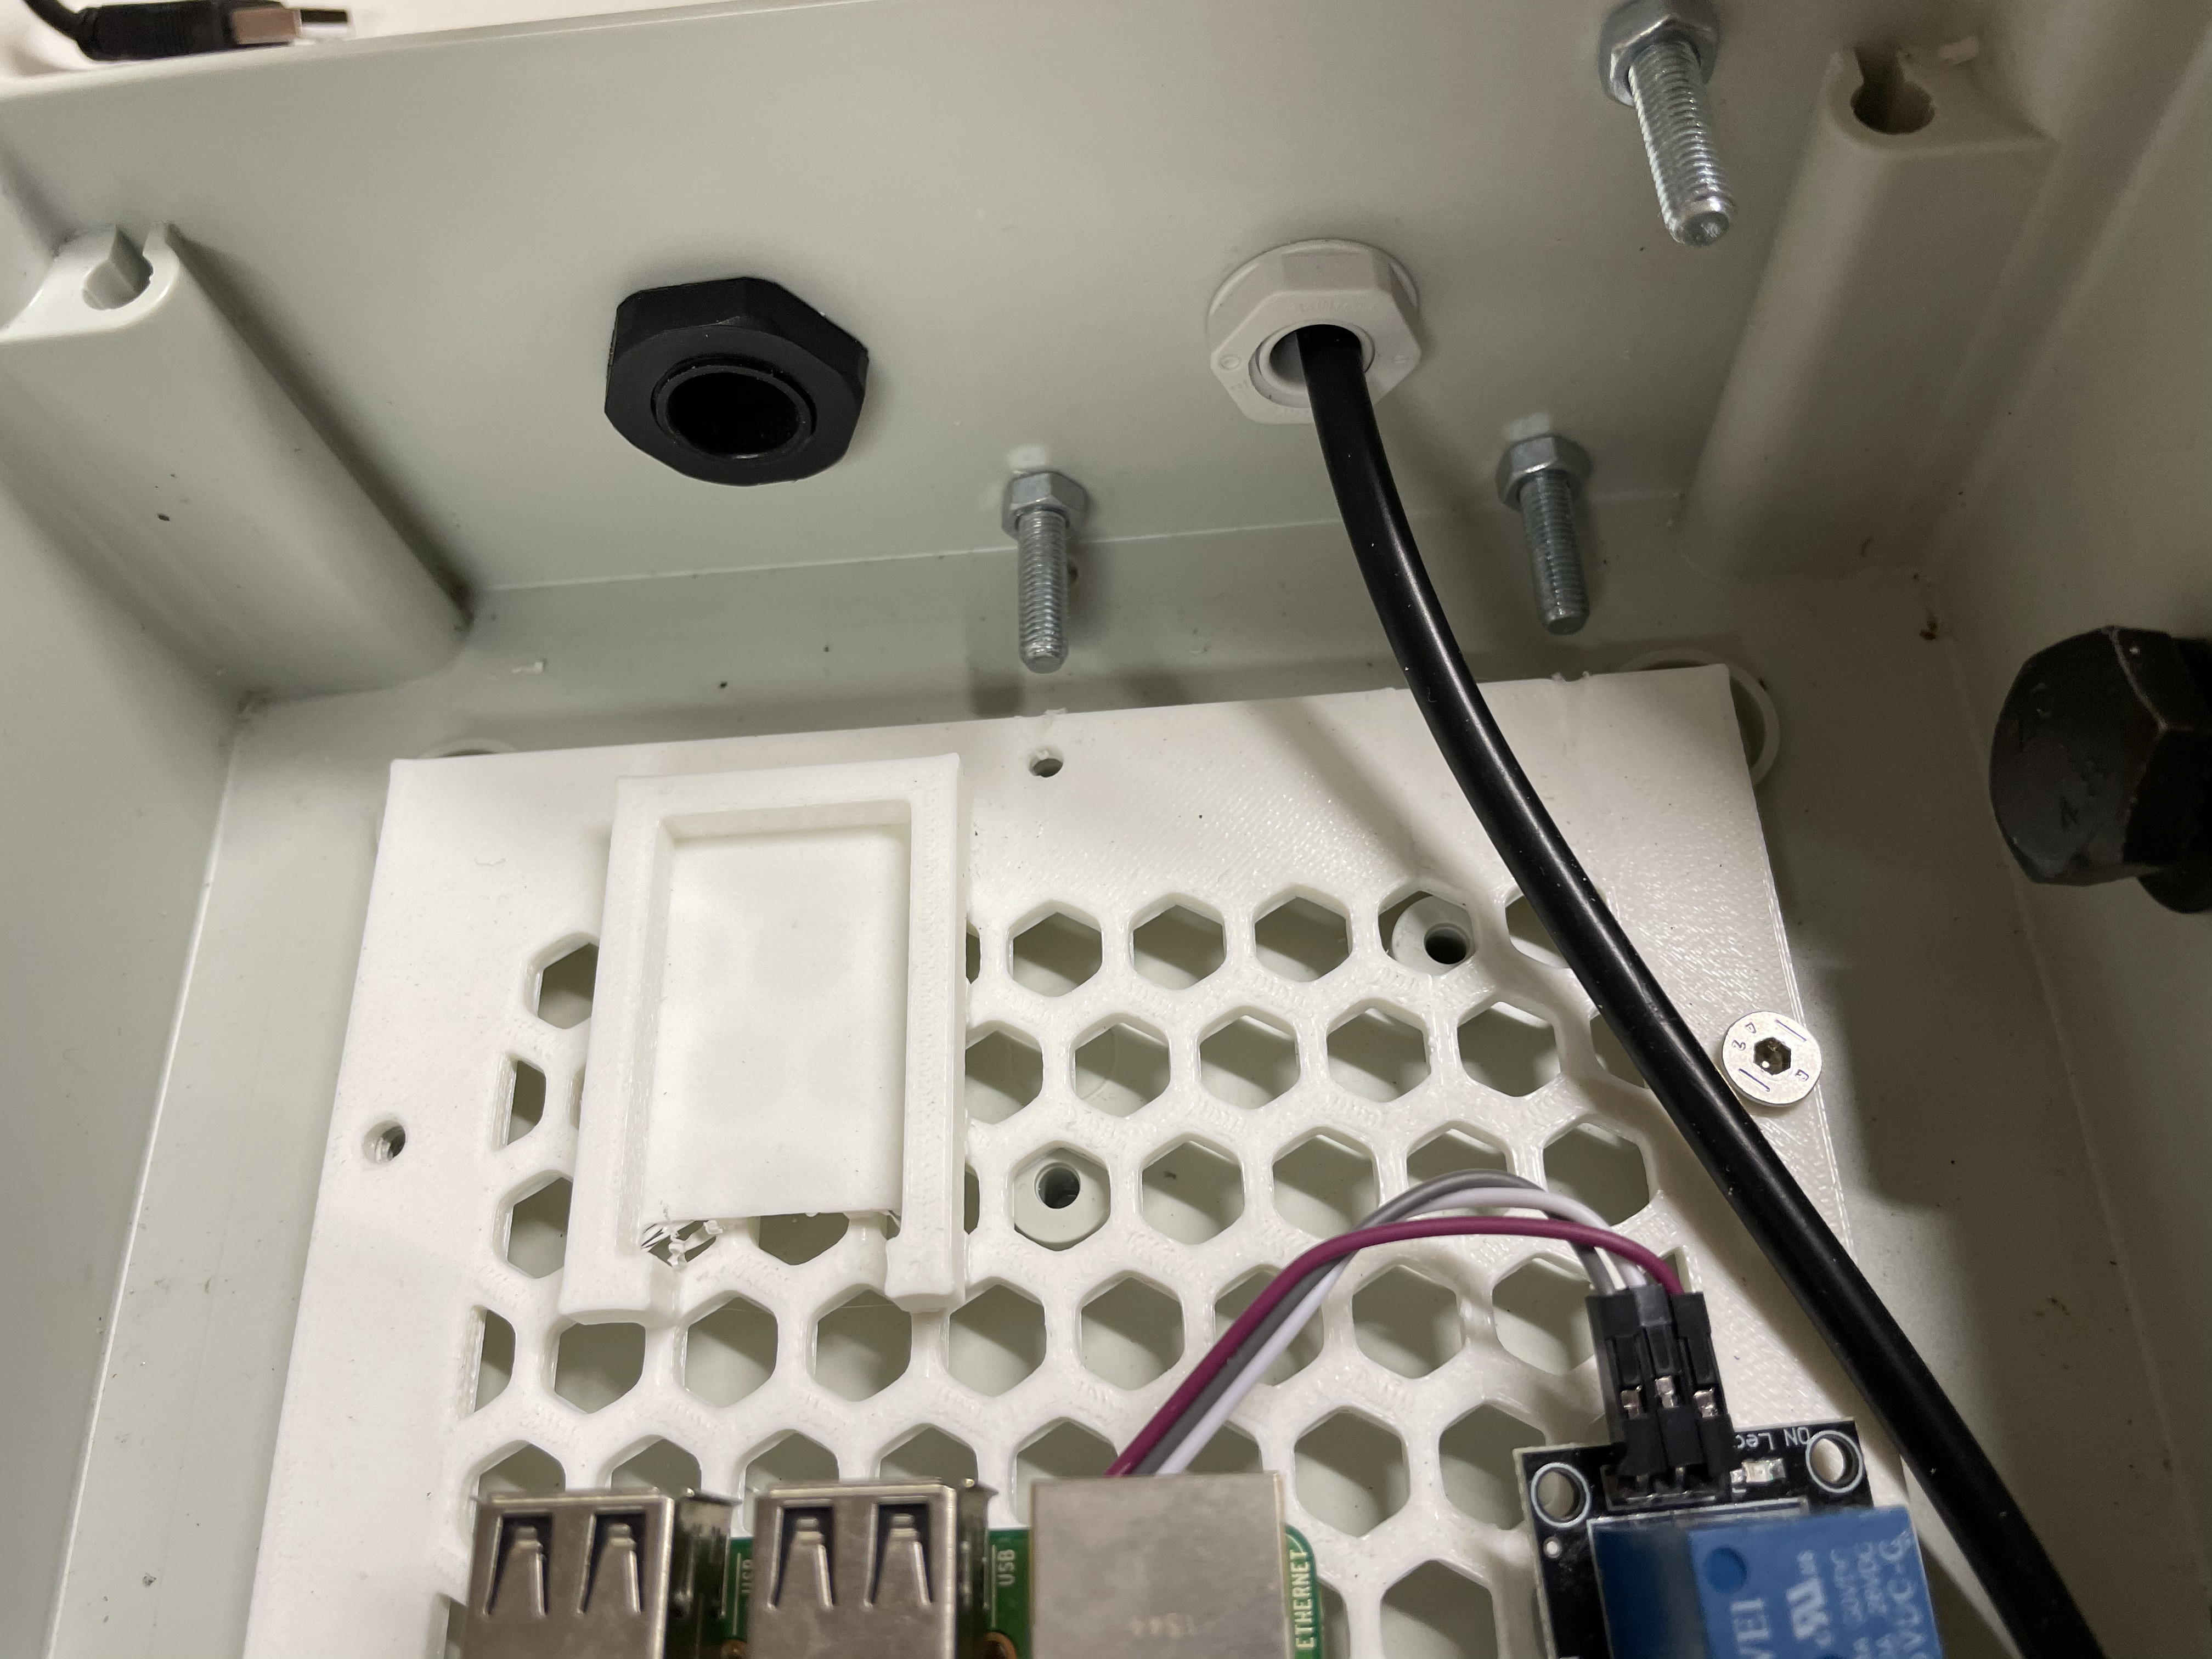
On the top side of the case, two holes are drilled for the attachment to the tripod and two screws are attached.
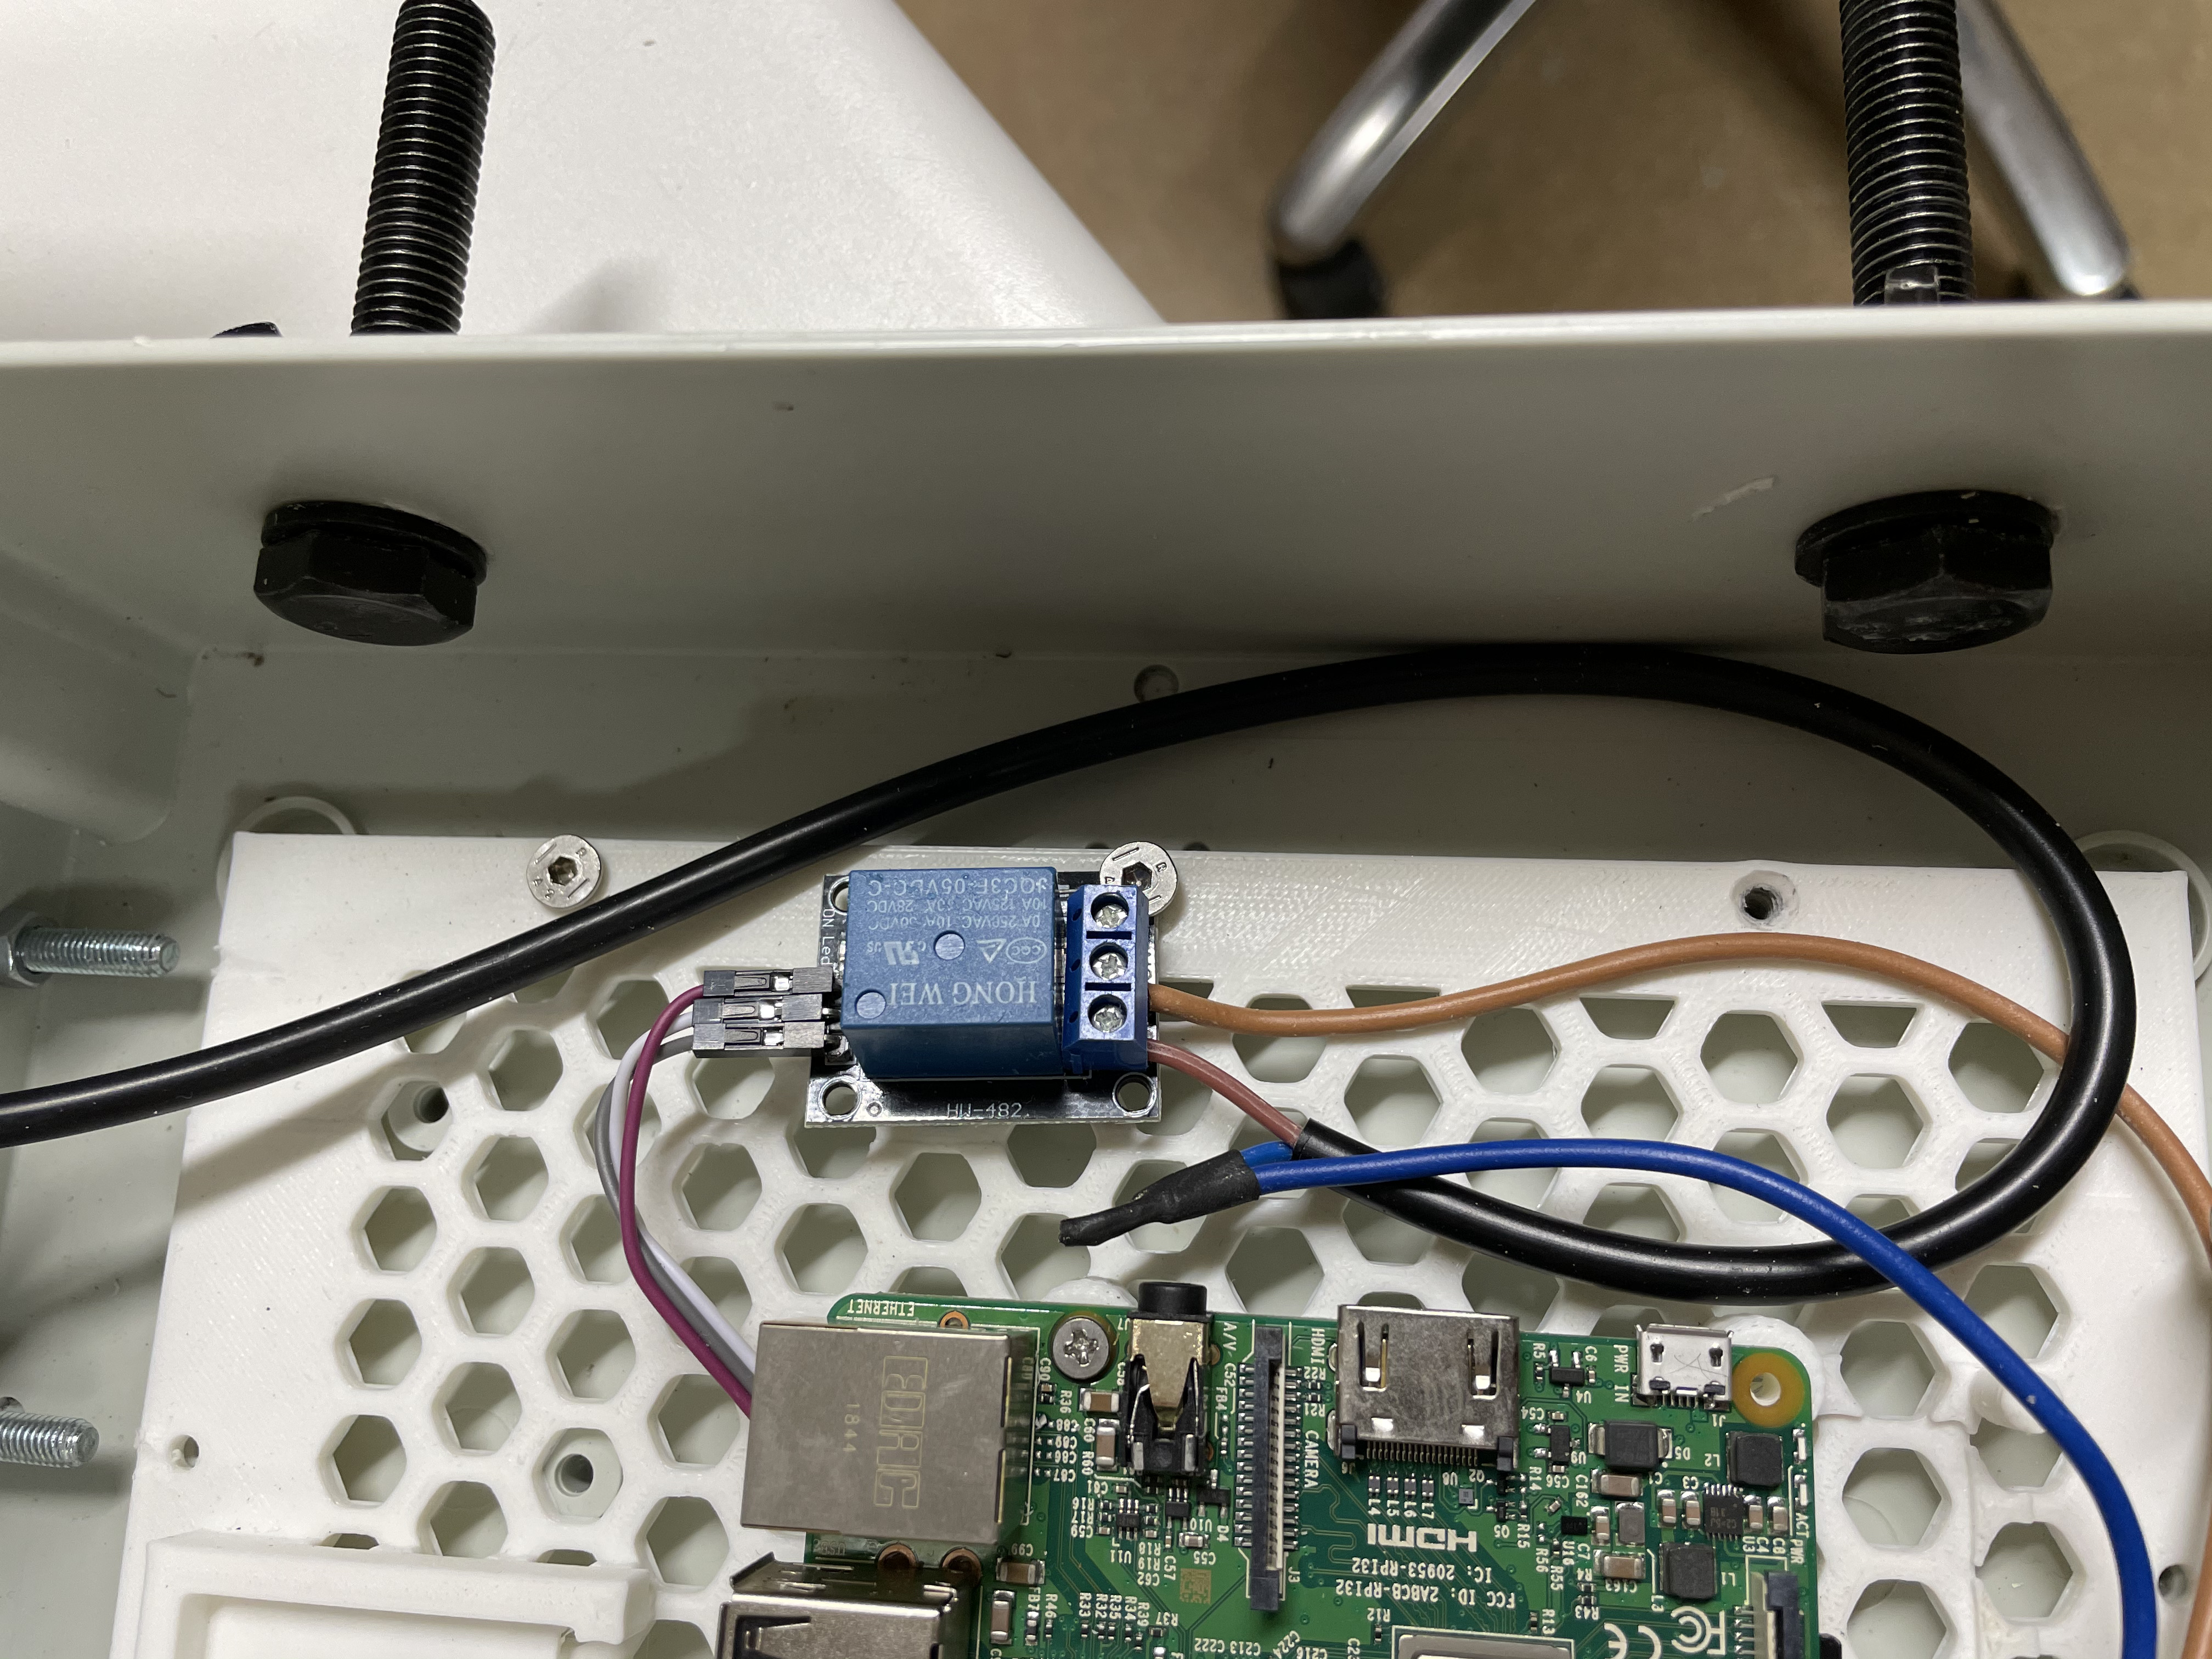
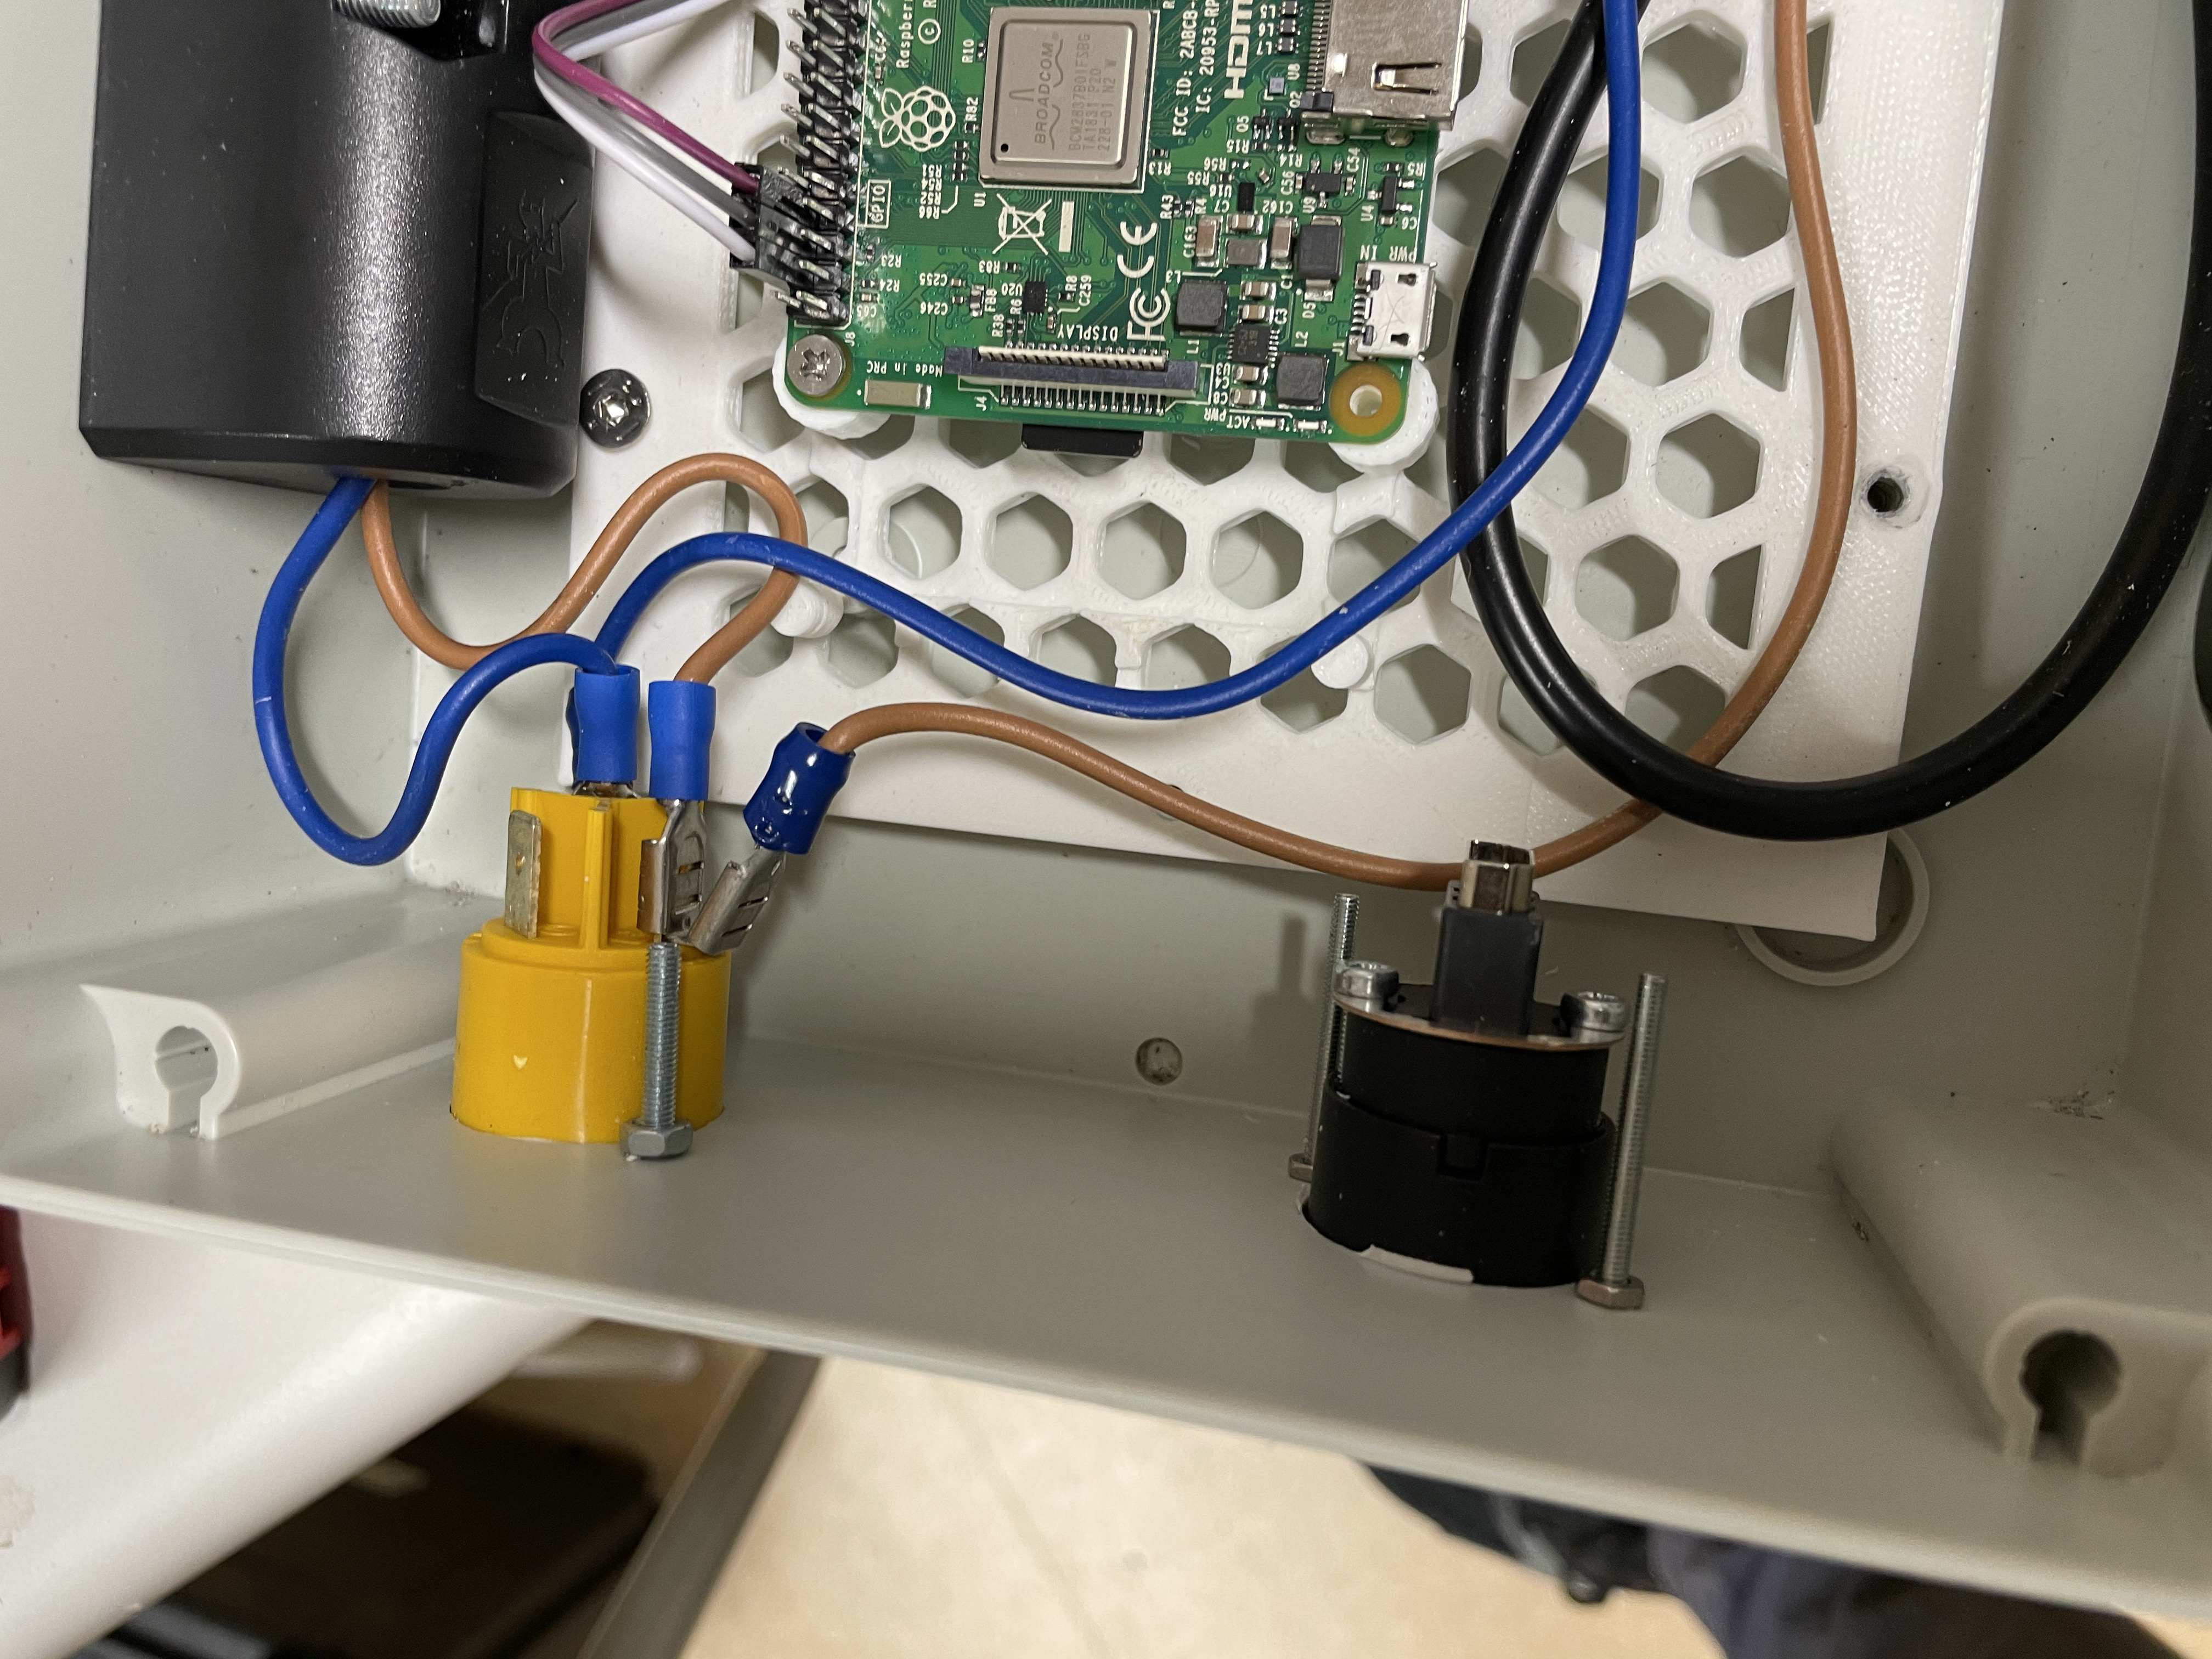
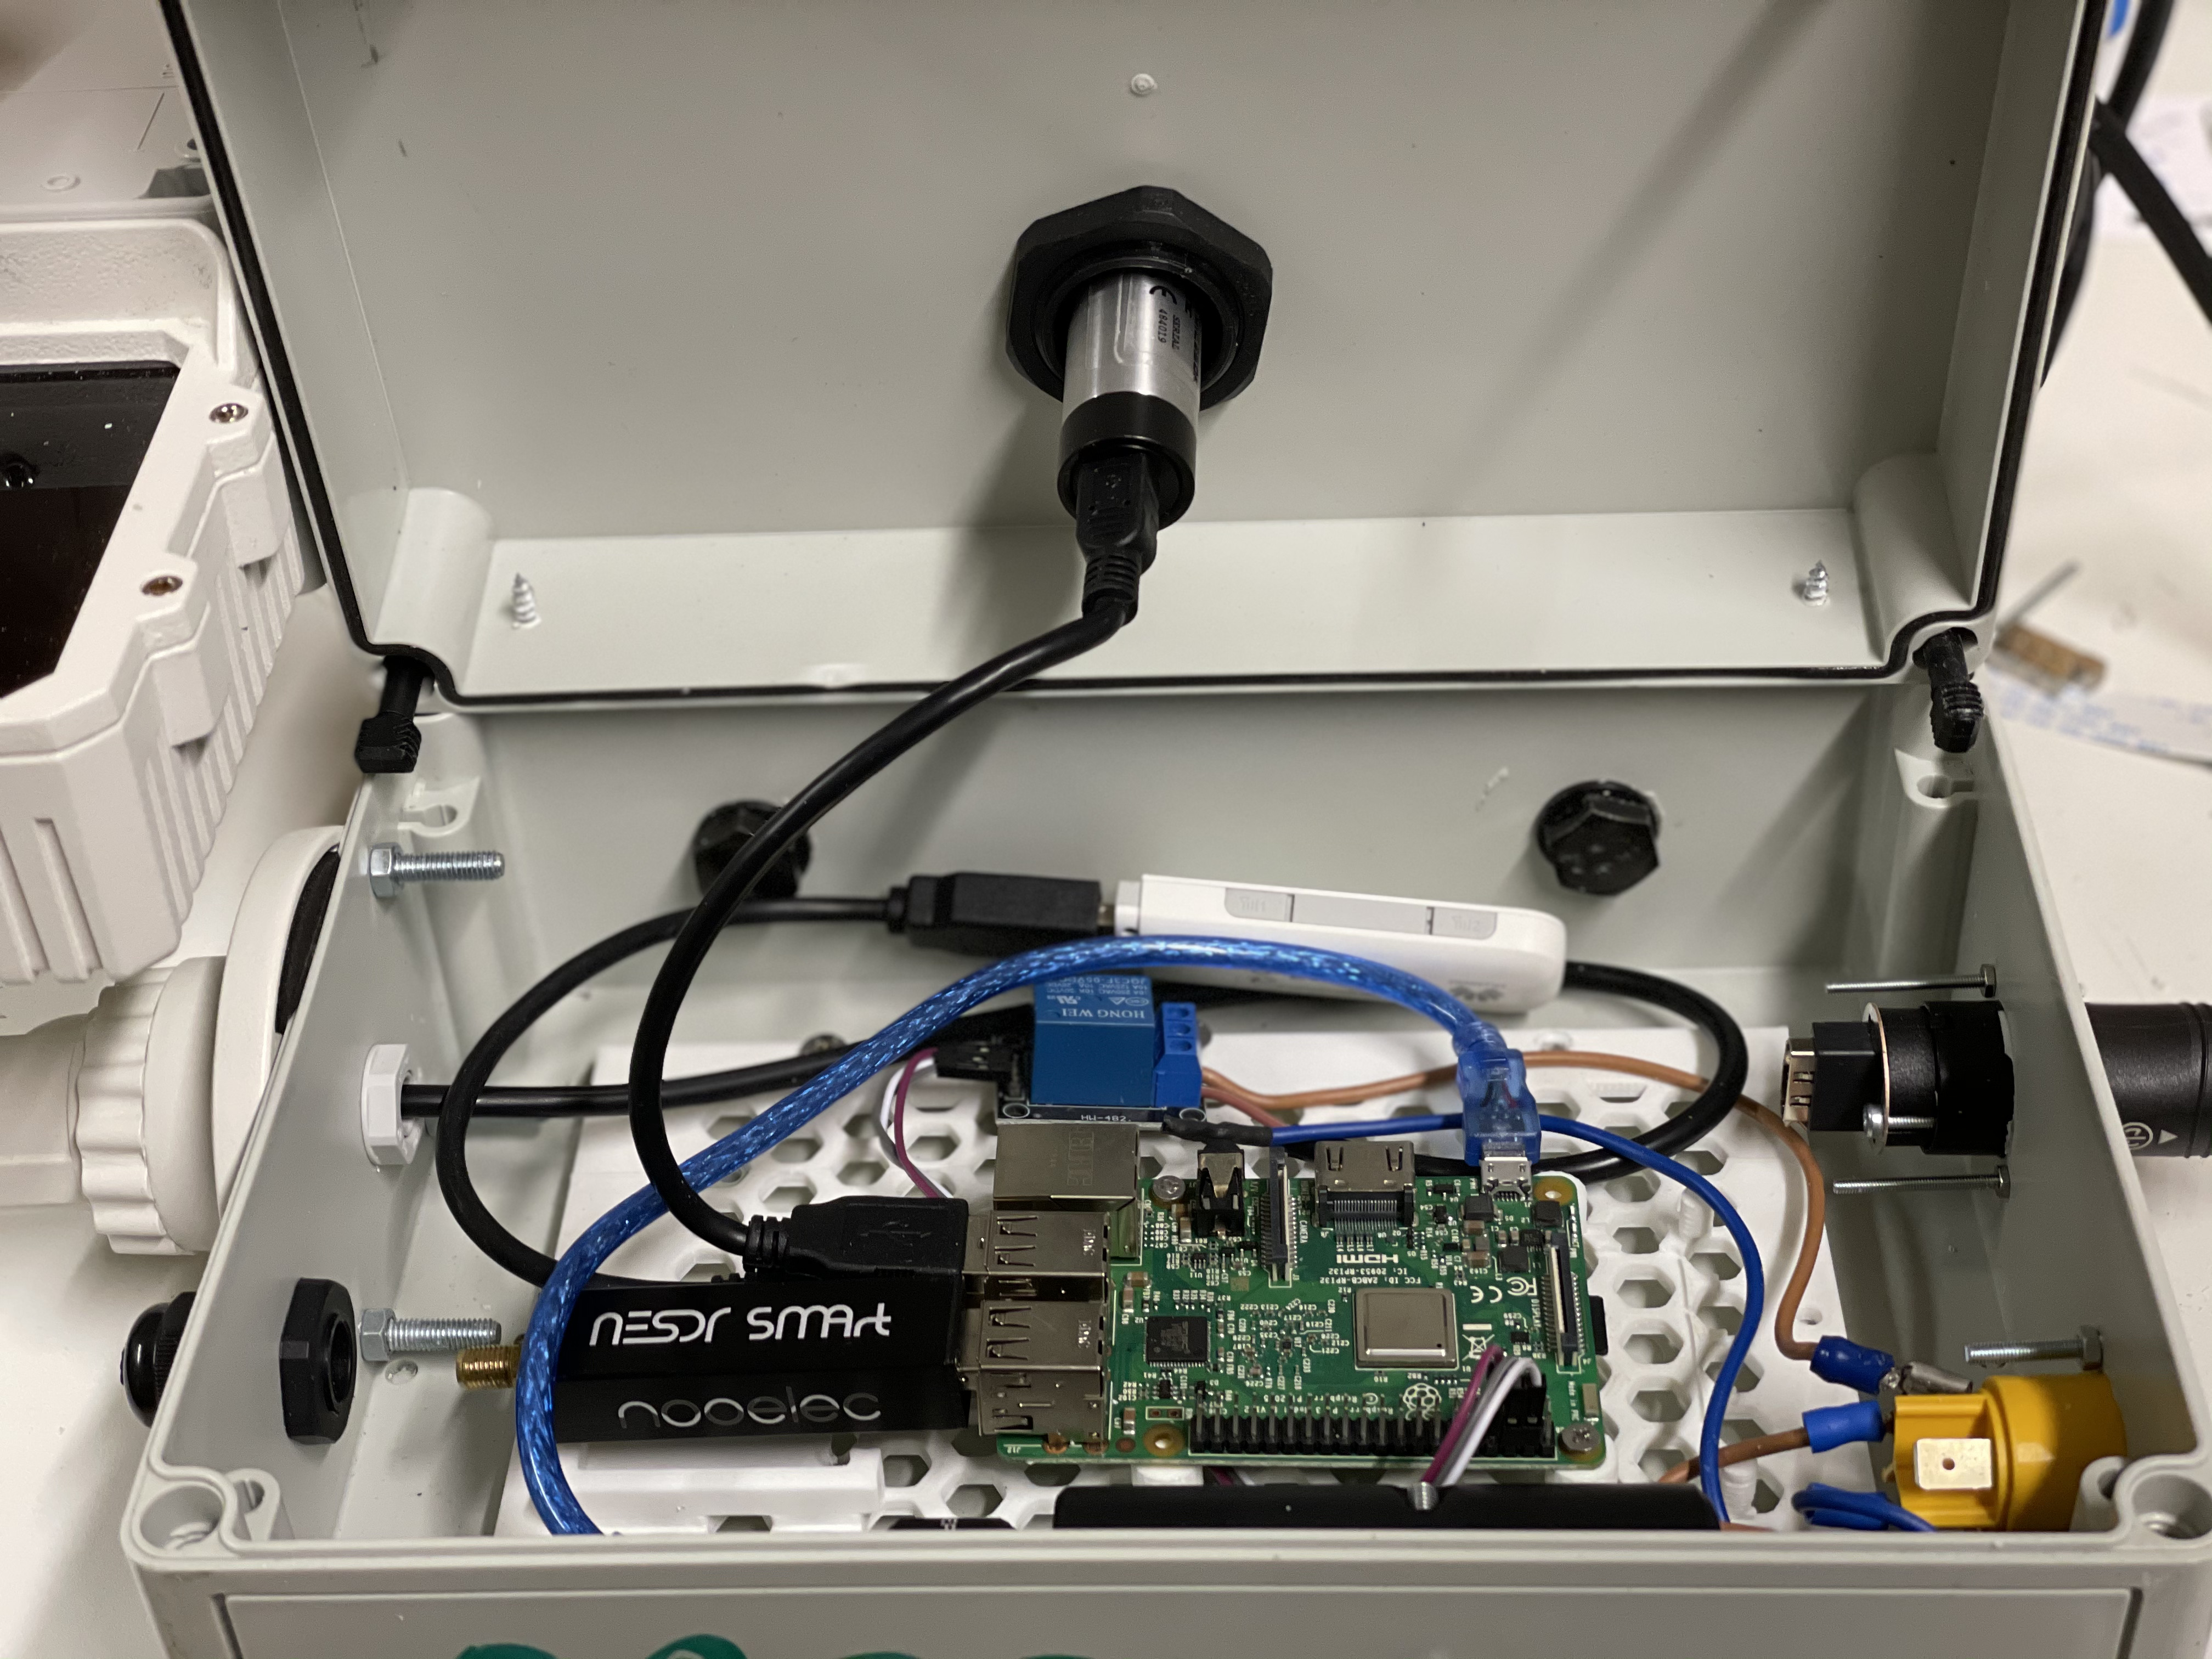
The construction of the interior can now be continued with the cabling. For this, power must be drawn from the outside to the 12V distribution and at the same time made available to the IR spotlight via the relay.
In addition, the relay is connected to the Pi, the concrete wiring can be read in the following picture.
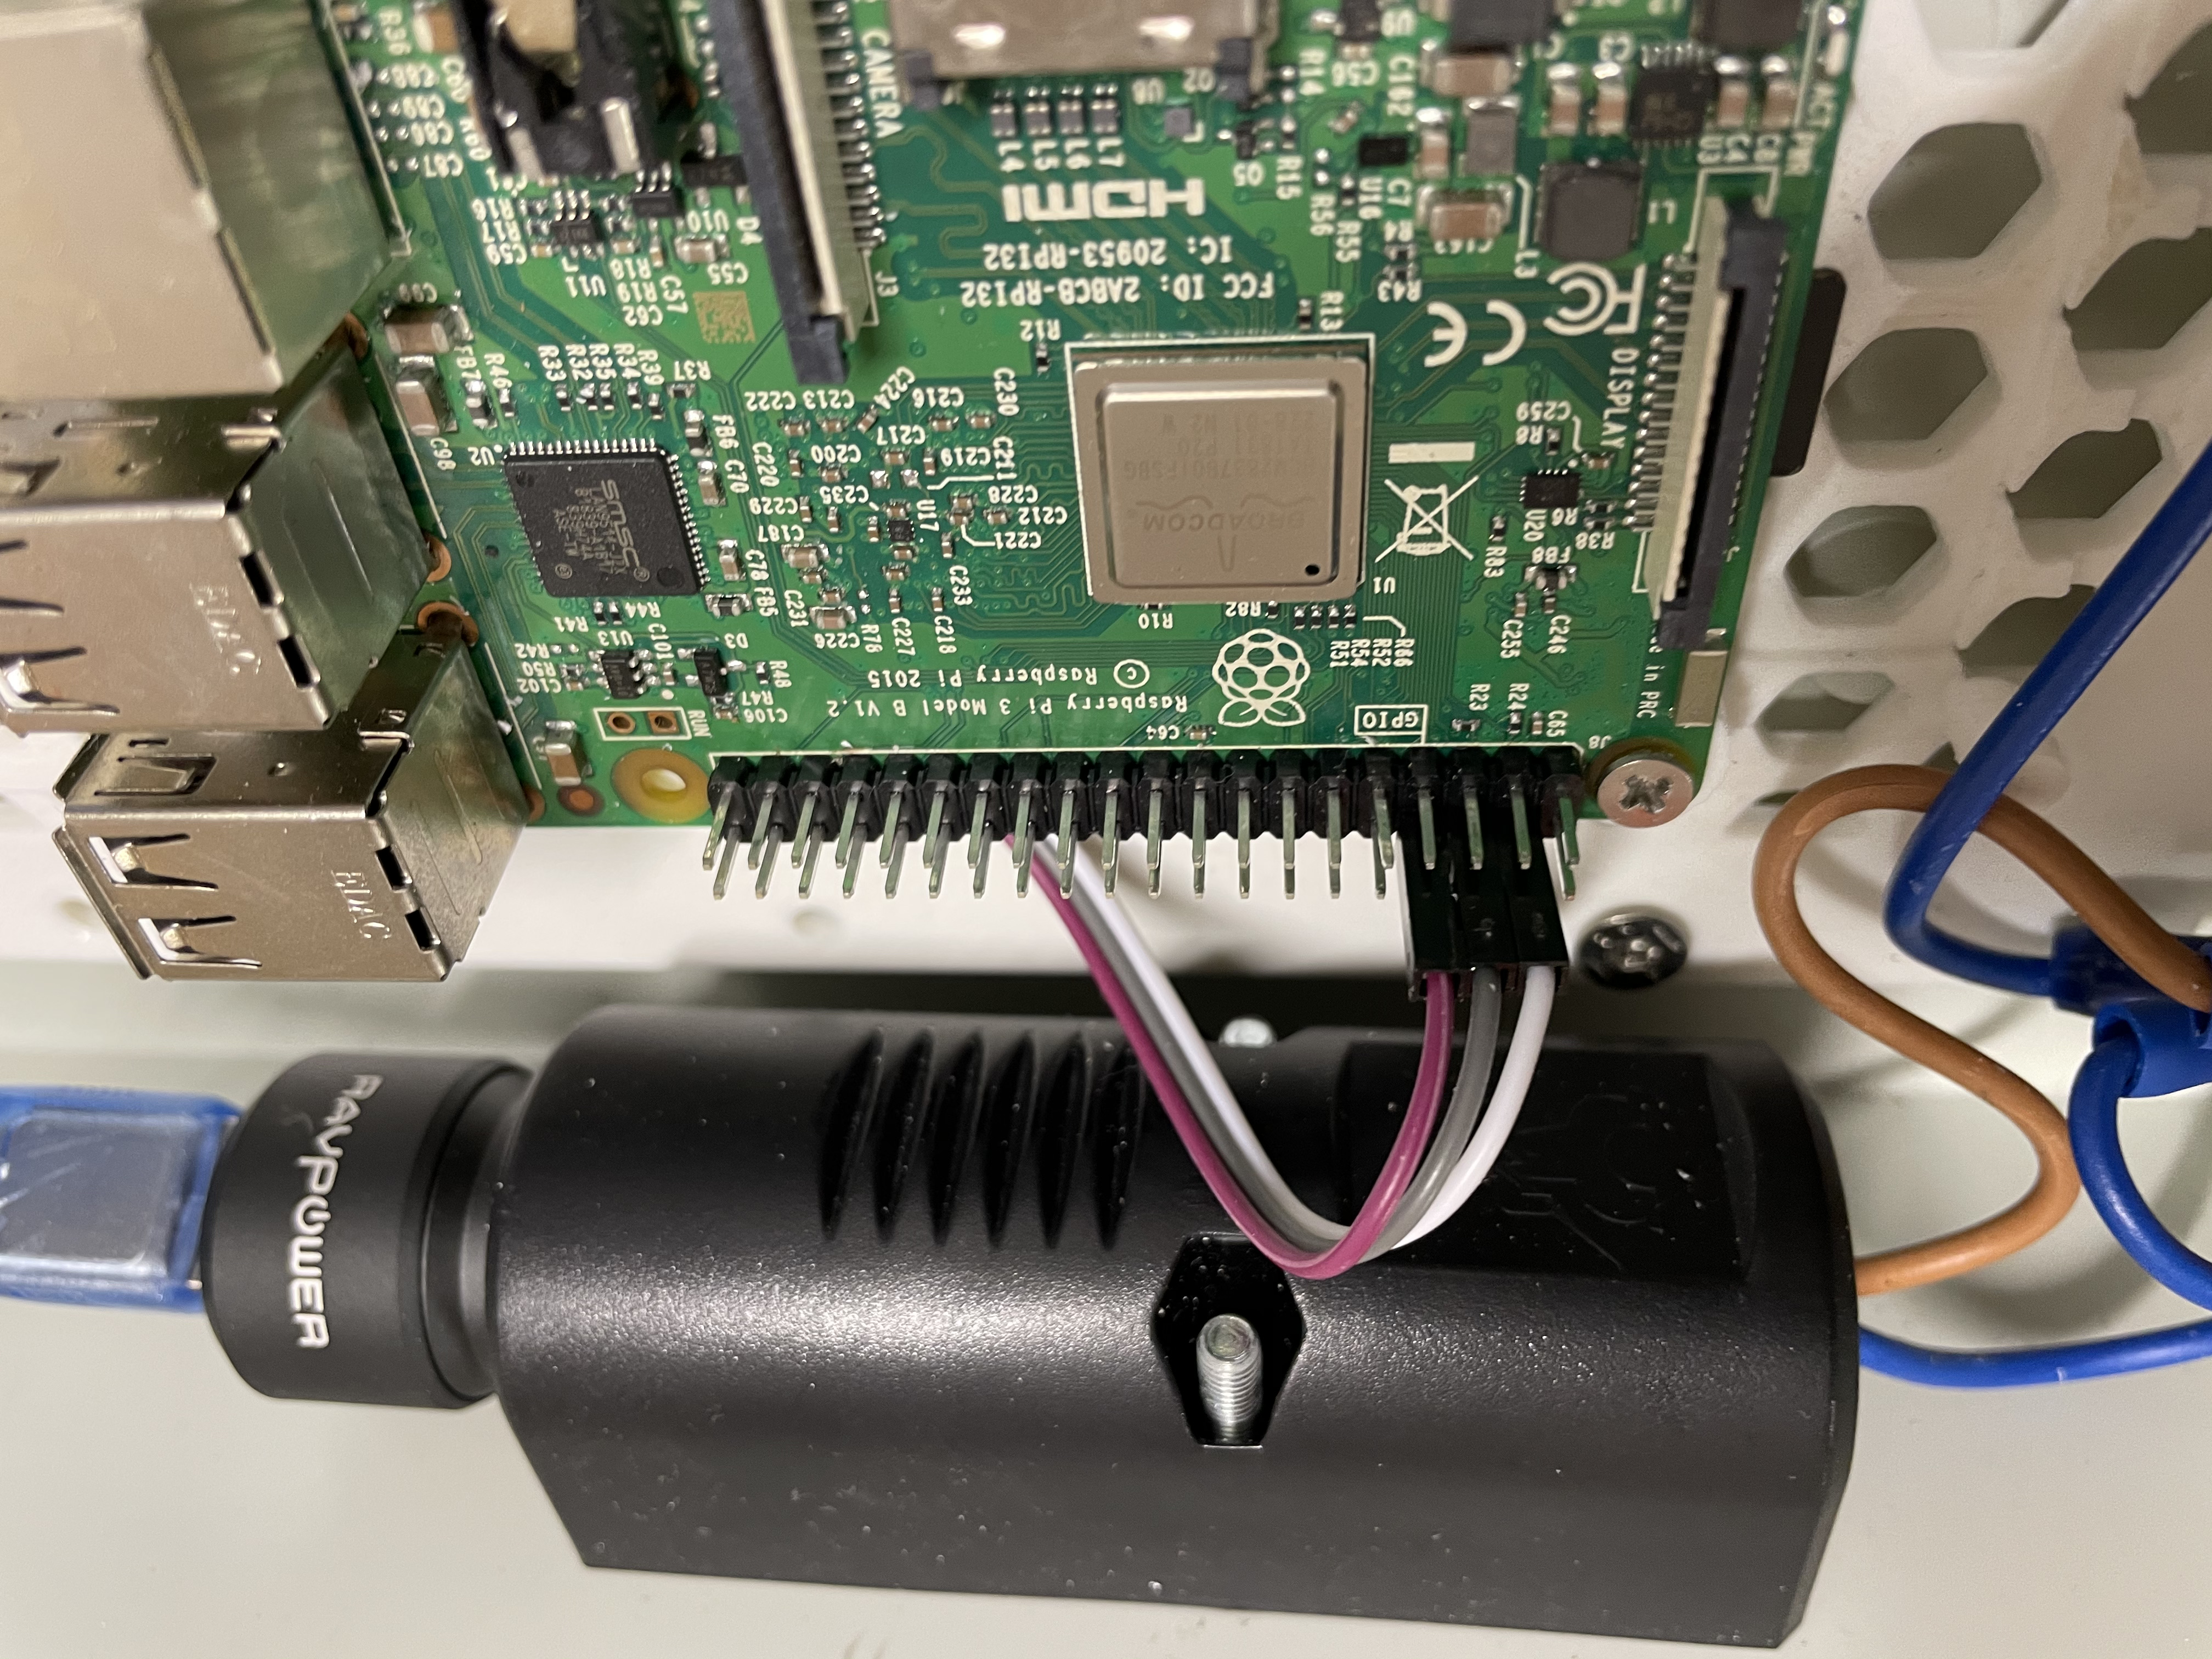
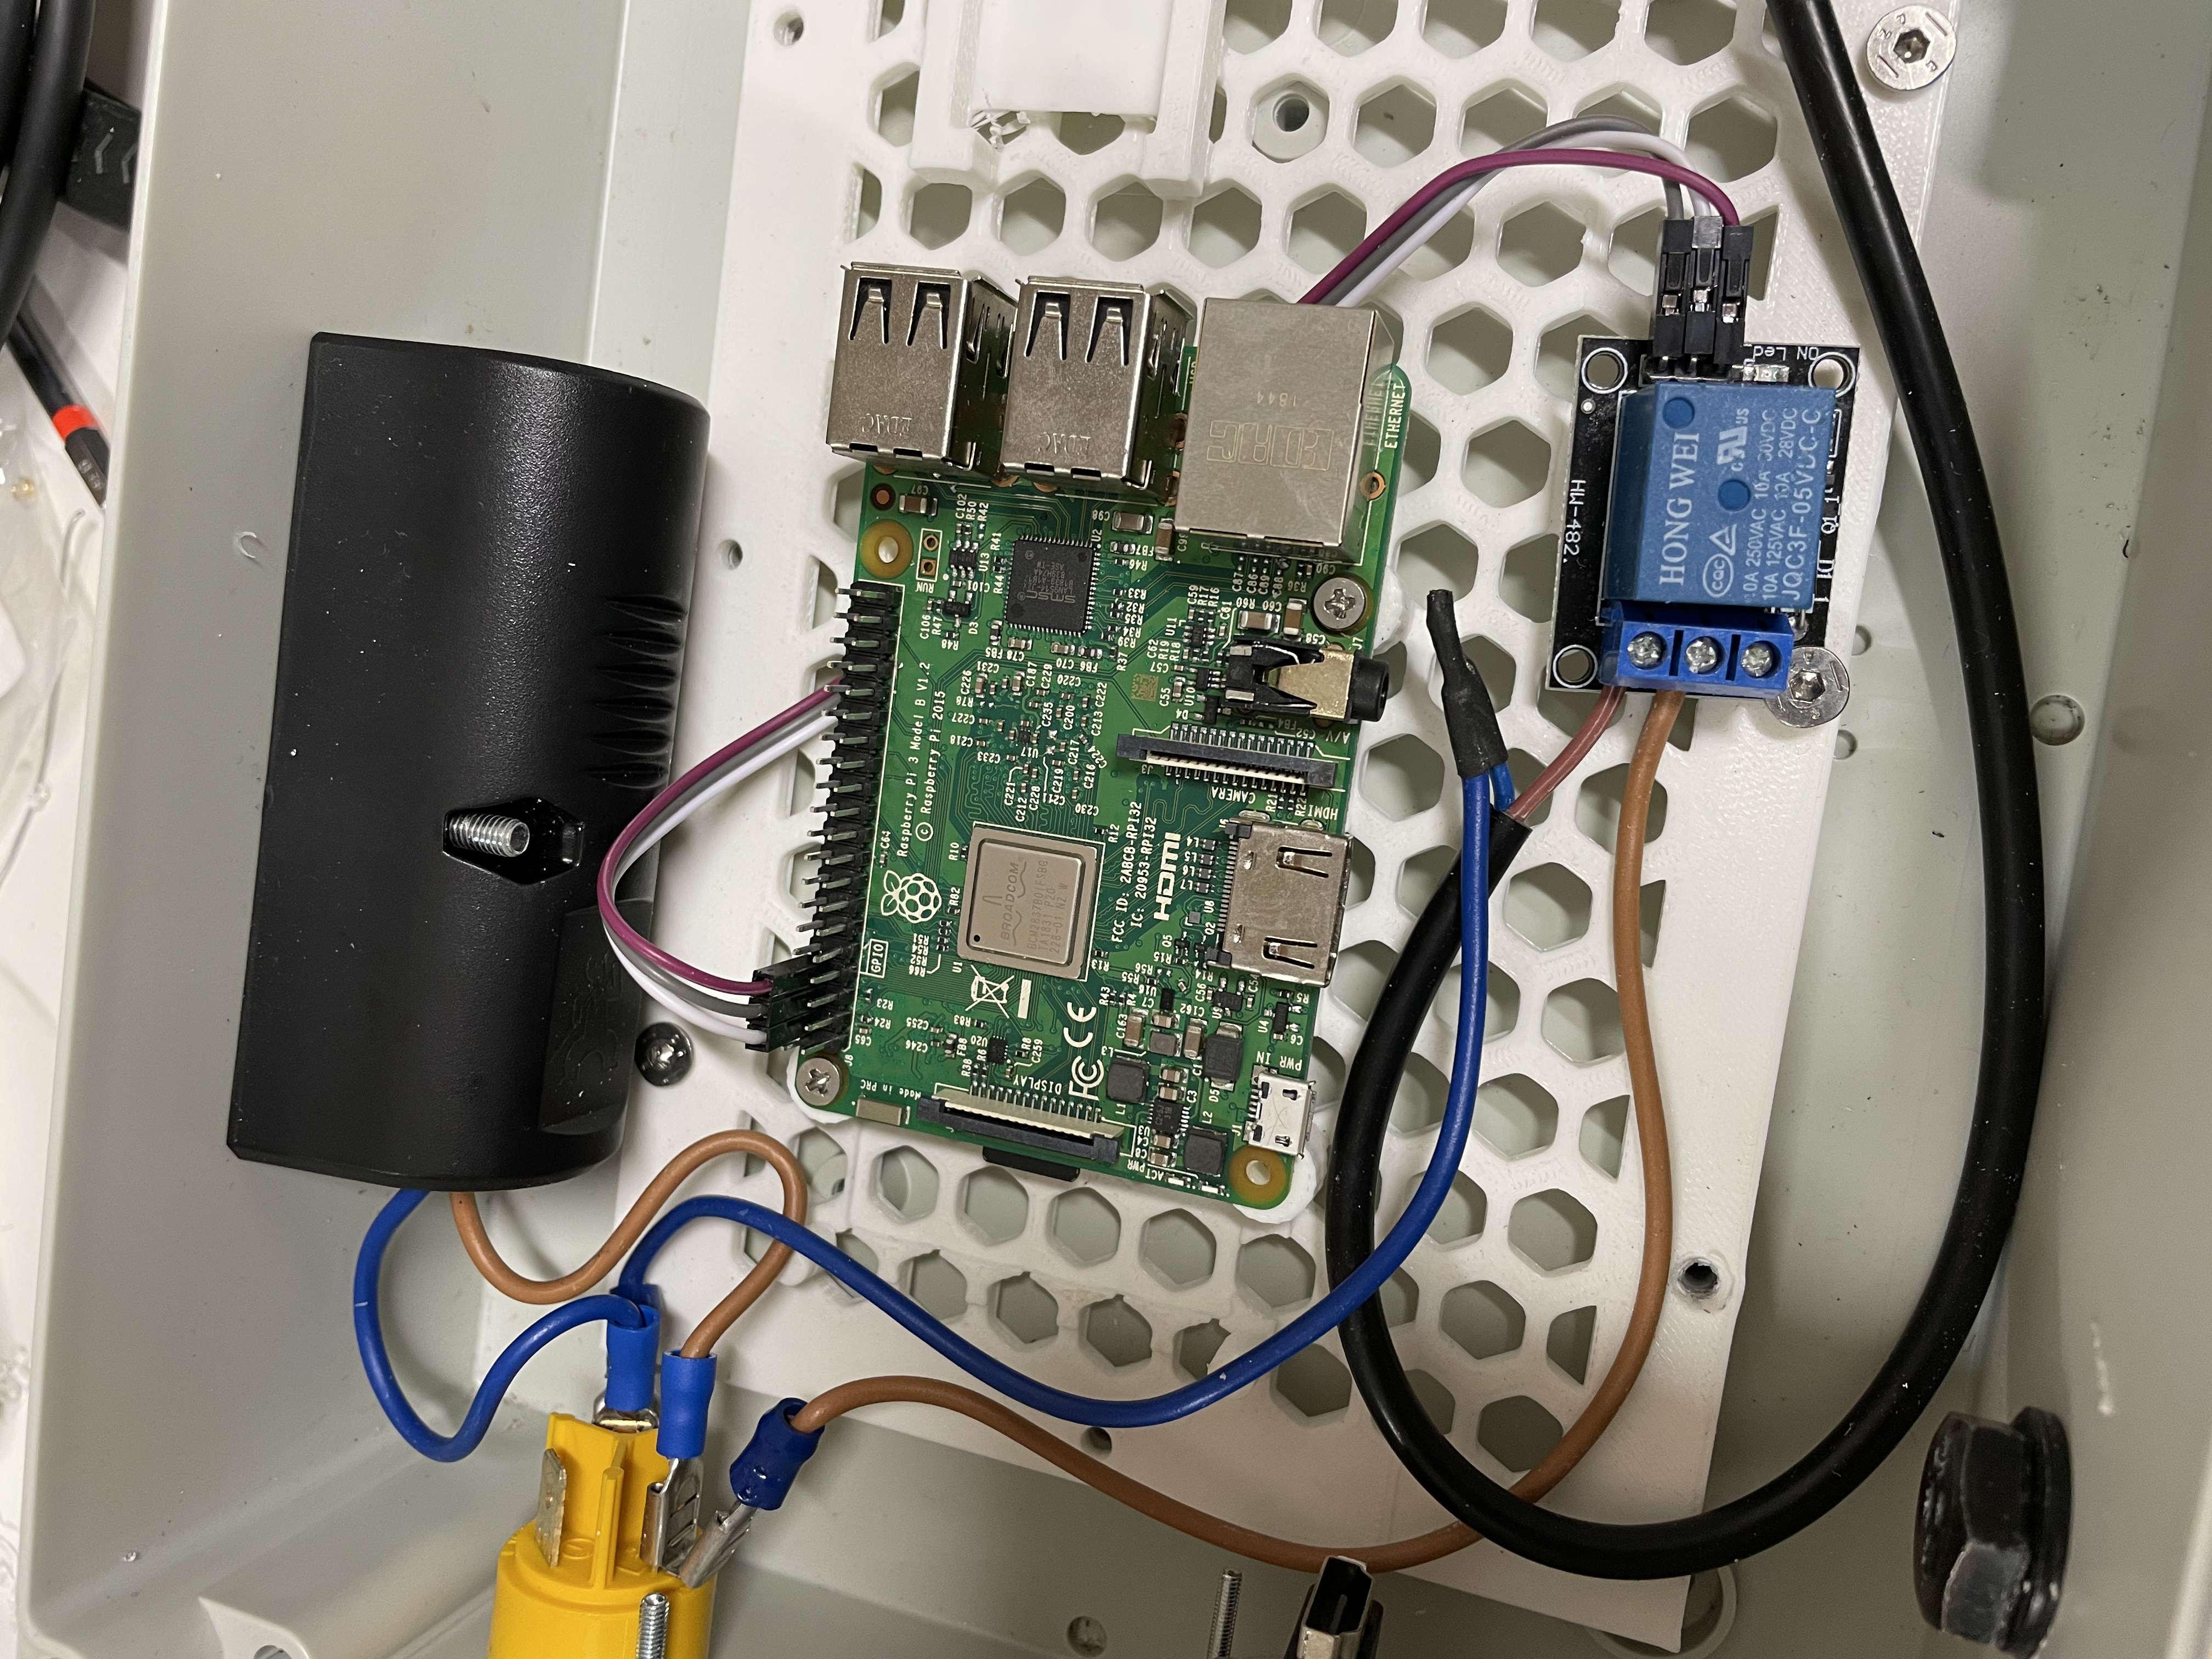
Now the 12V to 5V adaption can be installed and the connection of the Pi can be done.
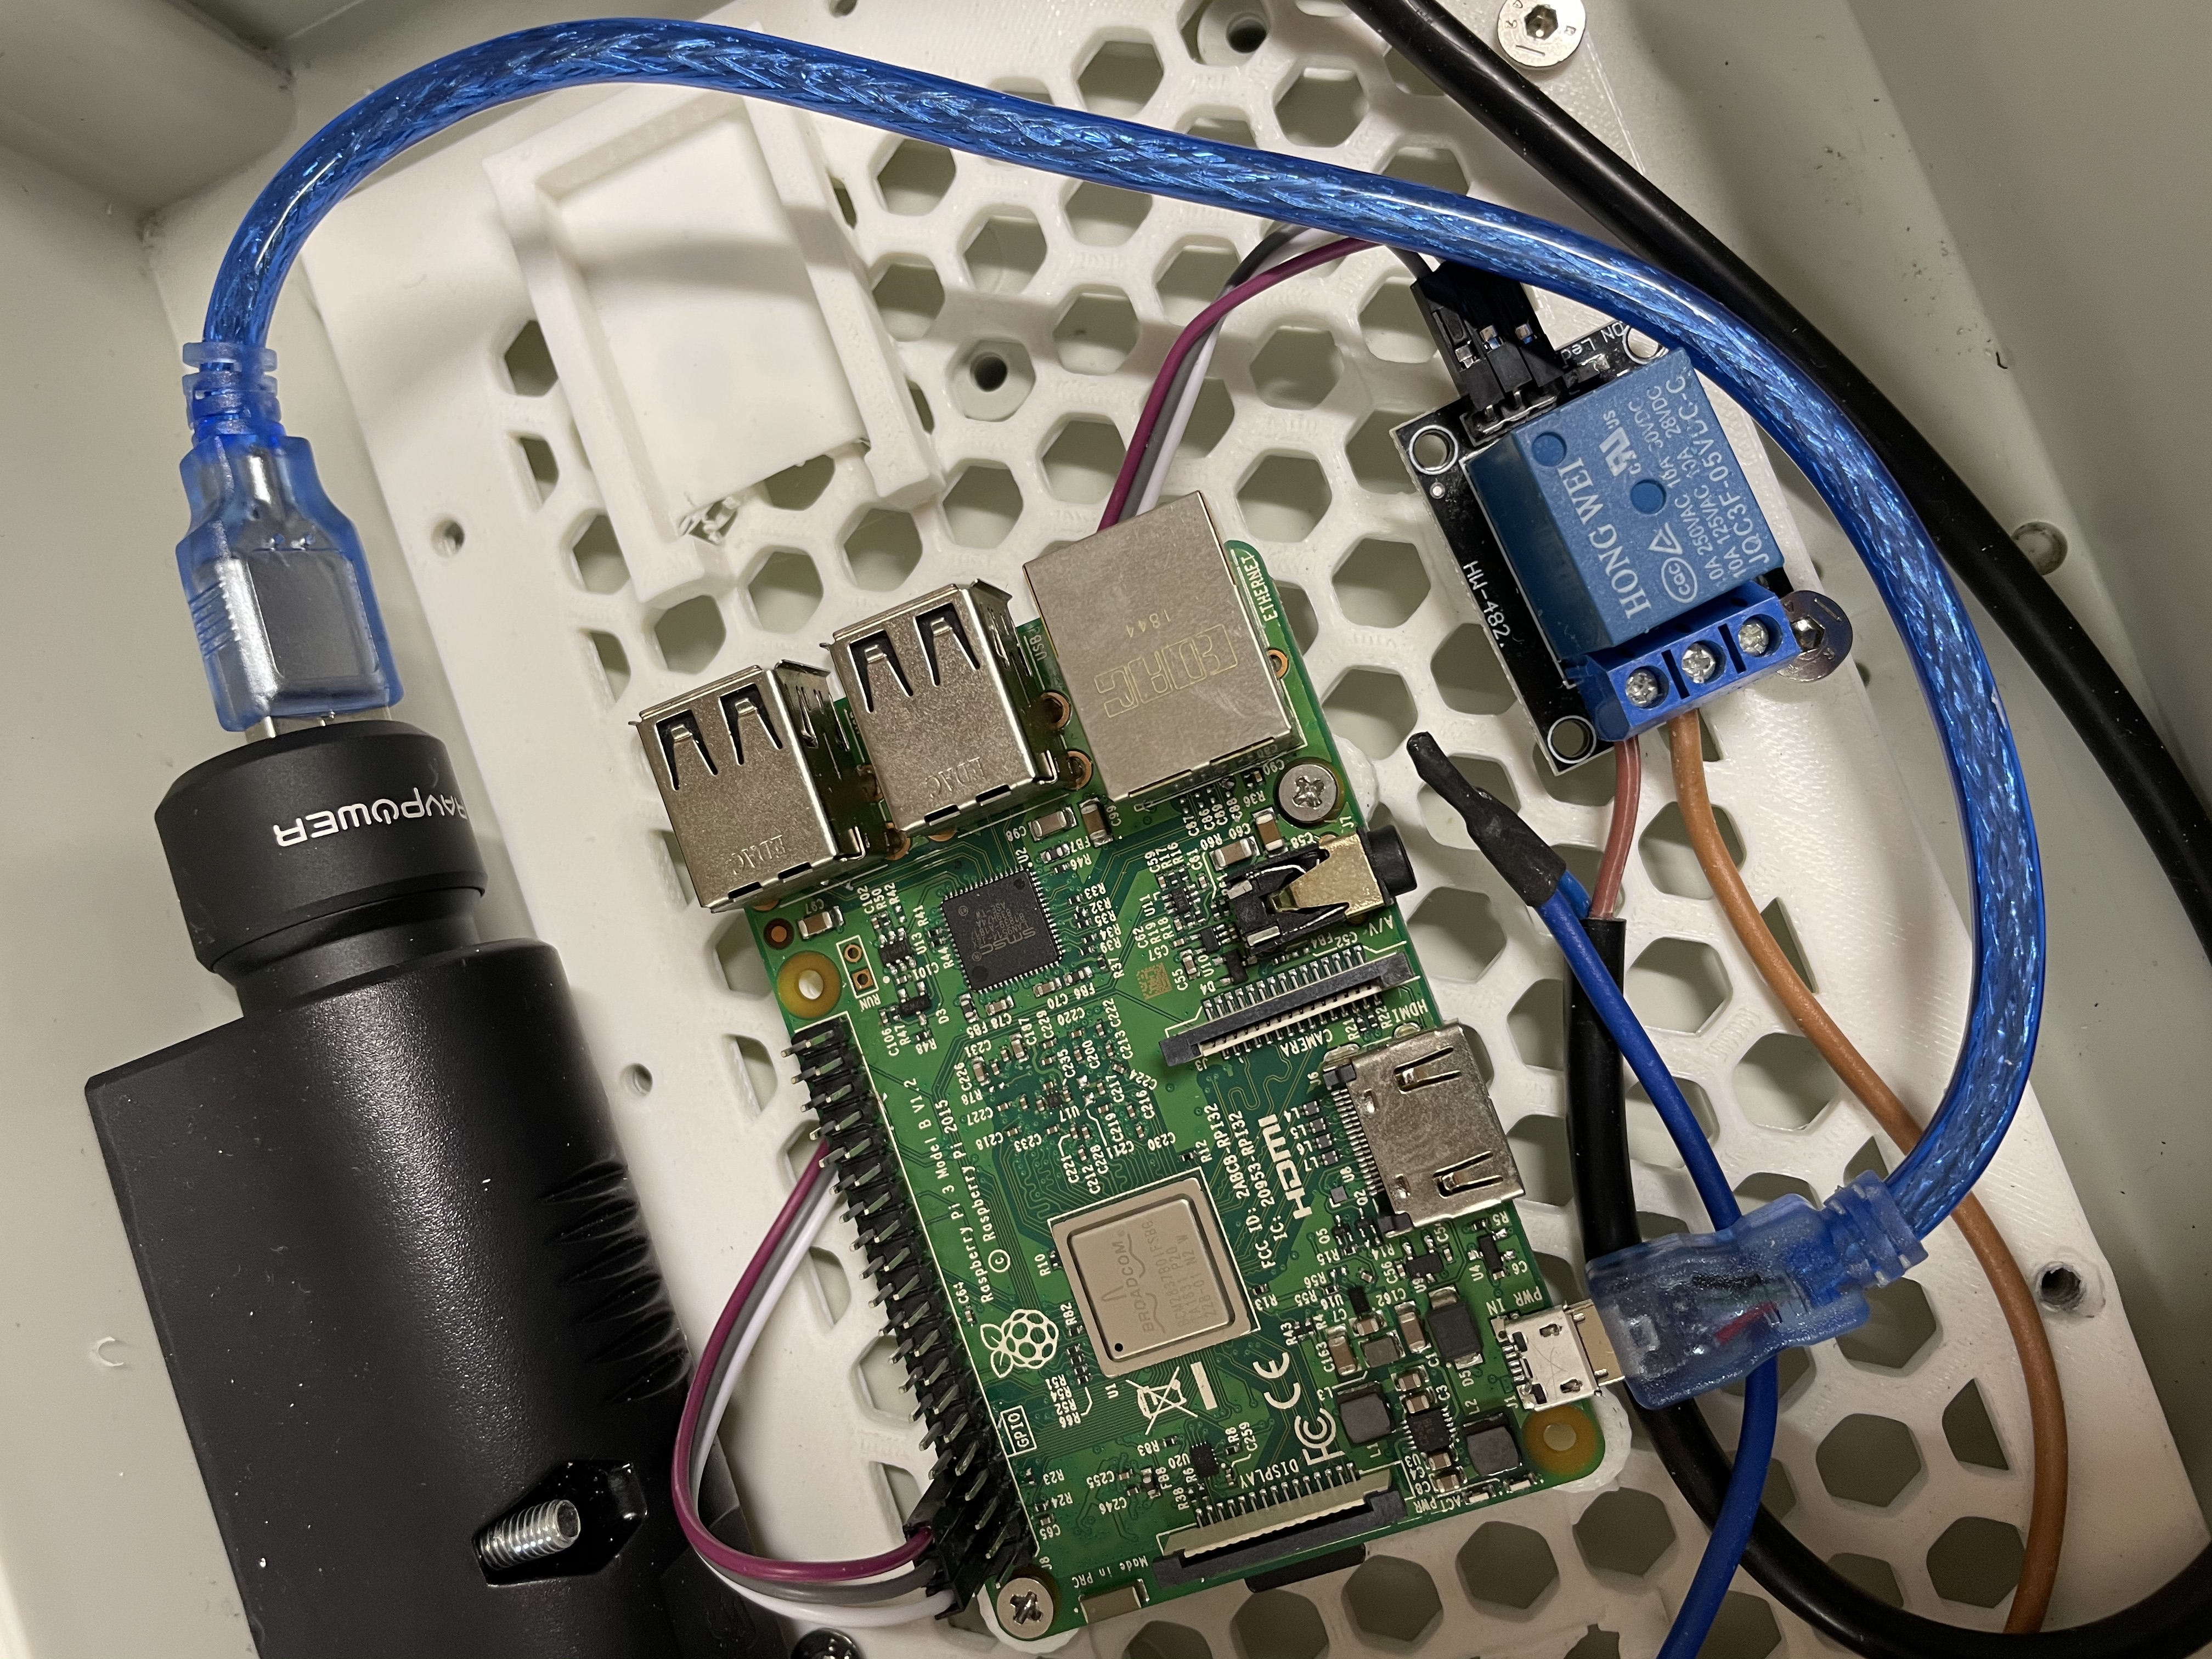
Finally SDR stick, LTE stick and the ultrasonic microphone are connected via USB.
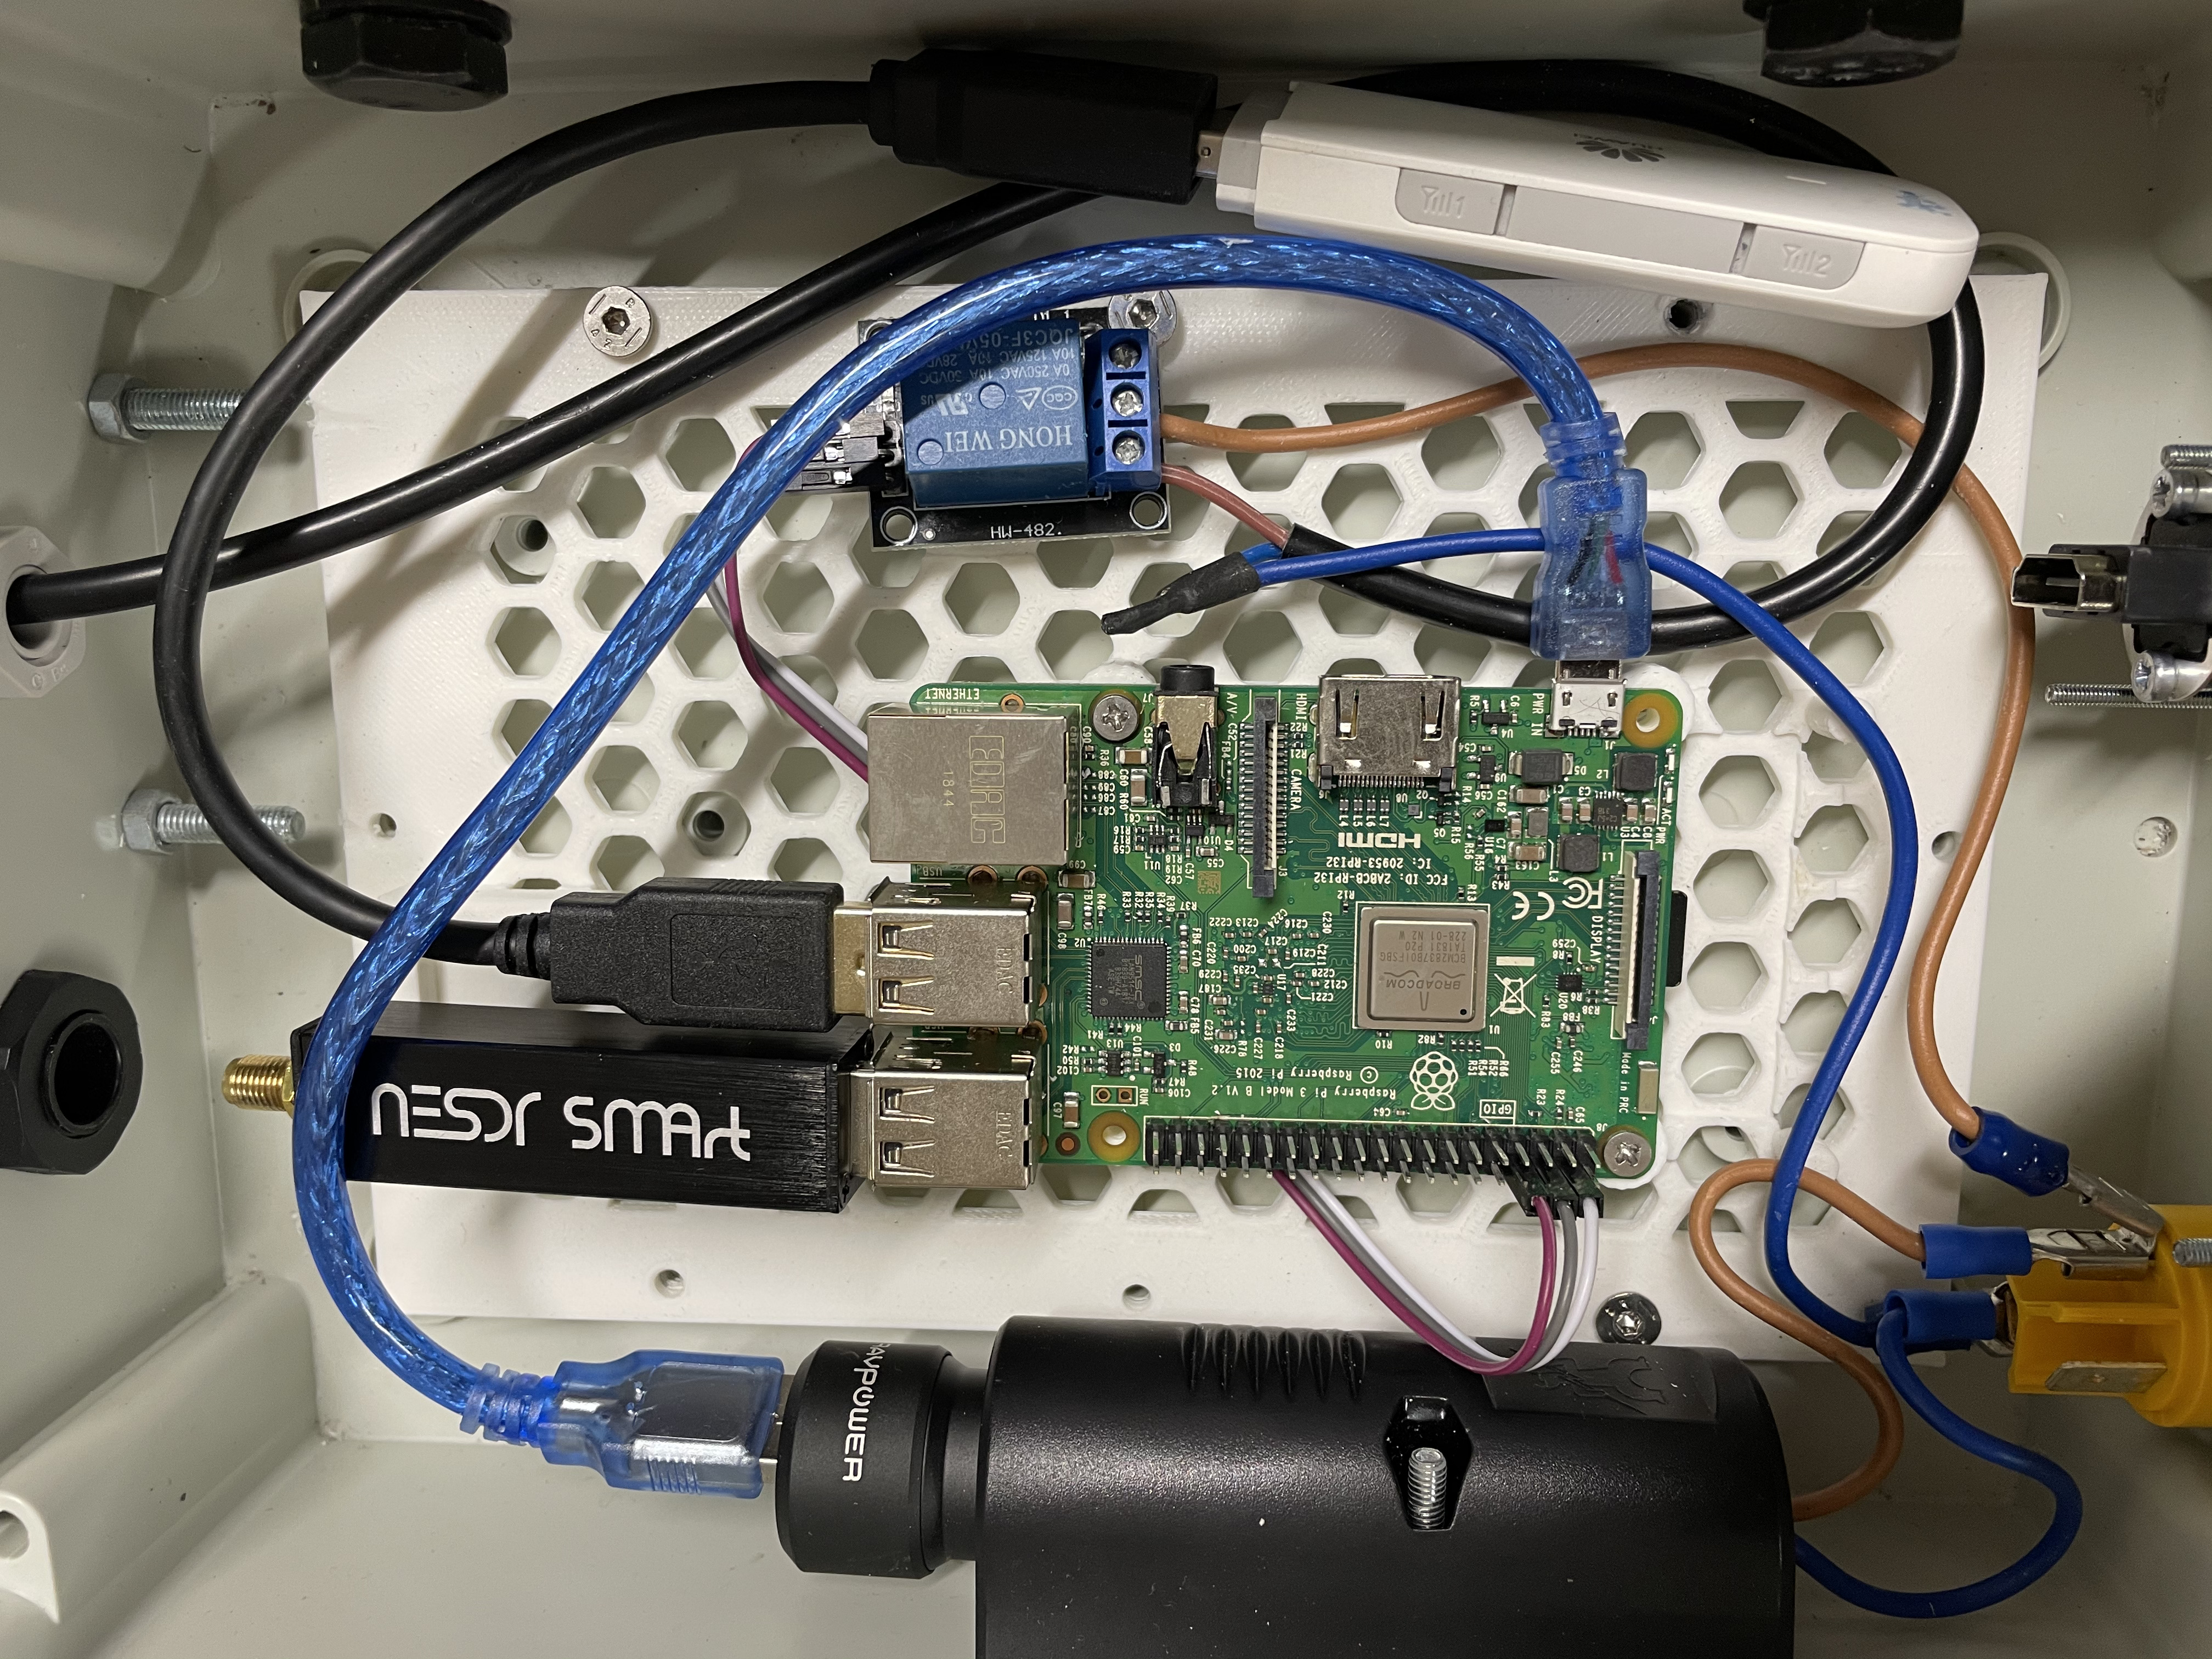
The whole setup of the main box can be seen in the following picture.
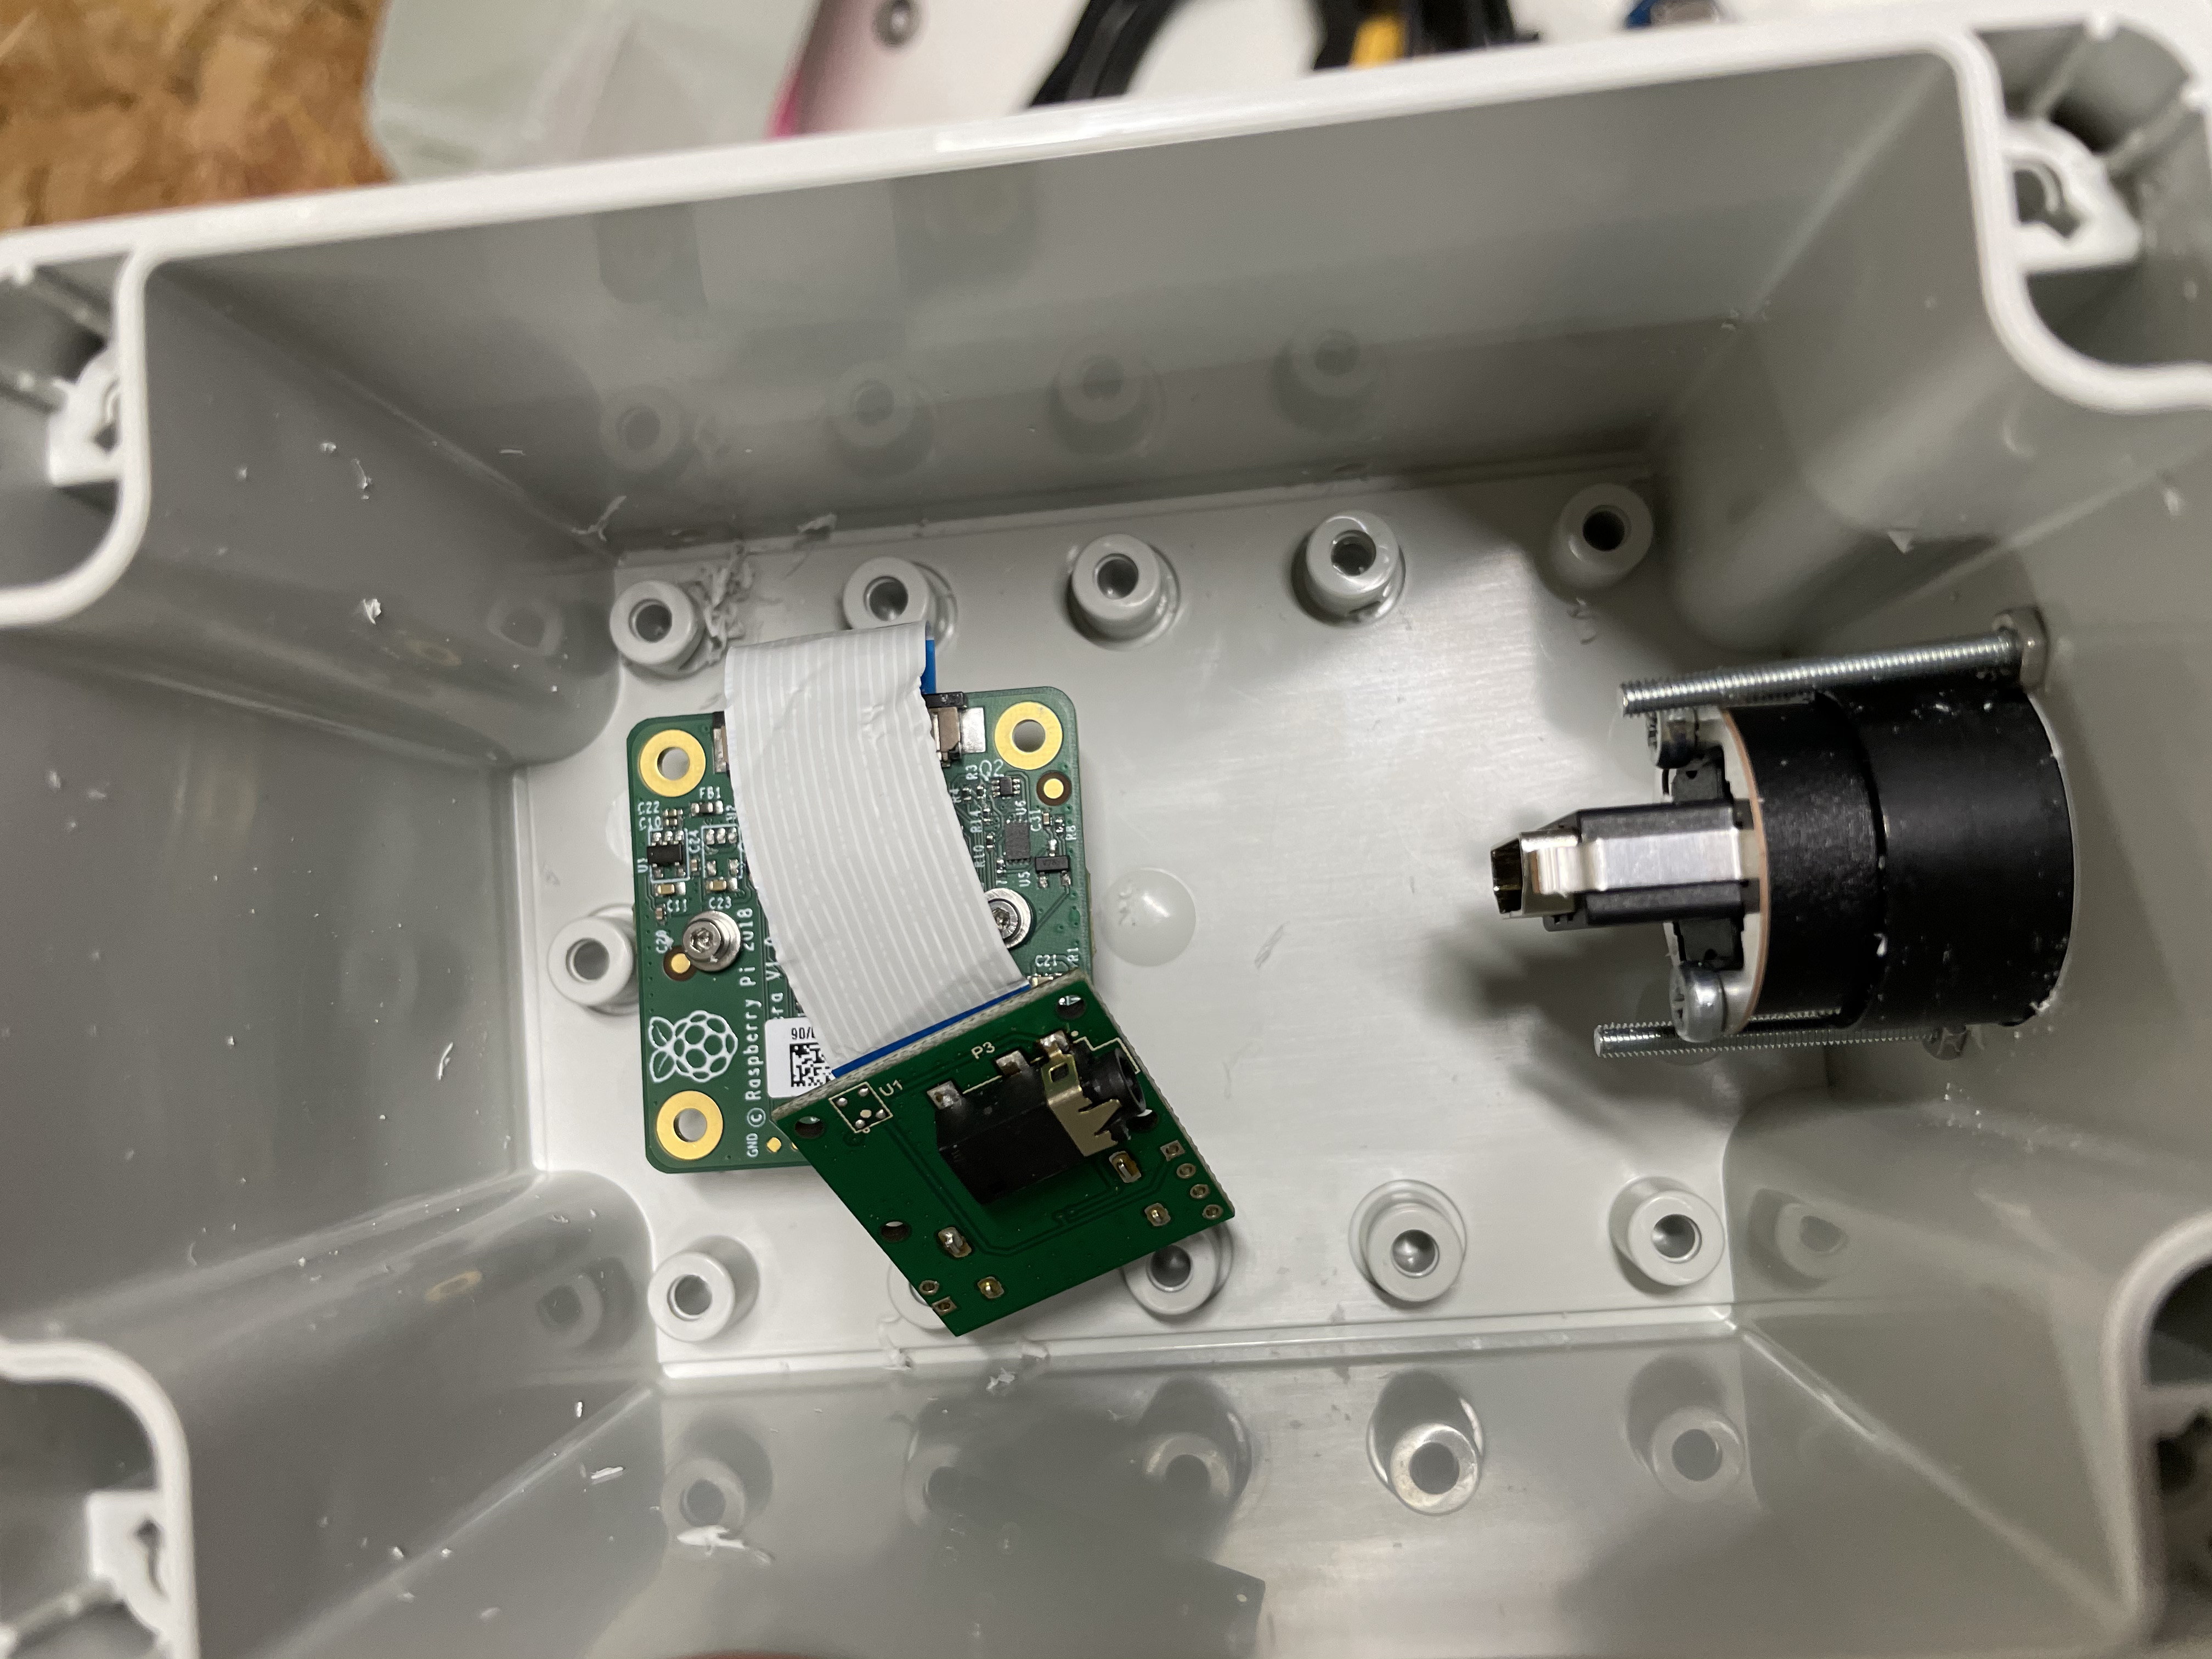
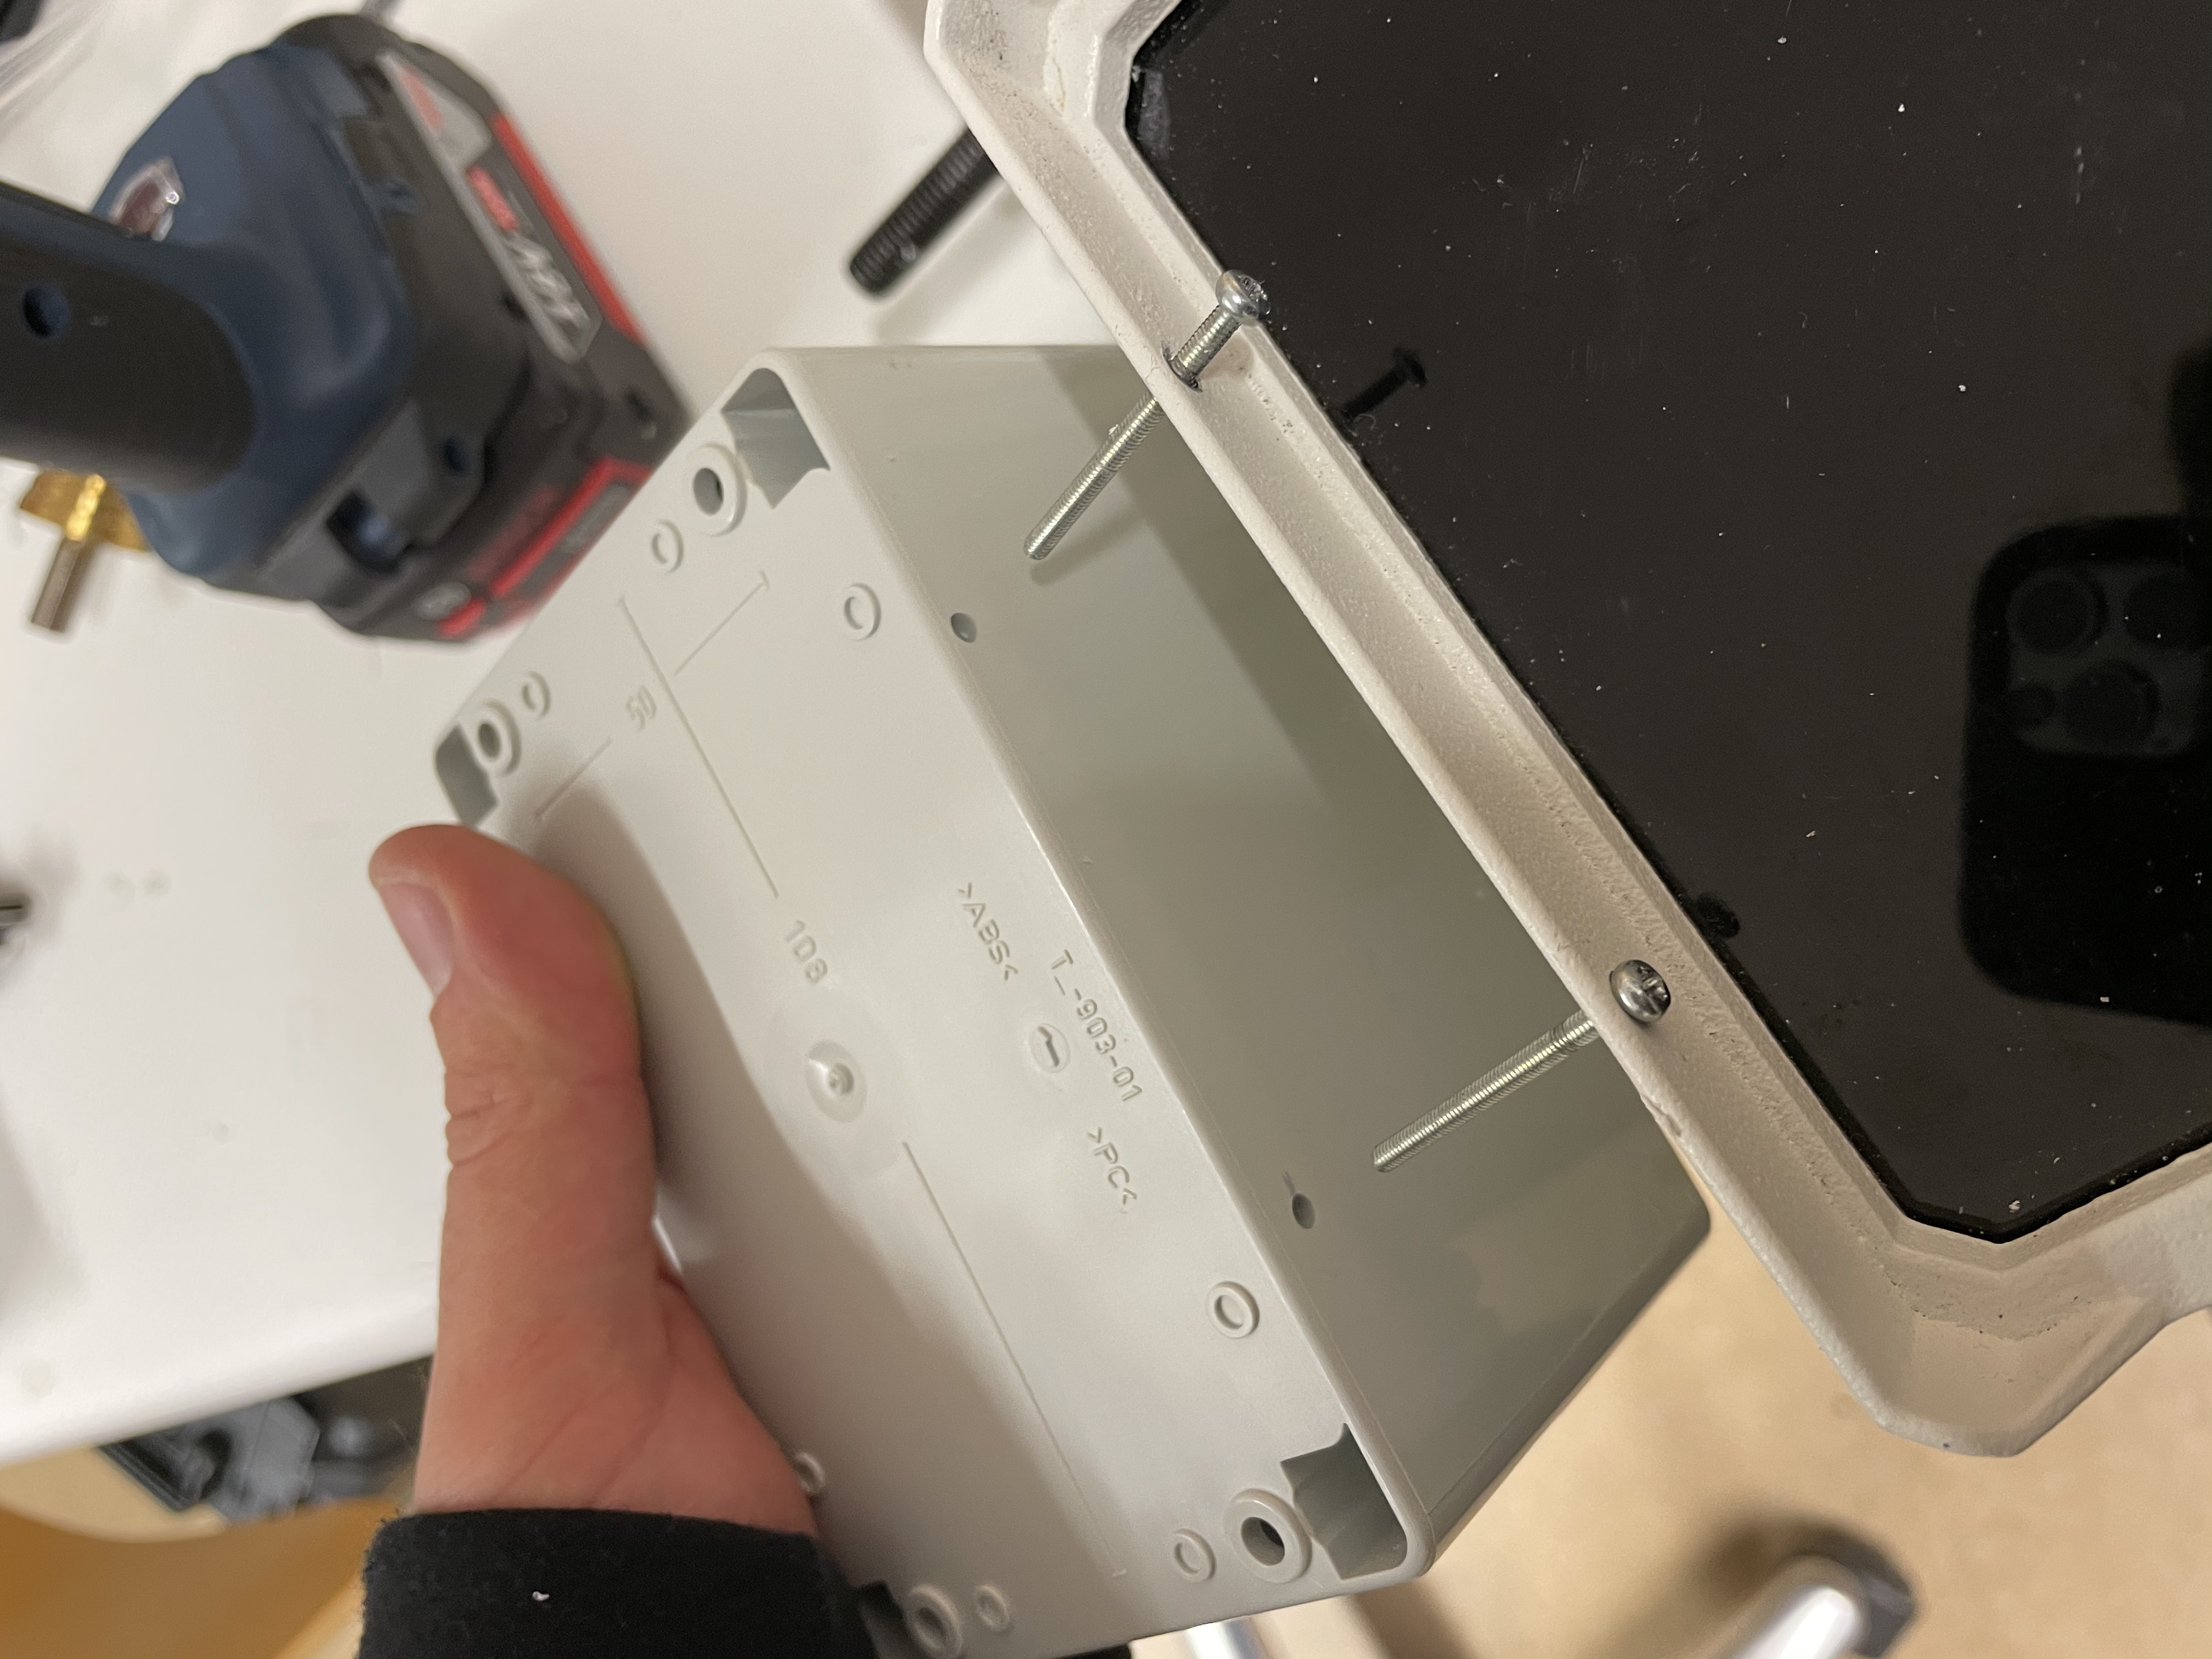
Step 2 - Camera case:
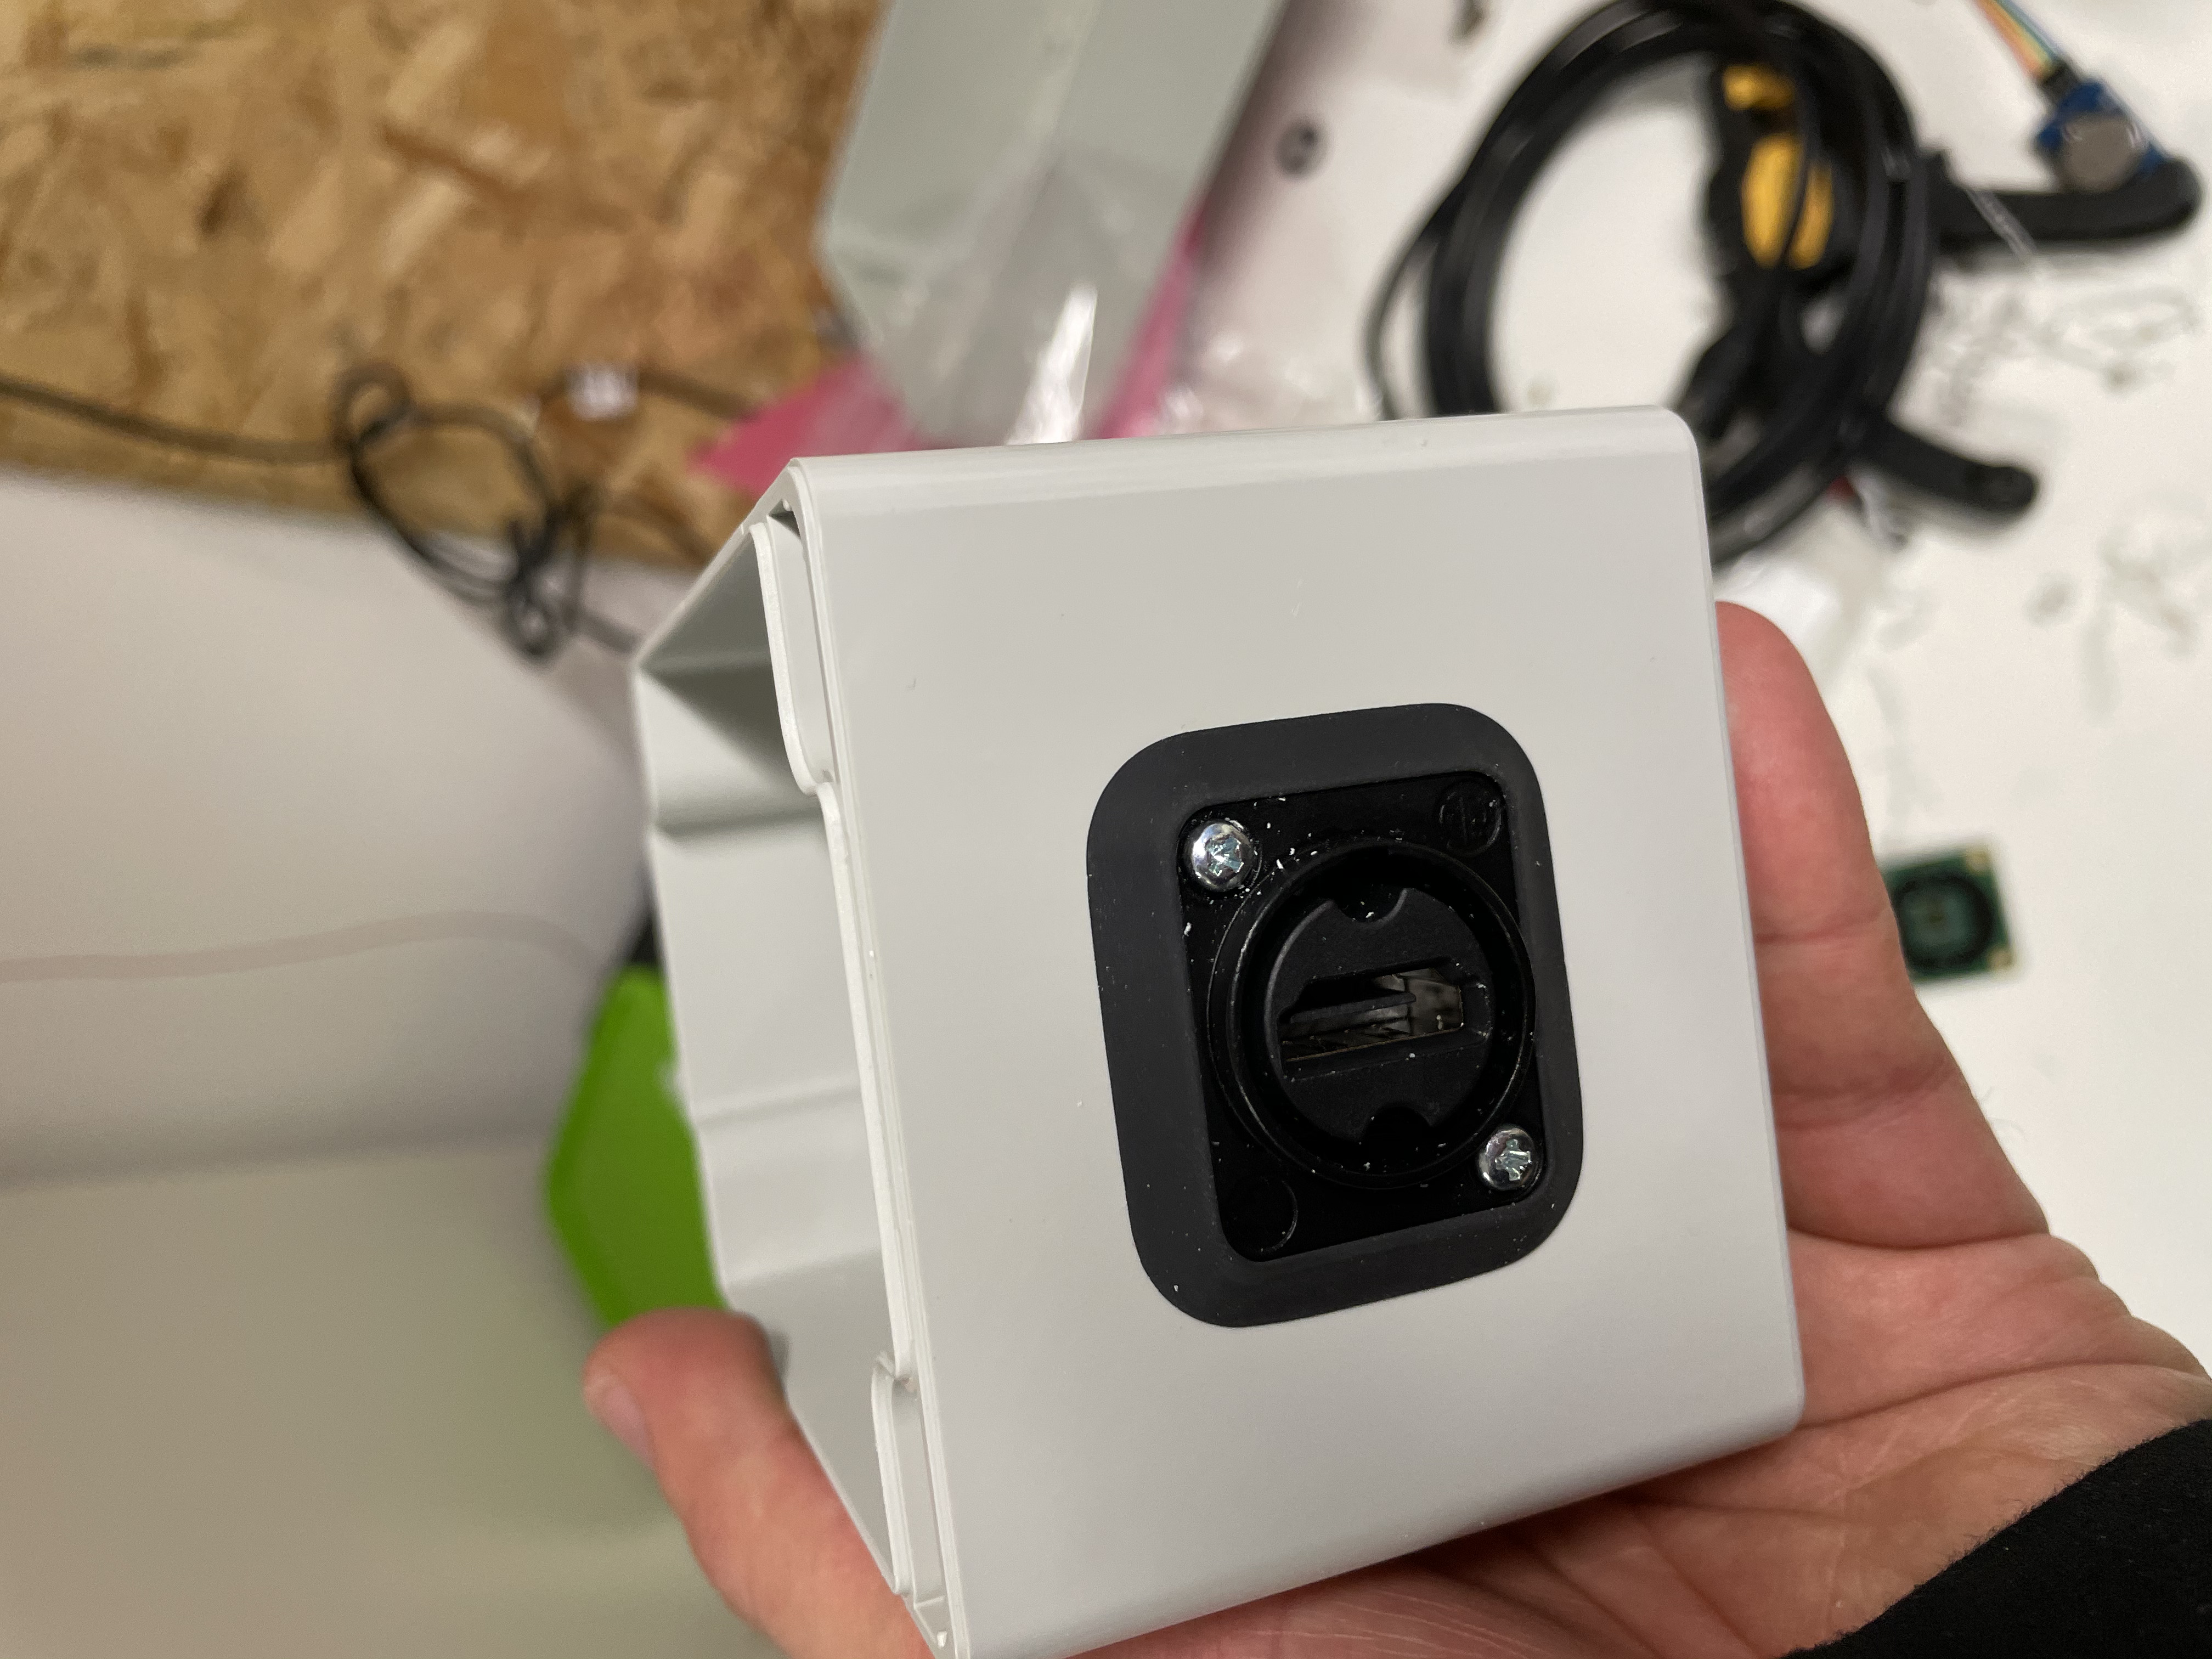
The first thing to do is to drill the holes for the camera, the HDMI feed-through and the attachment to the ir headlight. Then the camera can be inserted and screwed to the housing.
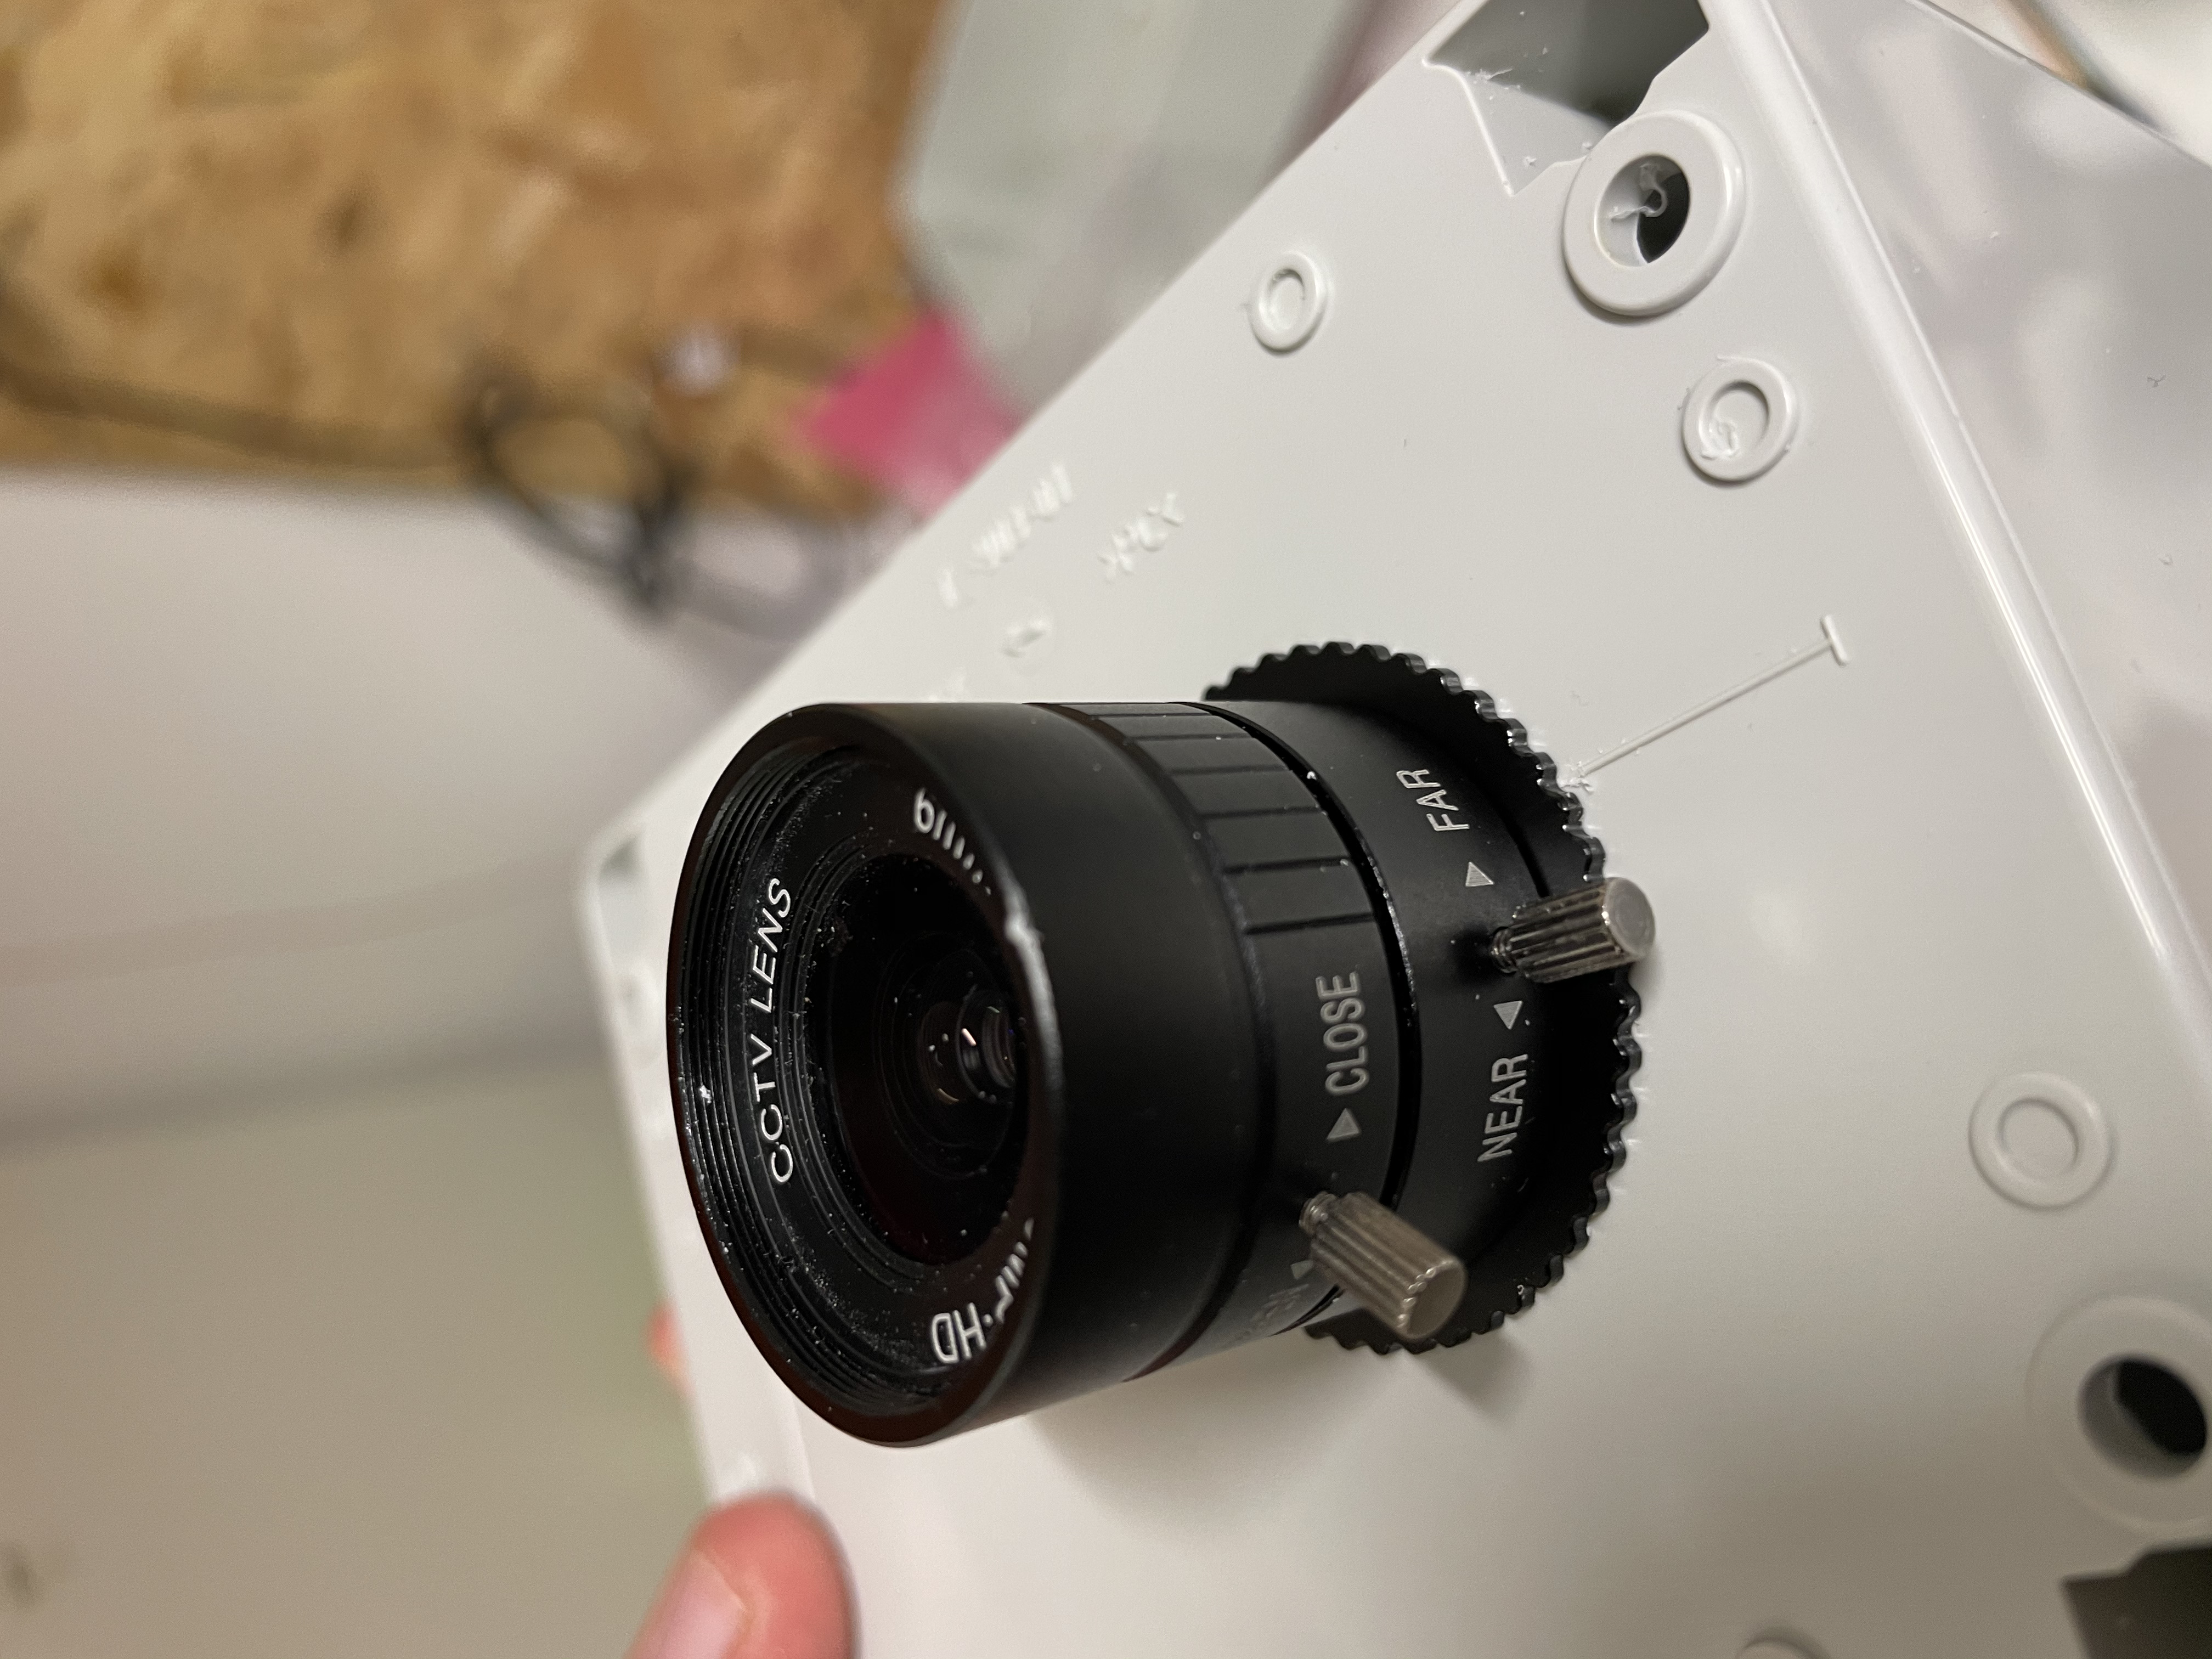
When this is done, the feed-through for the HDMI signal should be attached.
The inside of the box now looks like this.
The camera should be shielded with a vhf fleece. Especially the high quality camera s produces vhf noise, if the NoIR camera is used this step can be skipped.
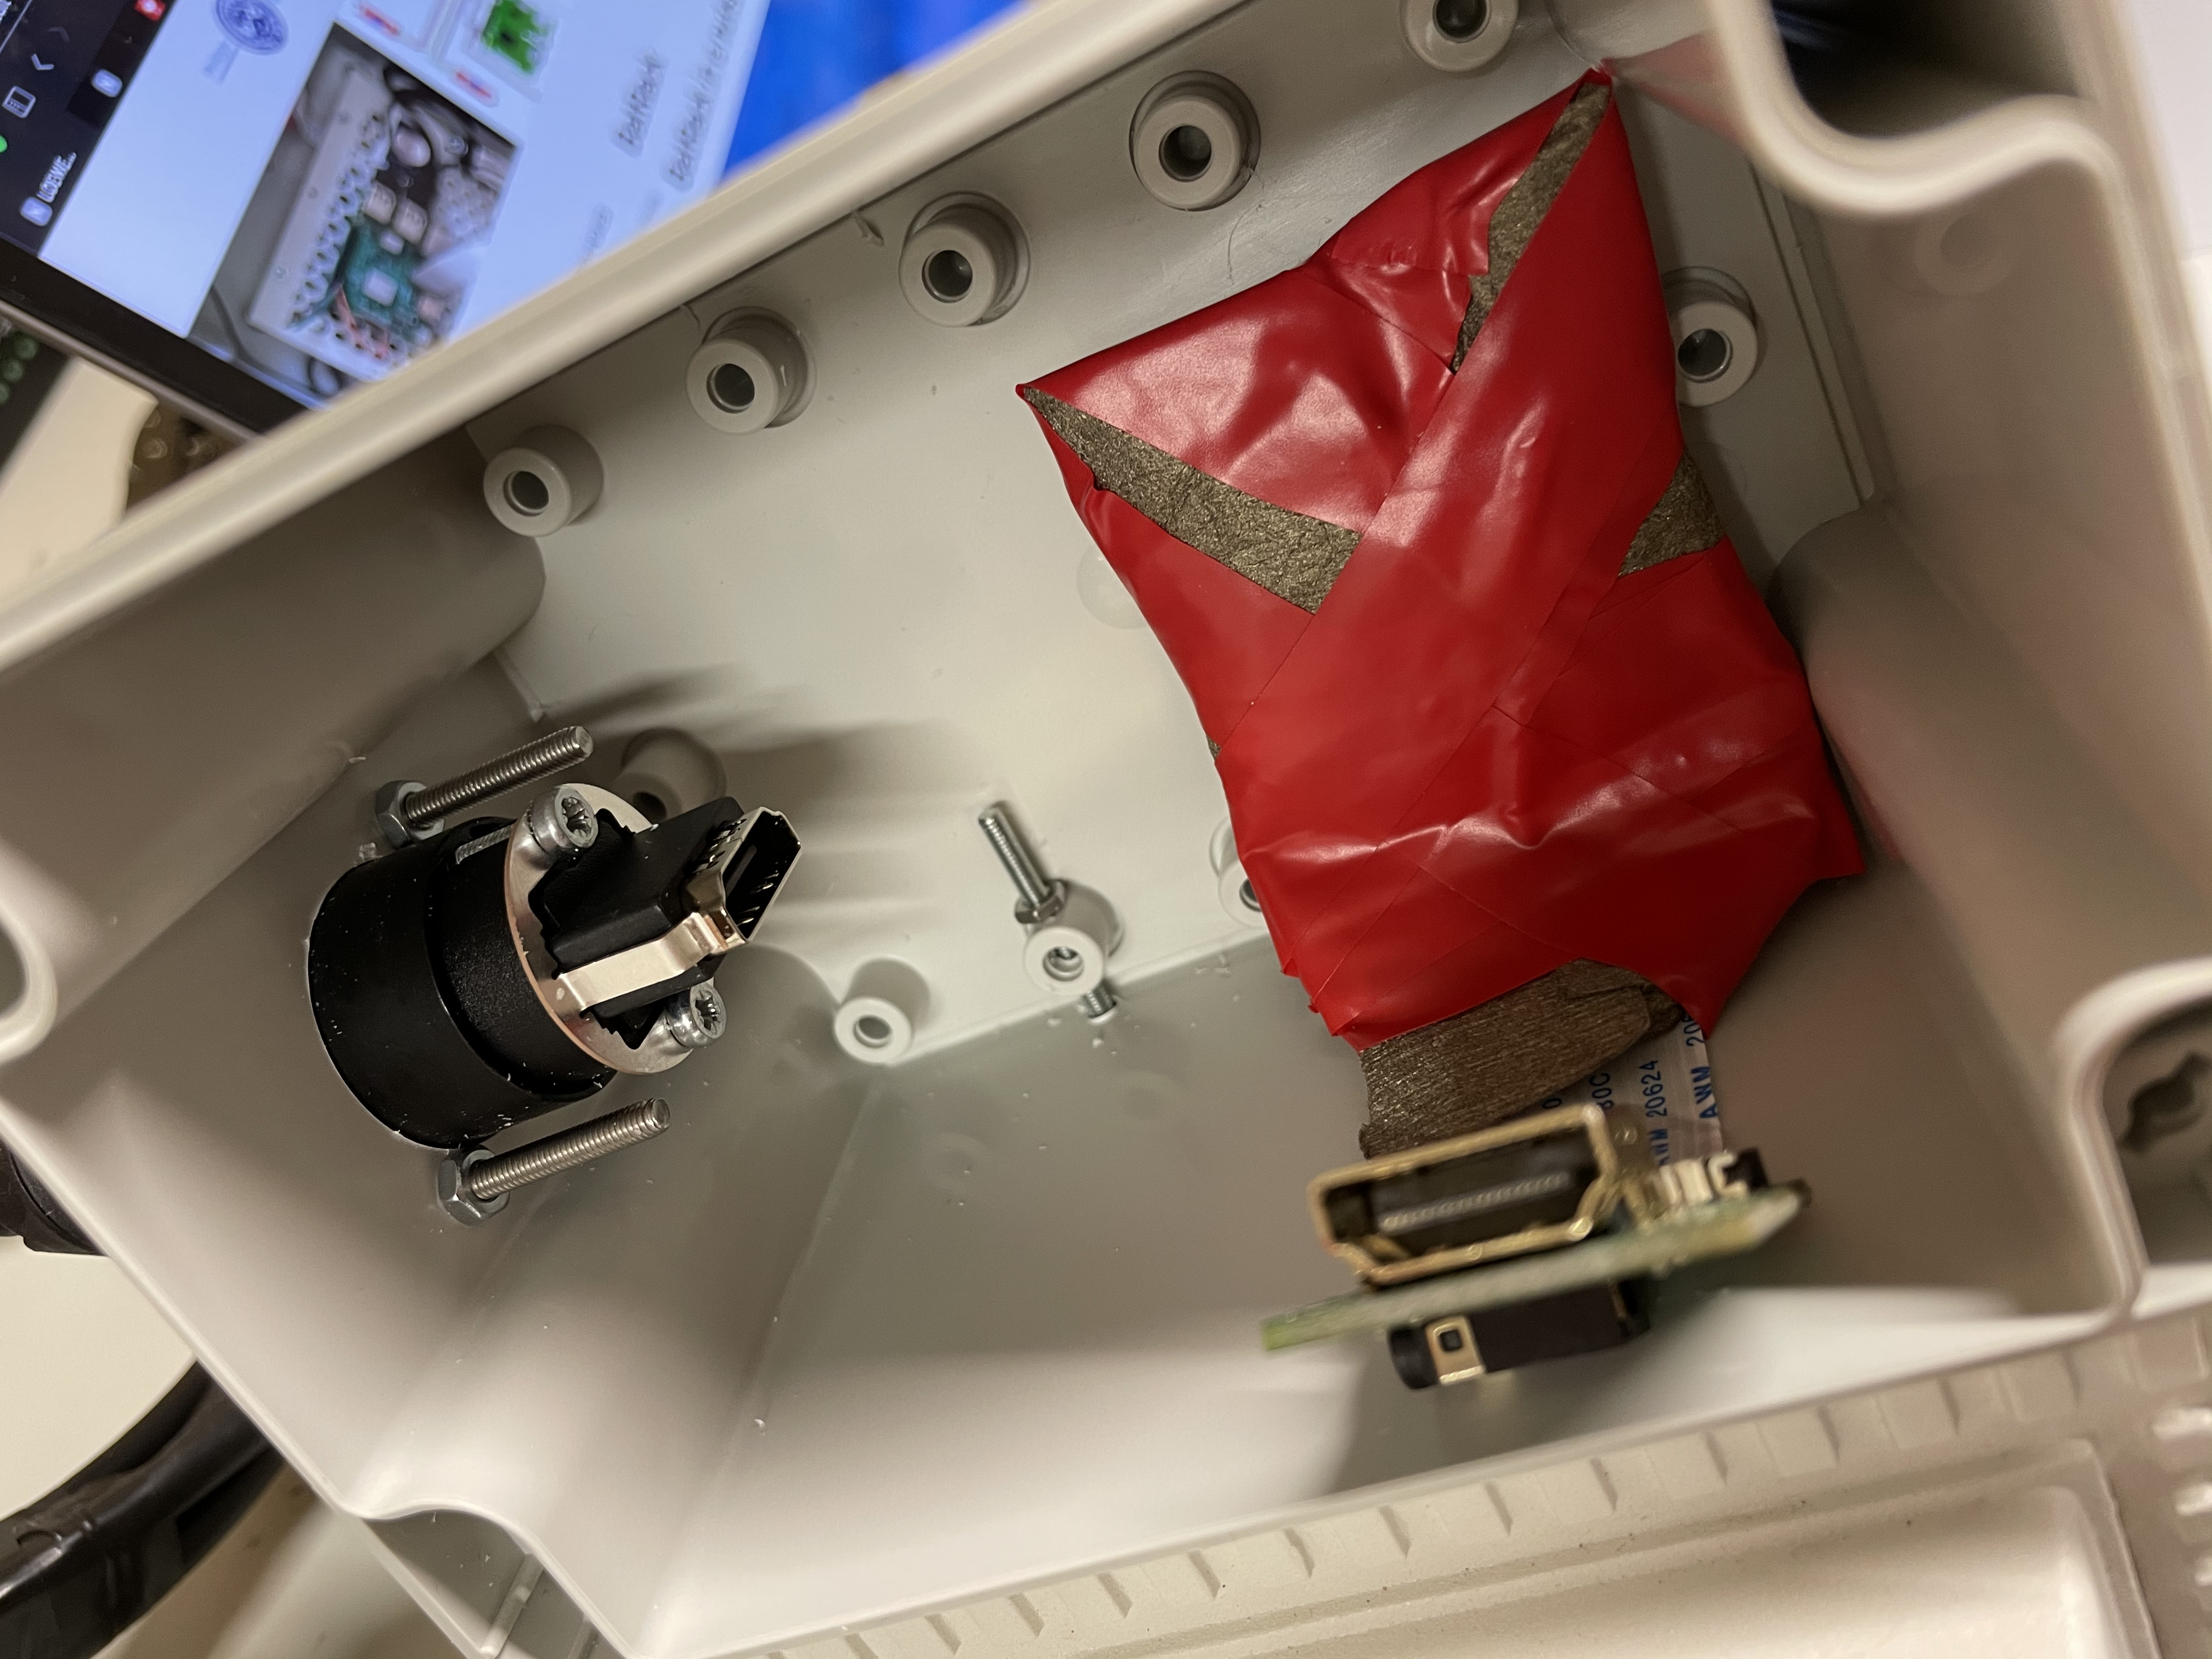
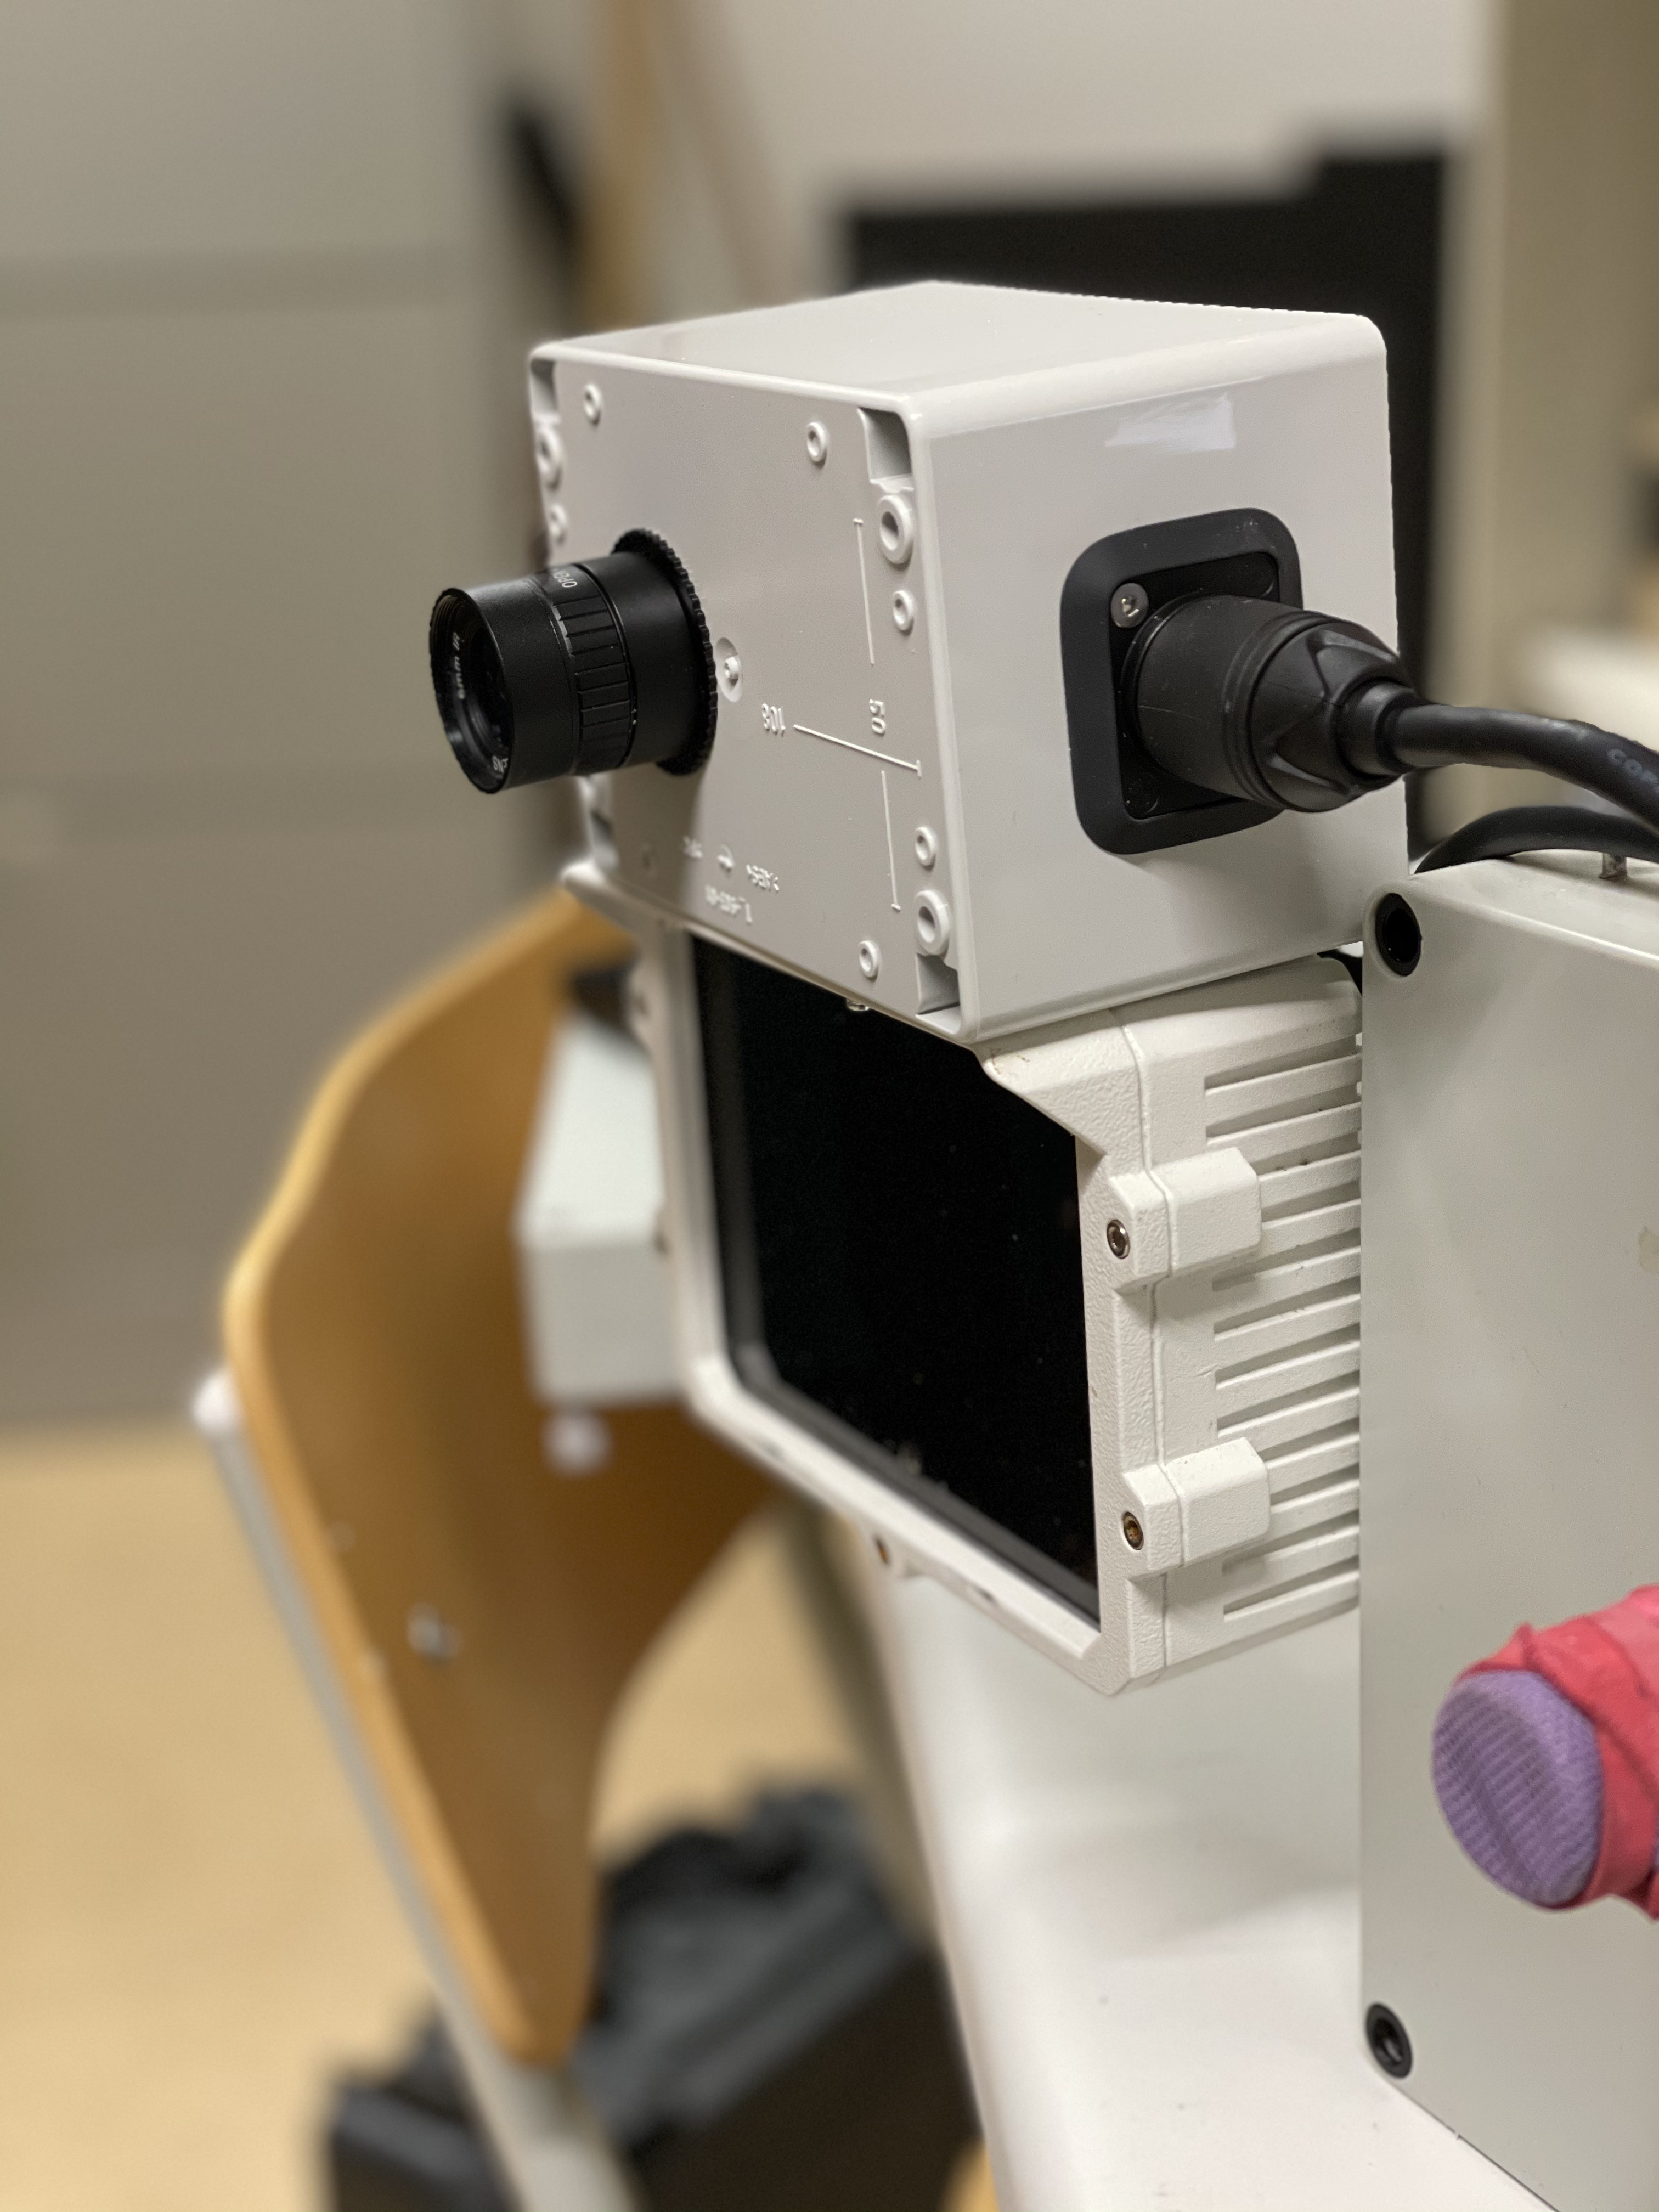
The camera box, now ready for use, can be attached to the IR spotlight with two screws.
The result then looks like this. The camera holds to the housing without any other tools and the HDMI connection to the main box is waterproof.
Step 3 - Deployment:
The last step is inserting a sd card with an flashed image from BatRack image page and deploy BatRack in the field.
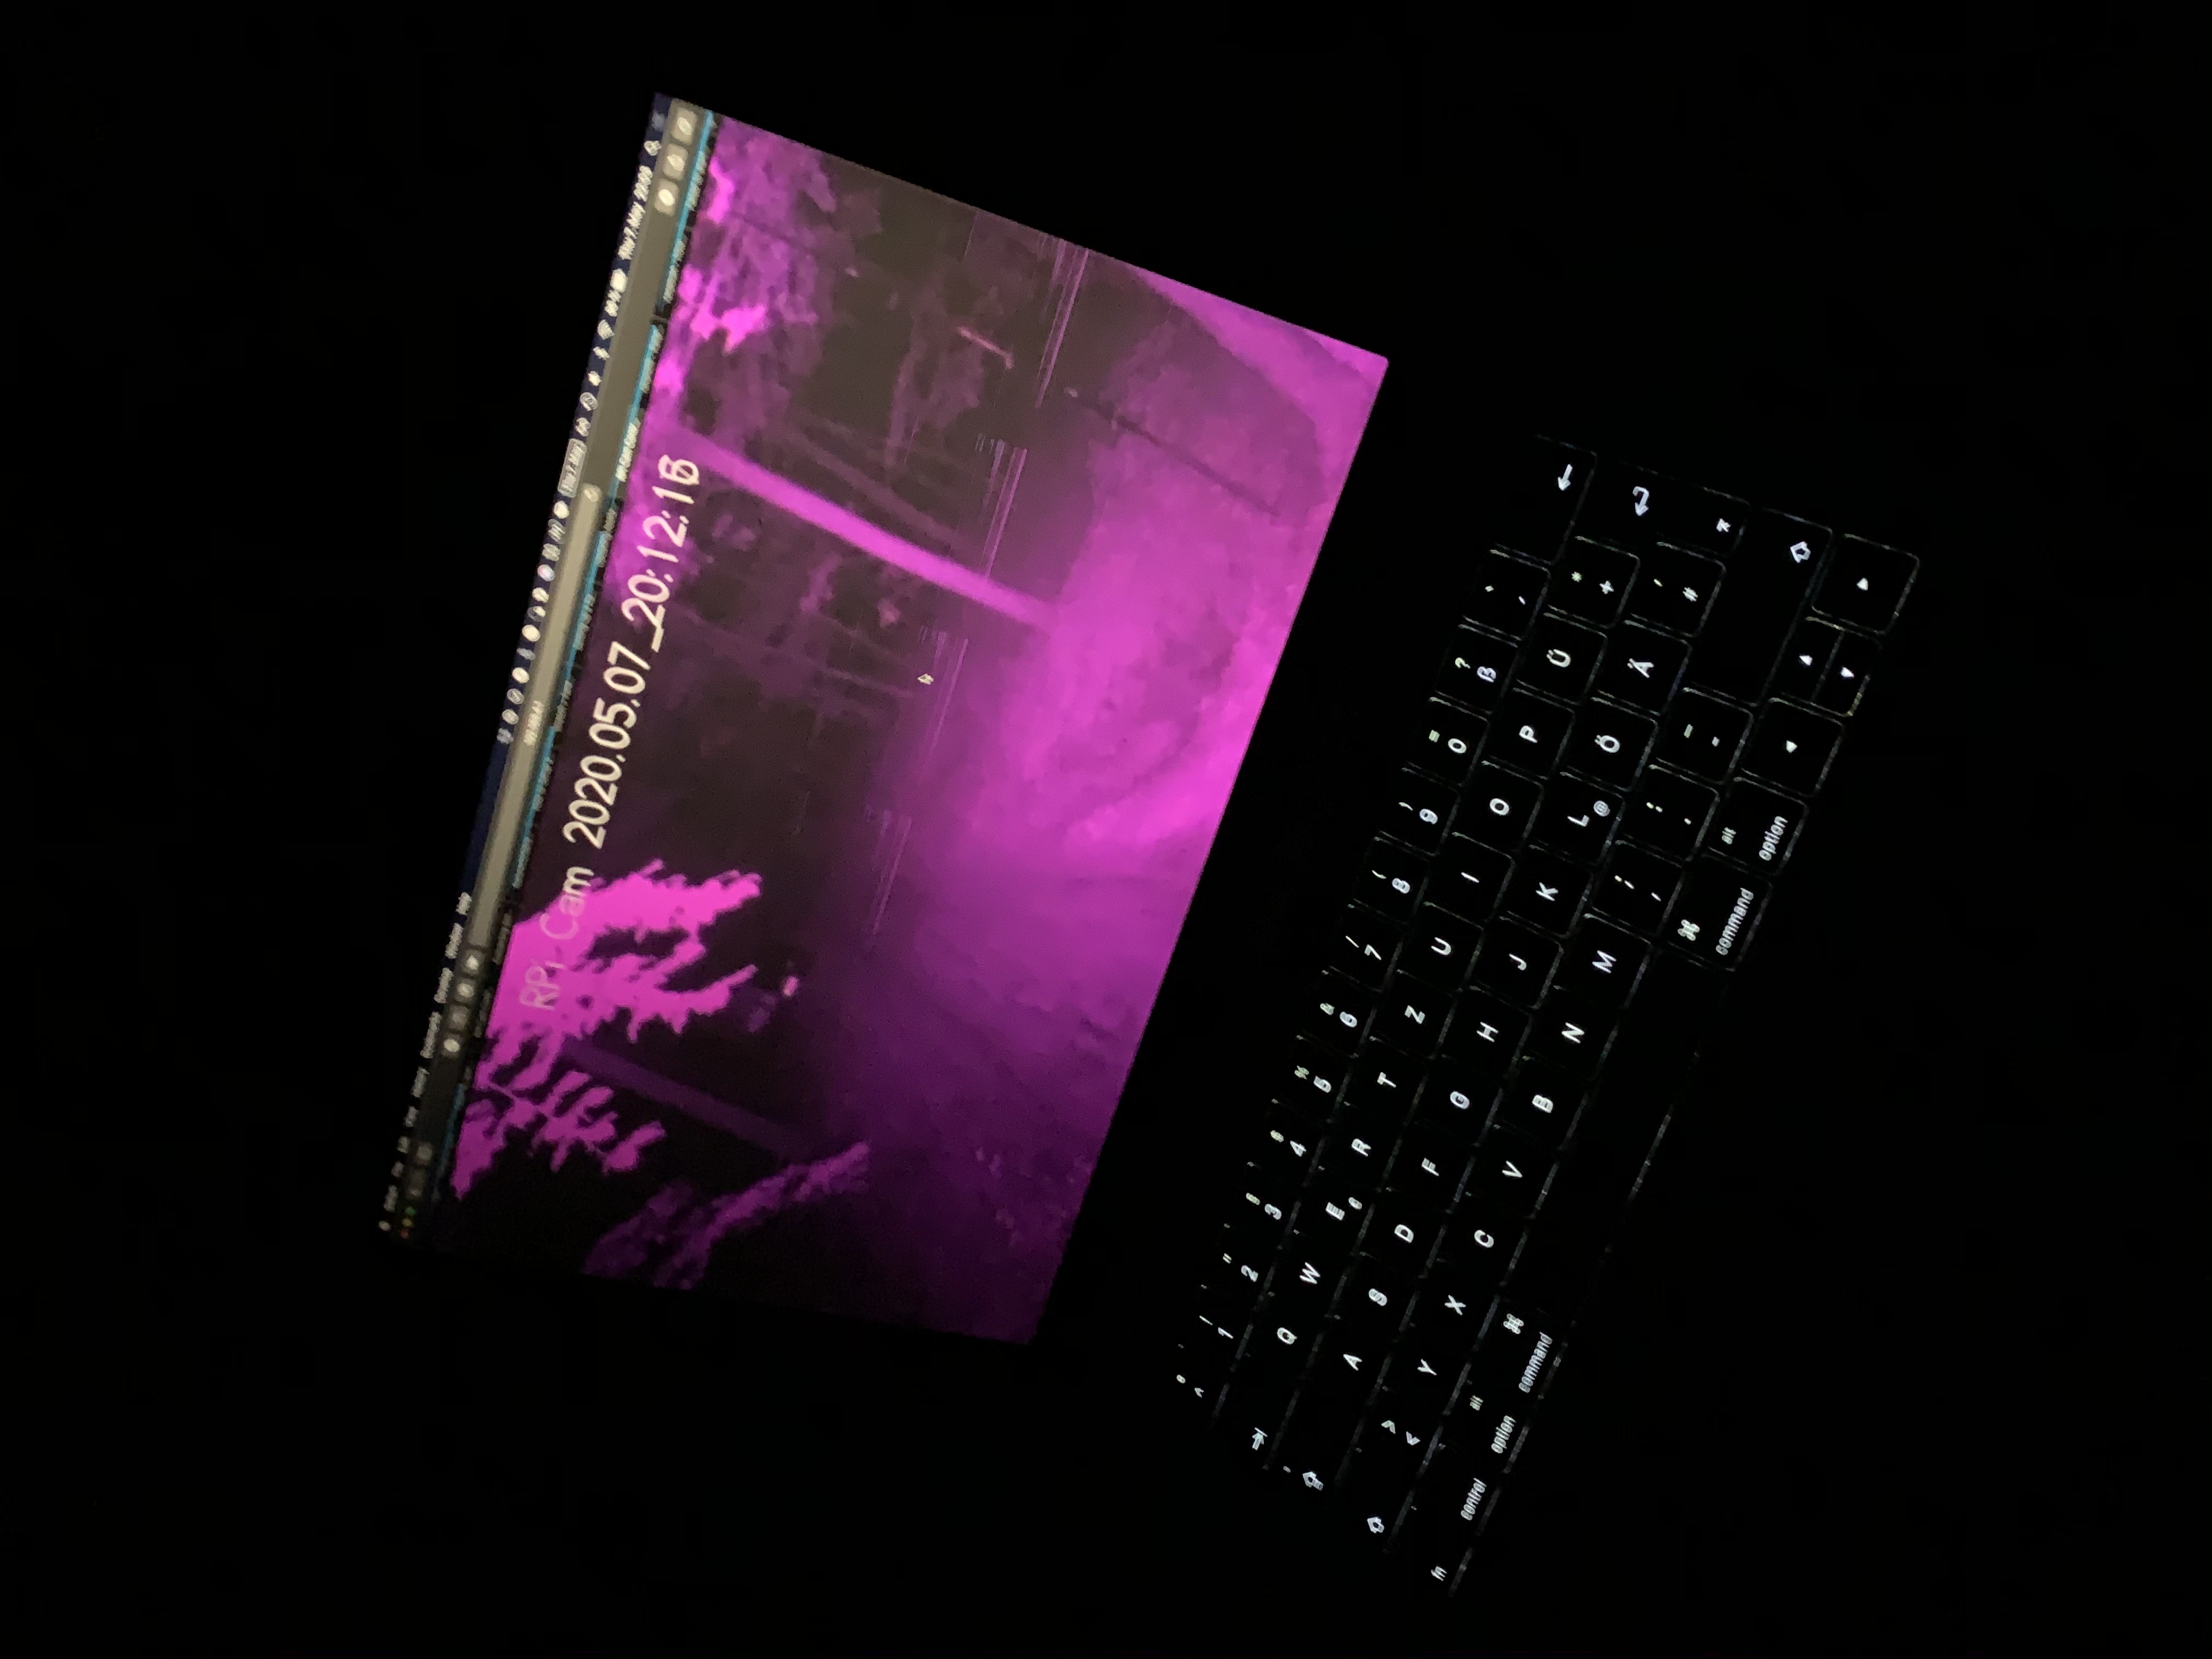
You can also watch the live video stream over wifi from any mobile end device.
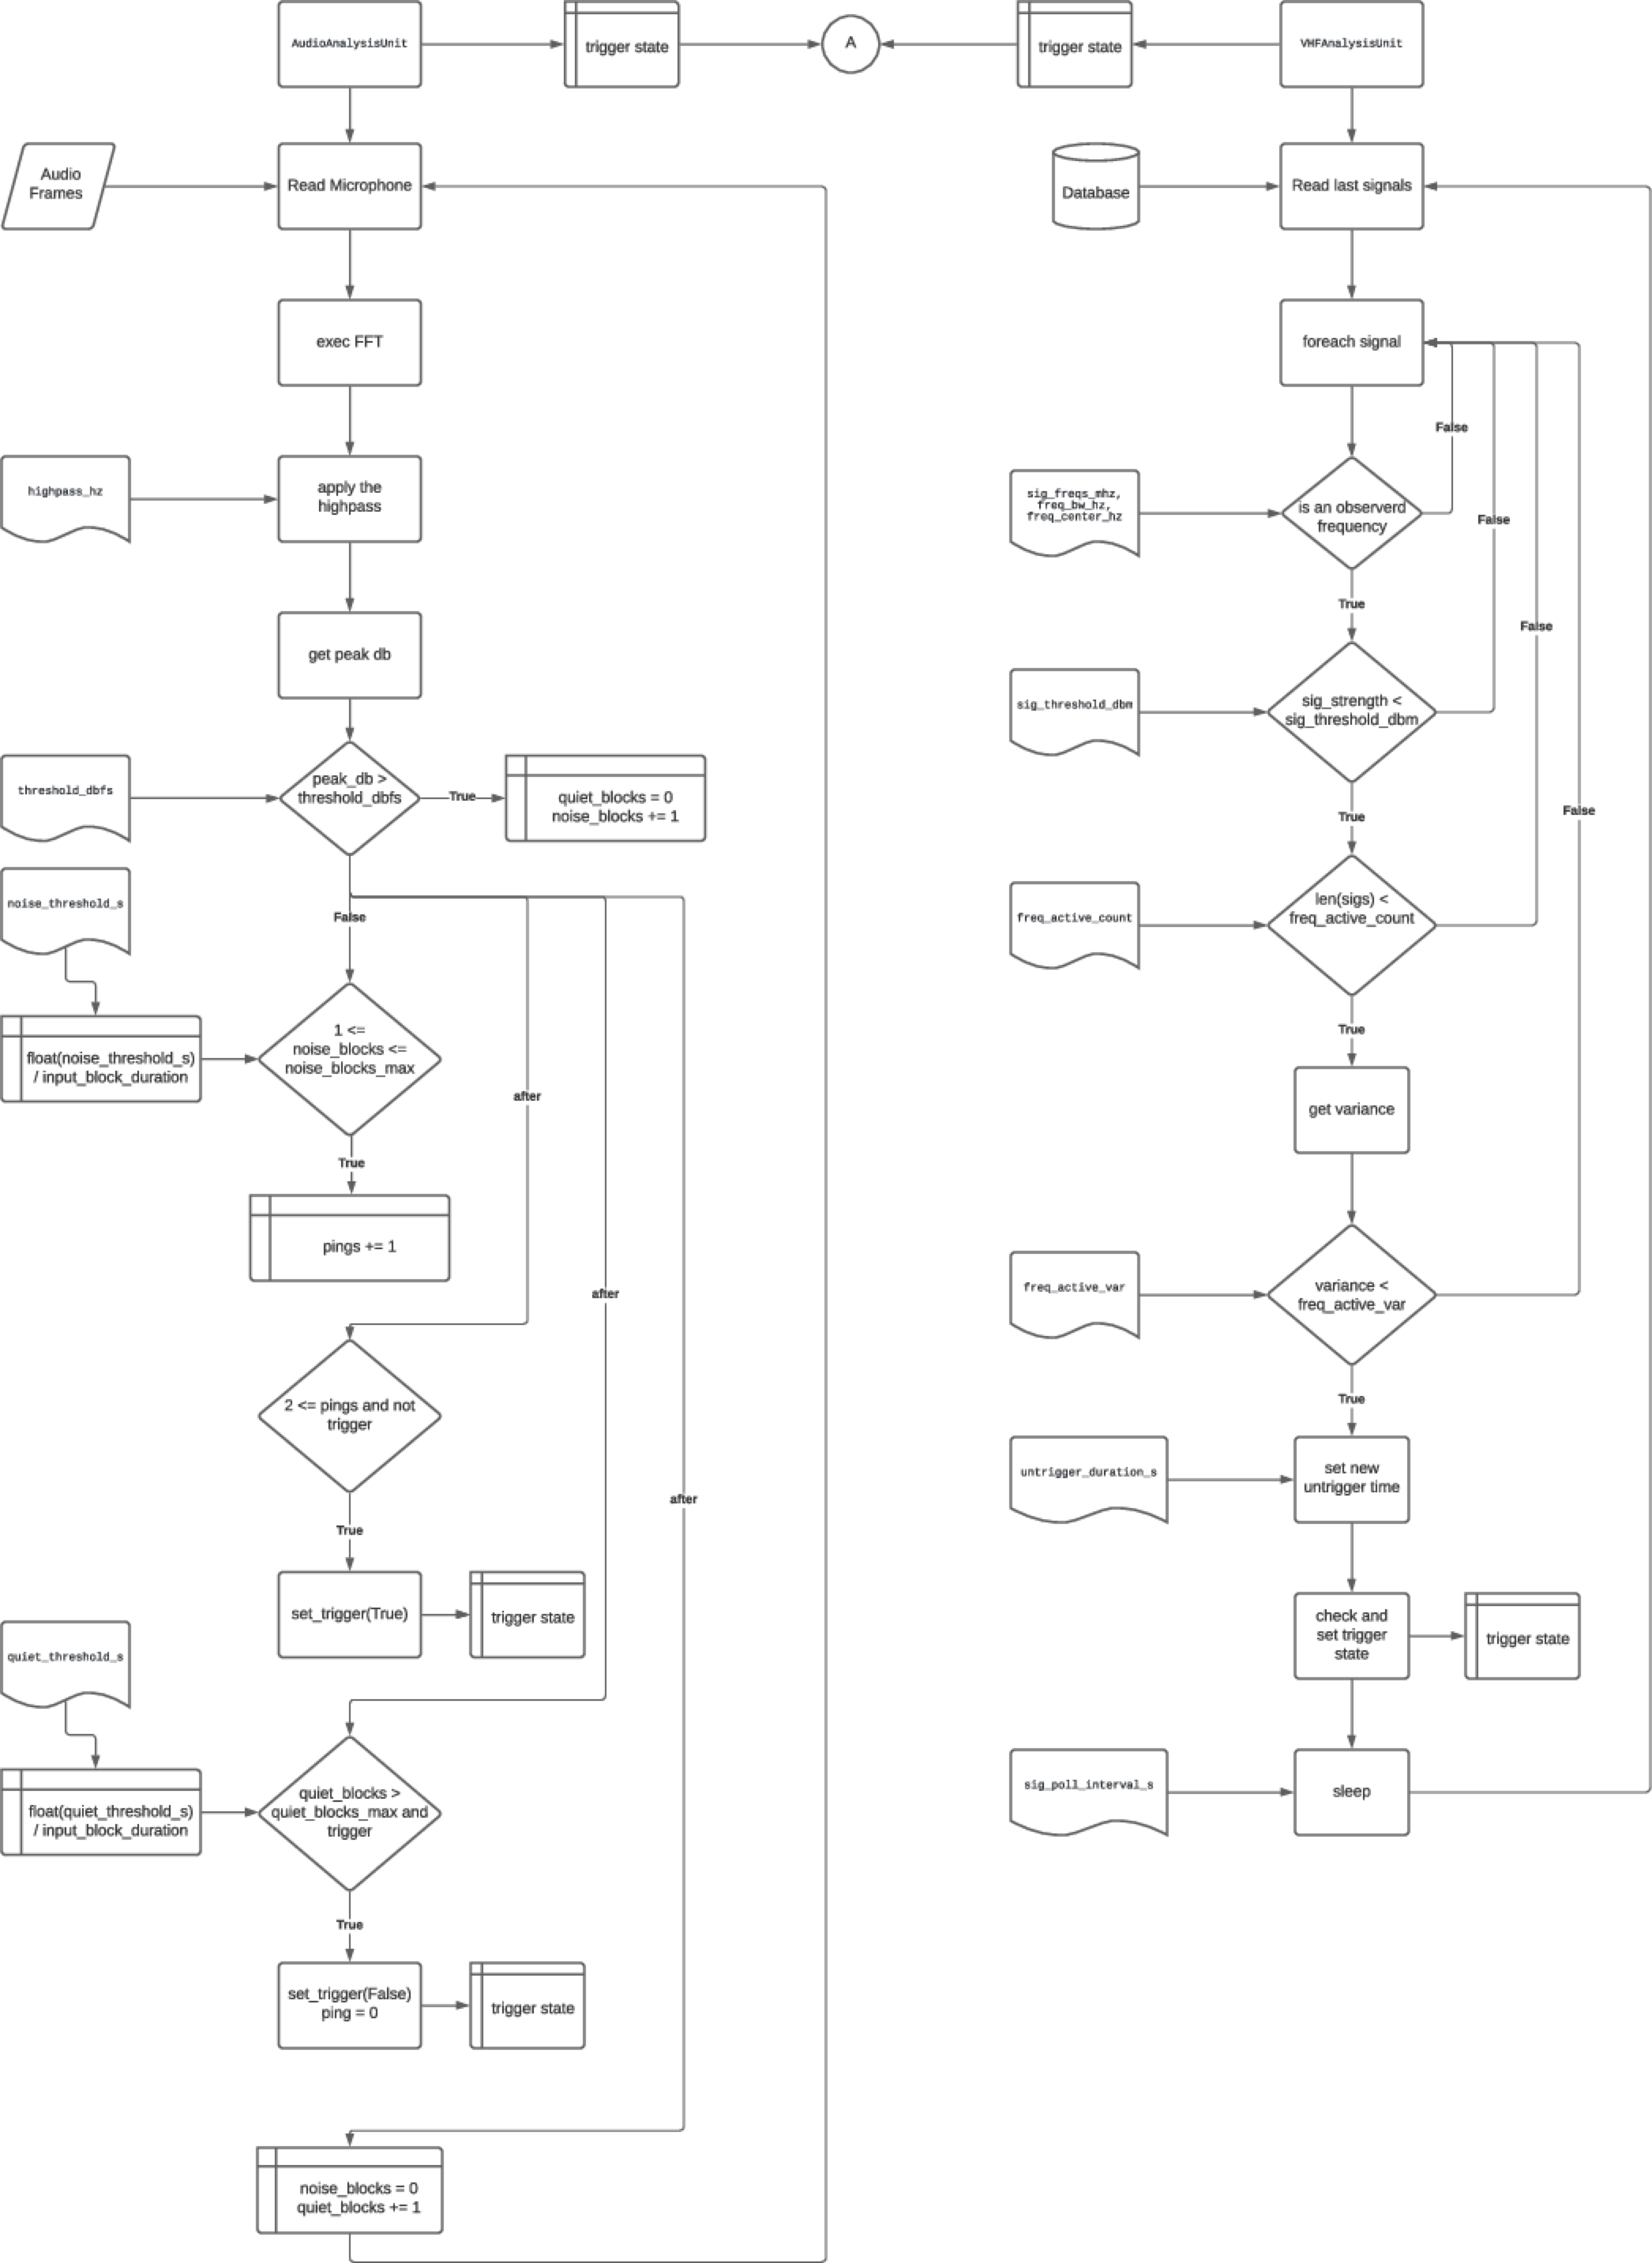
Flowchart
The following flowchart illustrates the program flow of the audio and vhf unit. Here the individual decisions are shown as well as the influence of configuration options on the behavior of the algorithm. This also shows that the flexible configuration options make it possible to adapt BatRack to a wide range of applications.
Configuring BatRack
BatRack is configured through a configuration file, which is loaded on startup.
It can be accessed via file manager on the sd card in /boot/BatRack.conf or via ssh on the running system.
For ssh you have to use the command ssh pi@169.254.0.1 over the wifi of BatRack and use the password natur.
When connected the file /boot/BatRack.conf can be accessed via nano /boot/BatRack.conf and can be changed.
The camera can be accessed over 169.254.0.1:81 or 169.254.0.1/camera or by clicking on the camera unit in the control panel on 169.254.0.1.
We recorded video in 720p@30hz with the NoIR camera and in 1080p@30hz with the high quality camera.
All setting for the camera can be changed on the same address.
Continous Operation Mode
In the basic continuous operation mode, BatRack is configured through the options available in the [BatRack] section.
[BatRack]
logging_level = INFO
data_path = /data/
duty_cycle_s = 10
always_on = False

; analysis units to instantiate
use_vhf = True
use_audio = True
use_camera = True

; triggers to be evaluated
use_trigger_vhf = True
use_trigger_audio = True
use_trigger_camera = True

[CameraAnalysisUnit]
light_pin = 14

[AudioAnalysisUnit]
threshold_dbfs = 40
highpass_hz = 15000
wave_export_len_s = 300

quiet_threshold_s = 1.0
noise_threshold_s = 0.15

[VHFAnalysisUnit]
freq_center_hz = 150100001
freq_bw_hz = 8000
untrigger_duration_s = 10

; properties of the signals
sig_freqs_mhz = [150.077, 150.038, 150.225, 150.203]
sig_threshold_dbm = 50
sig_duration_threshold_s = 0.02
sig_poll_interval_s = 0.1

; properties for frequency active / passive classification
freq_active_window_s = 60
freq_active_var = 2.0
freq_active_count = 10
In the configuration presented above, BatRack runs continuously 24h a day. All of the three analysis units (audio, vhf and camera) are evaluated and in the case that one of those detected a bat, a recording would be triggered.
Scheduled Operation Mode
If the BatRack.conf configuration file contains any [run.*] sections, the software runs in the scheduled operation mode, which allows the configuration to change over time.
In this case BatRack runs as a daemon and instancitates varying configurations at the requested times.
In the [run] sections there are two mandatory variables start and stop.
In addition to this, all variables of the [BatRack] section can be customized in each individual run.
; define scheduled instances with start and stop parameters
; variables defined in [run.*]-sections override those of [BatRack]
[run.1]
start = 20:00
stop = 01:00

[run.2]
start = 05:00
stop = 06:00

use_trigger_vhf = False
use_trigger_audio = False
use_trigger_camera = False
In the examples presented above, a trigger-based run (as defined in the [BatRack] section defined in the first example) would be running starting 8 pm until 1 am at night.
Second, a continuous recording would run from 5 until 6 am.
In this second example none of the triggers are actually used (use_trigger_* = False), which is internally interpreted as a continuous recording.
Overlapping schedulings
Since some of the sensors are mutual exclusive, only one instance of BatRack is allowed to run at a time. This is also the case for scheduled runs. If a run is configured to start before an ongoing job ends, it will wait for the running job to finish.
Installation
BatRack is currently only supported on the Raspberry Pi platform, since it depends on its GPIO port interface.
The required python libraries are defined as dependecies and are automatically installed when using pip.
numpy as well as pyaudio require binaray libraries, which need to be installed manually.
In the case of Raspbian / Raspberry Pi OS, this can be achieved using apt:
apt-get install -y python3-numpy python3-pyaudio
python3 -m pip install .
Software
The software can be found at: https://github.com/Nature40/BatRack and the final image at: published_later